Объемный рендеринг более прозрачен с одного направления, чем с другого
Я пытаюсь разобраться с объемным рендерингом с помощью three.js и лучевого марширования GLSL. У меня есть некоторые данные, которые я синтезировал из массива NumPy.
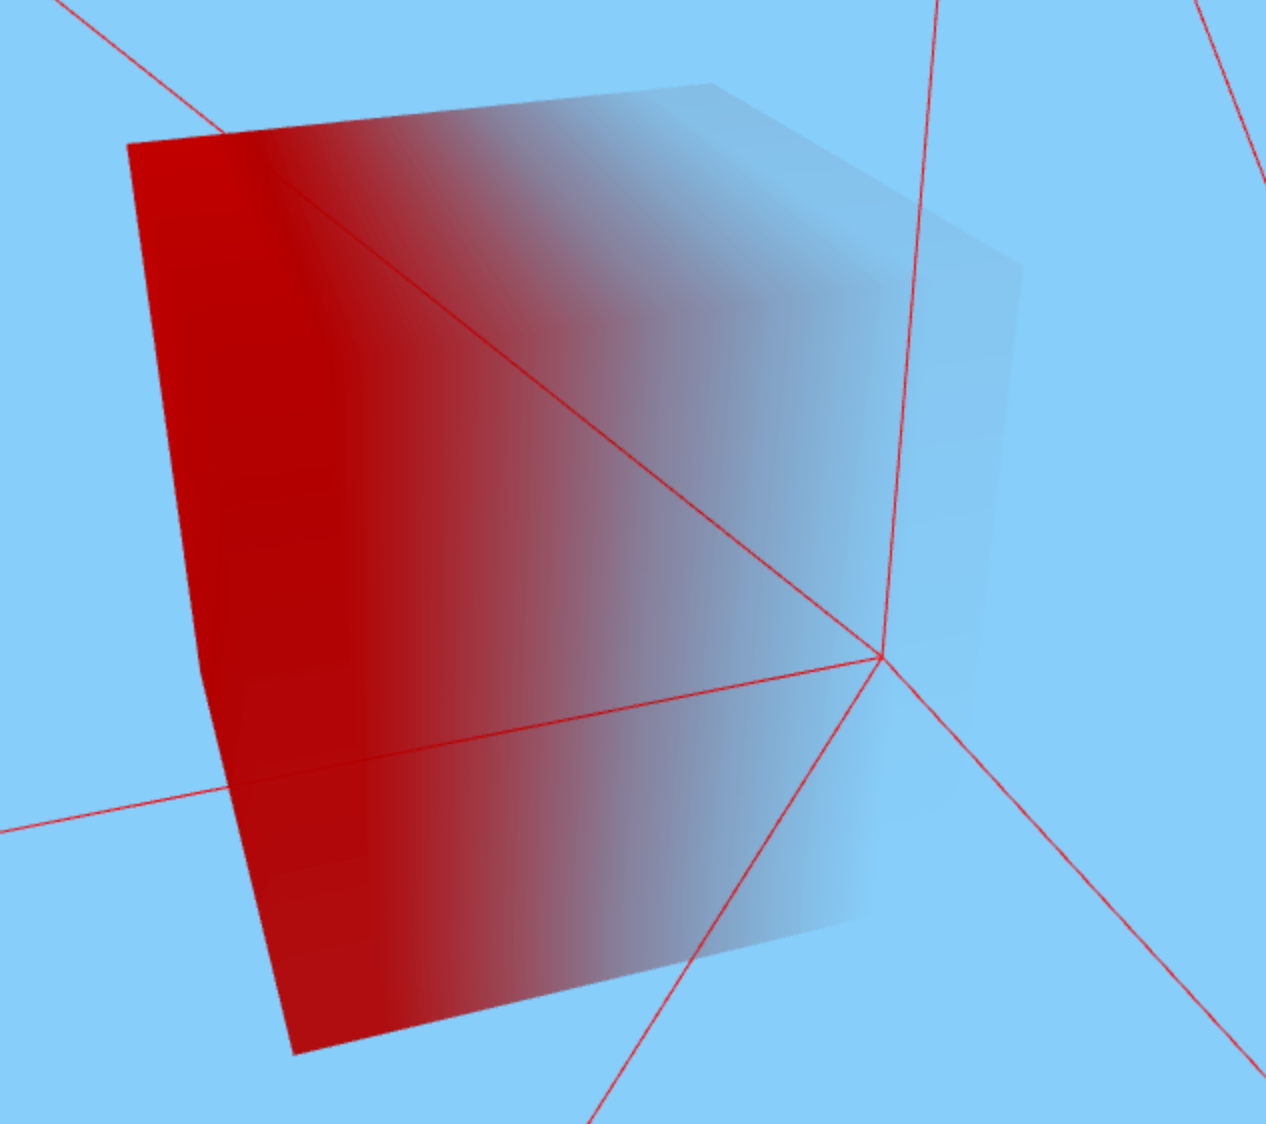
Куб визуализируемых данных с одной стороны более непрозрачен, а с другой стороны становится прозрачным - вот так (не обращайте внимания на каркас, это просто для ориентации)
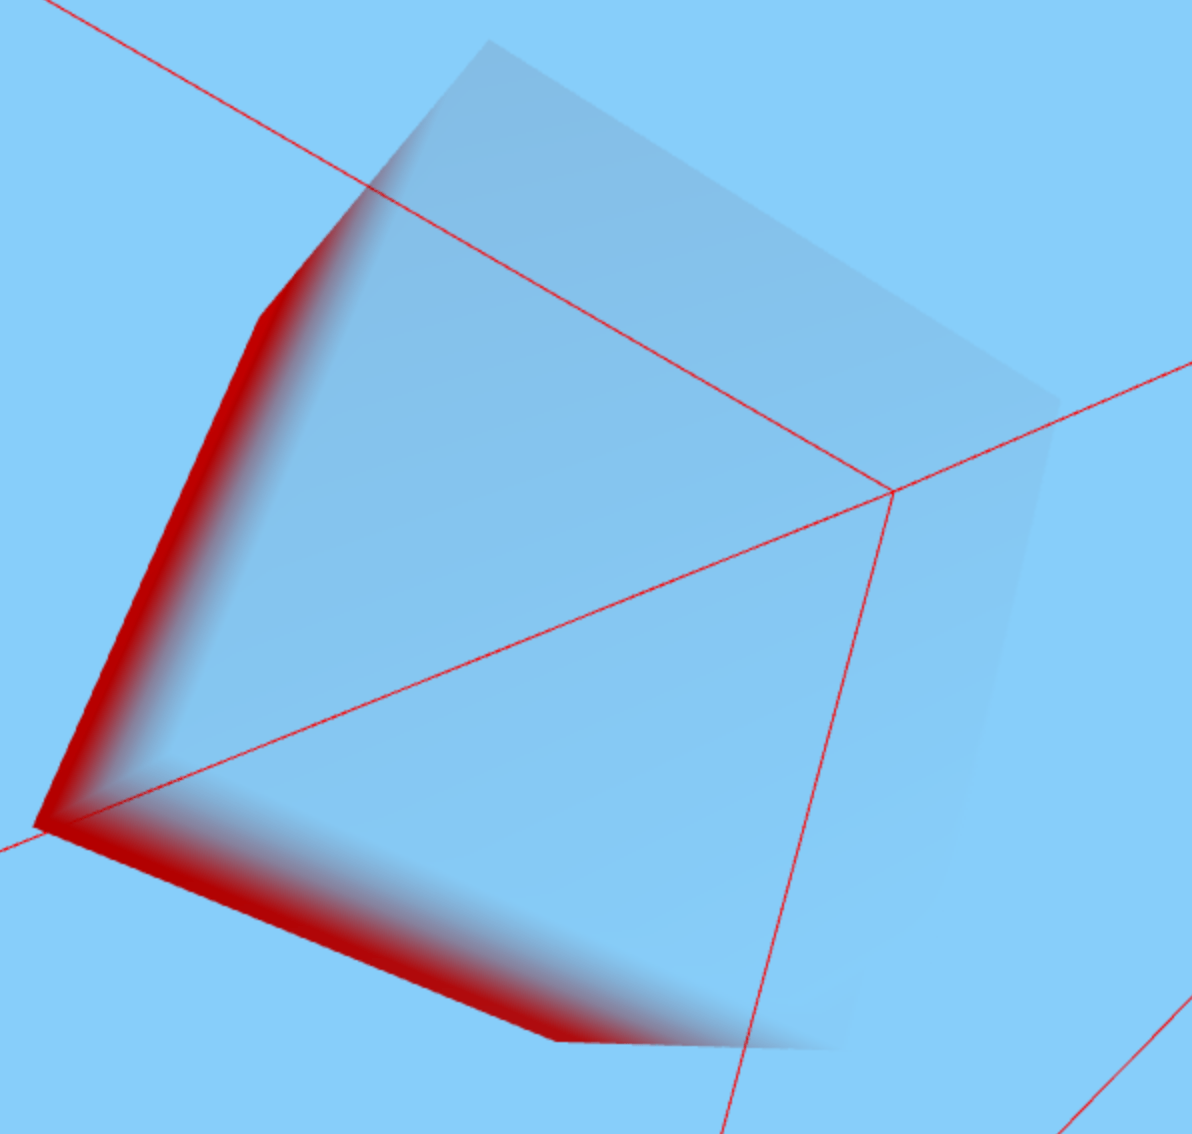
однако, когда вы смотрите на куб с более прозрачного конца, прозрачность, кажется, "блокирует" менее прозрачный конец (надеюсь, что это имеет смысл). Как это:
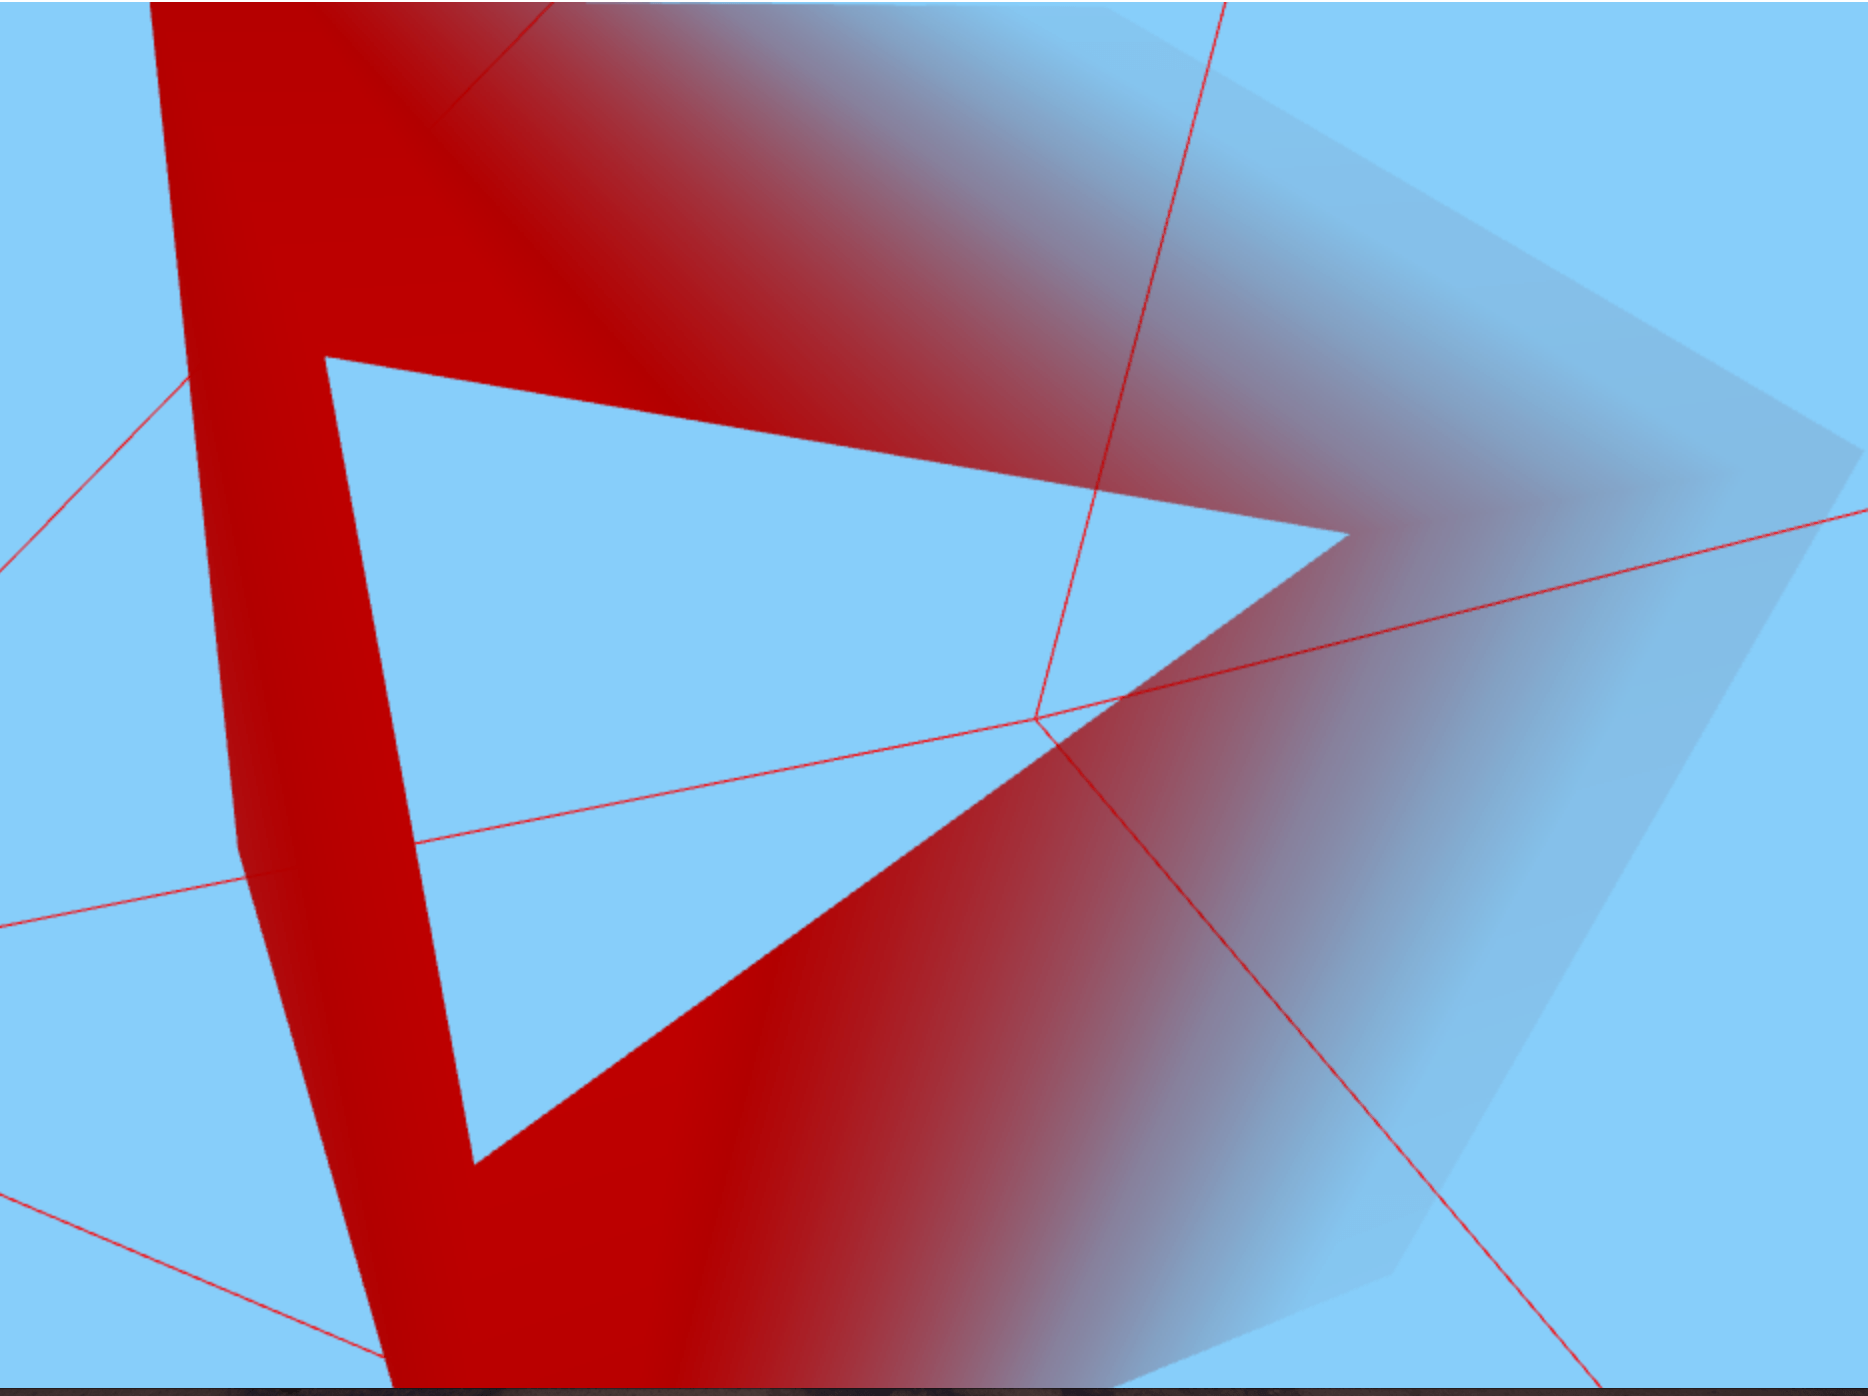
Я не знаю, связано ли это, но у меня также есть проблема, что, когда камера находится немного внутри куба, она перестает правильно рендериться. Отсекает бит, ближайший к камере, вот так: Это связанная проблема, или это просто ограничение метода.
Код здесь https://github.com/niallrobinson/test-volume-rendering/blob/master/viewer.htmlhttps://github.com/niallrobinson/test-volume-rendering/blob/master/viewer.js https://github.com/niallrobinson/test-volume-rendering/blob/master/viewer.html
и шейдеры второго прохода выглядят так:
<script id="vertexShaderFirstPass" type="x-shader/x-vertex">
    varying vec3 worldSpaceCoords;
    void main(){
        //Set the world space coordinates of the back faces vertices as output.
        worldSpaceCoords = position + vec3(0.5, 0.5, 0.5); //move it from [-0.5;0.5] to [0,1]
        gl_Position = projectionMatrix * modelViewMatrix * vec4( position, 1.0 );
    }
</script>

<script id="fragmentShaderFirstPass" type="x-shader/x-fragment">
    varying vec3 worldSpaceCoords;
    void main(){
        //The fragment's world space coordinates as fragment output.
        gl_FragColor = vec4( worldSpaceCoords.x , worldSpaceCoords.y, worldSpaceCoords.z, 1 );
    }
</script>


<!-- second pass shaders -->
<script id="vertexShaderSecondPass" type="x-shader/x-vertex">
    varying vec3 worldSpaceCoords;
    varying vec4 projectedCoords;

    void main()
    {
        worldSpaceCoords = (modelMatrix * vec4(position + vec3(0.5, 0.5, 0.5), 1.0 )).xyz;
        gl_Position = projectionMatrix *  modelViewMatrix * vec4( position, 1.0 );
        projectedCoords =  projectionMatrix * modelViewMatrix * vec4( position, 1.0 );
    }
</script>

<script id="fragmentShaderSecondPass" type="x-shader/x-fragment">
    varying vec3 worldSpaceCoords;
    varying vec4 projectedCoords;

    uniform sampler2D firstPassTexture, dataTexture; //i.e. tex and cubeTex
    uniform float steps;
    uniform float alphaCorrection;
    const int MAX_STEPS = 512;

    vec3 dataDims = vec3(4, 4, 4);

    vec4 sampleAs3DTexture(sampler2D tex, vec3 pos) {
        // pos is in UV coords i.e. 0->1. We also want to interrogate out texture in the range 0->1
        // however, our 3D dimensions are conceptually 4,4,4
        float nTiles = dataDims.z;
        float tileWidth = 1.0 / nTiles;
        float p = pos.y * tileWidth + pos.x / nTiles;
        float q = pos.z;

        lowp vec4 sample = texture2D(tex, vec2(p, q)); //I think this fn might convert from 255 range to 0->1 range
        vec4 returnSample = vec4(0.7, 0., 0., sample.x * alphaCorrection); // alpha is 255 in png so overwrite
        return returnSample;
    }

    // max 2d size is 4096 x 4096

    void main( void ) {
        //Transform the coordinates it from [-1;1] to [0;1]
        vec2 firstPassTexCoord = vec2(((projectedCoords.x / projectedCoords.w) + 1.0 ) / 2.0,
                        ((projectedCoords.y / projectedCoords.w) + 1.0 ) / 2.0 );

        //The back position is the world space position stored in the texture.
        vec3 backPos = texture2D(firstPassTexture, firstPassTexCoord).xyz;

        //The front position is the world space position of the second render pass.
        vec3 frontPos = worldSpaceCoords;

        //The direction from the front position to back position.
        vec3 dir = backPos - frontPos;

        float rayLength = length(dir);

        //Calculate how long to increment in each step.
        float delta = 1.0 / steps;

        //The increment in each direction for each step.
        vec3 deltaDirection = normalize(dir) * delta;
        float deltaDirectionLength = length(deltaDirection);

        //Start the ray casting from the front position.
        vec3 currentPosition = frontPos;

        //The color accumulator.
        vec4 accumulatedColor = vec4(0.0);

        //The alpha value accumulated so far.
        float accumulatedAlpha = 0.0;

        //How long has the ray travelled so far.
        float accumulatedLength = 0.0;

        //vec4 dataSample;
        vec4 dataSample;

        float alphaSample;

        //Perform the ray marching iterations
        for(int i = 0; i < MAX_STEPS; i++){
            //Get the voxel intensity value from the 3D texture.
            dataSample = sampleAs3DTexture(dataTexture, currentPosition);

            //Allow the alpha correction customization
            alphaSample = dataSample.a;

            //Perform the composition.
            accumulatedColor += (1.0 - accumulatedAlpha) * dataSample * alphaSample;
            //accumulatedColor += dataSample;

            //Store the alpha accumulated so far.
            accumulatedAlpha += alphaSample;

            //Advance the ray.
            currentPosition += deltaDirection;
            accumulatedLength += deltaDirectionLength;

            //If the length traversed is more than the ray length, or if the alpha accumulated reaches 1.0 then exit.
            if(accumulatedLength >= rayLength || accumulatedAlpha >= 1.0 )
                break;
        }
        gl_FragColor = accumulatedColor;
    }

</script>
Заранее всем спасибо
РЕДАКТИРОВАТЬ: После небольшого количества экспериментов, кажется, что проблема в том, что визуализируется только внешняя часть куба. Если я помещу большой объем данных в середину куба, вы ничего не увидите.
РЕДАКТИРОВАТЬ: Infact, это только данные рендеринга на передней поверхности. Если я переверну направление движения луча (т.е. поменяю его на камеру), вы сможете увидеть его только на задней поверхности
1 ответ
Думаю, что это отсортировано! Данные, возвращенные из поиска tex, были vec4. Это было тогда использовано для увеличения accumulatedColor, Я изменился accumulatedColor к vec3 и только увеличил его на .xyz и это, казалось, добилось цели
Спасибо всем, кто посмотрел