Вычисление новой позиции парентного контроллера после поворота родителя в Maya с использованием Python
Я создаю код для создания траектории движения контроллера на основе его ключевых позиций в Maya. Я столкнулся с проблемой при попытке использовать этот код для создания траектории движения парентного контроллера. Если я поворачиваю и перевожу родителя, сгенерированный путь движения не отражает фактический путь движения. Вместо этого он создает траекторию движения, как если бы он не был затронут родителем. Я посмотрел вокруг и нашел информацию для применения поворота с использованием матричных преобразований к текущей позиции, но, похоже, он слишком сильно поворачивается. Я включил функцию для создания траектории движения, она немного длинная, но часть, которая не работает, находится внутри оператора else при работе с контроллером верхнего туловища.
Старый код
#
# This function creates an animation curve within the scene that follows the path of motion
# of the selected controller. It requires keyframe information in order to genereate the curve
# and uses the range of frames given by the user.
#
def createAnimCurve( bodyField, startField, endField, firstColor ):
    # Takes the value of the text field to select the controller
    obj = cmds.textField(bodyField, query=True, text=True)
    print obj
    # Takes in the string input of the paramter values and turns them into integer values
    startFrame = cmds.intField(startField, query=True, value=True)
    print startFrame
    endFrame = cmds.intField(endField, query=True, value=True)
    print endFrame
    color = cmds.colorIndexSliderGrp( firstColor, query=True, value=True ) - 1
    print color

    if obj == "":
        cmds.warning( "WARNING: Need to Select Body Part from Diagram" )
        return
    if cmds.objExists(obj[:-3]+'Path'):
        # Creates a warning pop up that double checks if the user wants to remove the curve
        delRes = cmds.confirmDialog( title='Delete Path Warning', message='Recreation will delete current path. Are you sure?', button=['Yes','No'], defaultButton='Yes', cancelButton='No', dismissString='No' )
        # If yes then the curve is deleted
        if delRes == 'Yes':
            #cmds.delete(obj[:-3]+'ScalePath')
            #cmds.delete(obj[:-3]+'ScalePath_LOC')
            cmds.delete(obj[:-3]+'Path')
            cmds.delete(obj[:-3]+'Path_LOC')
        else:
            return
    # Sorts through the list of keyframes of the selected obj from the selected time line
    global keyframes
    keyframes = sorted(list(set(cmds.keyframe(obj, q=True, time=(startFrame,endFrame), timeChange=True))))
    # Creates the arrays for the required point positions
    points = []
    centerPoints = []
    centerRotates = []
    combinedPoints = []

    # Special cases for controllers that are named differently than their joints
    if obj == "L_foot_CTL" or obj == "R_foot_CTL":
        loc = obj[:-4] + "Ankle_LOC"
    elif obj == "M_upTorso_CTL":
        loc = "M_spineTip_LOC"
    else:
        loc = obj[:-3] + "LOC"
    # Grabs the original world space position to calculate the approraite motion points
    locPos = cmds.getAttr(loc+".translate")
    centerLocPos = cmds.getAttr("M_centerMass_LOC.translate")

    #for step in range( startFrame, endFrame+2, int(curveCVstep)):
    for step in range(len(keyframes)):
        # Moves throughout the specified timeline to find point results
        cmds.currentTime( keyframes[step] )
        if obj != "M_upTorso_CTL":
            # Queries the position of the controller to draw the curve
            # Adds the position of the controller in world space to draw it relative to the control
            pos = cmds.xform( obj,q=True,ws=True,t=True )
            pos[0] = pos[0] + locPos[0][0]
            pos[1] = pos[1] + locPos[0][1]
            pos[2] = pos[2] + locPos[0][2]
            # convert the tuple (vector) to a string
            points.append(pos)
            print pos
        else:
            spineLength = cmds.getAttr('spineCurveInfo.arcLength')

            # Queries the position of the controller to draw the curve
            # Adds the position of the controller in world space to draw it relative to the control
            # adds in the spine length to the y position to take into consideration the offset of the centerMass controller
            pos = cmds.xform( obj,q=True,ws=True,t=True )
            pos[0] = pos[0] + locPos[0][0]
            pos[1] = pos[1] + locPos[0][1]
            pos[2] = pos[2] + locPos[0][2]
            # convert the tuple (vector) to a string
            print "Printing out points"
            points.append(pos)
            print pos

            # Queries the position of the center of mass controller
            centerPos = cmds.xform( "M_centerMass_CTL",q=1,os=1,t=1 )
            centerPos[0] = centerPos[0] #+ centerLocPos[0][0]
            centerPos[1] = centerPos[1] #+ centerLocPos[0][1]
            centerPos[2] = centerPos[2] #+ centerLocPos[0][2]
            # convert the tuple (vector) to a string
            print "Printing out center Points"
            centerPoints.append(centerPos)
            print centerPos

            # Combine the two point positions to find the relative position
            combinedPos = []
            combinedPos1 = pos[0] + centerPos[0]
            combinedPos.append(combinedPos1)
            combinedPos2 = pos[1] + centerPos[1]
            combinedPos.append(combinedPos2)
            combinedPos3 = pos[2] + centerPos[2]
            combinedPos.append(combinedPos3)
            print "Printing out combined Points"
            print combinedPos

            # Queries the rotation of the center of mass controller
            #centerRot = cmds.xform( "M_centerMass_CTL",q=1,ws=1,ro=1 )
            #centerRotates.append(centerRot)
            #print "Printing out rotations"
            #print centerRot
            # applies rotation of the center of mass controller to the upper torso controller
            # rotation around the Z axis
            #tempX = combinedPos[0]*math.cos(math.radians(centerRot[2])) - combinedPos[1]*math.sin(math.radians(centerRot[2]))
            #tempY = combinedPos[0]*math.sin(math.radians(centerRot[2])) + combinedPos[1]*math.cos(math.radians(centerRot[2]))
            # rotation around the Y axis
            #tempX2 = tempX*math.cos(math.radians(centerRot[1])) + combinedPos[2]*math.sin(math.radians(centerRot[1]))
            #tempZ = combinedPos[2]*math.cos(math.radians(centerRot[1])) - tempX*math.sin(math.radians(centerRot[1]))
            # rotation around the X axis
            #tempY2 = tempY*math.cos(math.radians(centerRot[0])) - tempZ*math.sin(math.radians(centerRot[0]))
            #tempZ2 = tempY*math.sin(math.radians(centerRot[0])) + tempZ*math.cos(math.radians(centerRot[0]))

            #combinedPos[0] = tempX2
            #combinedPos[1] = tempY2
            #combinedPos[2] = tempZ2
            #print "Printing out rotated Points"
            combinedPoints.append(combinedPos)
            print combinedPos

    # if the obj is the upper torso controller we need to take into consideration the center of mass controller
    # Creates the motion curve with the required cvs
    if obj == "M_upTorso_CTL":
        cur = cmds.curve(d=2, ws=True, p=combinedPoints, n=obj[:-3]+'Path')
        cmds.setAttr(cur + '.overrideEnabled', 1)
        cmds.setAttr(cur + '.overrideColor', color)
        print cur
        cmds.move(points[0][0], points[0][1], points[0][2], cur+".scalePivot", cur+".rotatePivot", absolute=True)
    else:
        cur = cmds.curve(d=2, ws=True, p=points, n=obj[:-3]+'Path')
        cmds.setAttr(cur + '.overrideEnabled', 1)
        cmds.setAttr(cur + '.overrideColor', color)
        print cur
        cmds.move(points[0][0], points[0][1], points[0][2], cur+".scalePivot", cur+".rotatePivot", absolute=True)
    # command that runs through each cv of the curve and returns their position within a list.
    cvs = cmds.getAttr( obj[:-3]+'Path.cv[*]' )
    print cvs

    global initCVS
    initCVS = cvs
    # Create a locator for the motion path that the controller will now follow
    locate = cmds.spaceLocator( n=obj[:-3]+"Path_LOC" )
    #for step in range( startFrame, endFrame+2, int(curveCVstep)):
    for step in range(len(keyframes)):
        # Moves throughout the specified timeline to find point results
        cmds.currentTime( keyframes[step] )
        # Moves the locator to match the position of the controller
        cmds.move( cvs[step][0], cvs[step][1], cvs[step][2], locate)
        # Keyframes the locator
        cmds.setKeyframe( locate )
    # Position obj at the location of locate.
    cmds.pointConstraint( locate, obj, n=obj[:-3]+"LOC1_PNT" )
    cmds.setAttr( loc+'.visibility', 0)
    # keys the weight of the point constraint to 0 before and after time frame (set to 1 during time frame)
    #Before startFrame
    cmds.currentTime( startFrame - 1 )
    cmds.setAttr(obj+'.blendPoint1', 0 )
    cmds.setKeyframe(obj+'.blendPoint1' )
    #After startframe
    cmds.currentTime( startFrame )
    cmds.setAttr(obj+'.blendPoint1', 1 )
    cmds.setKeyframe(obj+'.blendPoint1' )
    #Before endframe
    cmds.currentTime( endFrame )
    cmds.setAttr(obj+'.blendPoint1', 1 )
    cmds.setKeyframe(obj+'.blendPoint1' )
    #After endframe
    cmds.currentTime( endFrame + 1 )
    cmds.setAttr(obj+'.blendPoint1', 0 )
    cmds.setKeyframe(obj+'.blendPoint1' )
    cmds.select(obj)
Проблема с кодом, что я застыла преобразования на моих контроллерах установки шарнира в (0,0,0) в мировом пространстве. Лучший способ исправить это - создать временный локатор и заставить его следовать за контроллером. Используйте позиции временного локатора для создания траектории движения контроллера. После создания удалите временный локатор.
Новый код
#
# This function creates an animation curve within the scene that follows the path of motion
# of the selected controller. It requires keyframe information in order to genereate the curve
# and uses the range of frames given by the user.
#
def createAnimCurve( bodyField, startField, endField, firstColor ):
    # Takes the value of the text field to select the controller
    obj = cmds.textField(bodyField, query=True, text=True)
    print obj
    # Takes in the string input of the paramter values and turns them into integer values
    startFrame = cmds.intField(startField, query=True, value=True)
    print startFrame
    endFrame = cmds.intField(endField, query=True, value=True)
    print endFrame
    color = cmds.colorIndexSliderGrp( firstColor, query=True, value=True ) - 1
    print color

    if obj == "":
        cmds.warning( "WARNING: Need to Select Body Part from Diagram" )
        return
    if cmds.objExists(obj[:-3]+'Path'):
        # Creates a warning pop up that double checks if the user wants to remove the curve
        delRes = cmds.confirmDialog( title='Delete Path Warning', message='Recreation will delete current path. Are you sure?', button=['Yes','No'], defaultButton='Yes', cancelButton='No', dismissString='No' )
        # If yes then the curve is deleted
        if delRes == 'Yes':
            cmds.delete(obj[:-3]+'Path')
            cmds.delete(obj[:-3]+'Path_LOC')
        else:
            return
    # Sorts through the list of keyframes of the selected obj from the selected time line
    global keyframes
    keyframes = sorted(list(set(cmds.keyframe(obj, q=True, time=(startFrame,endFrame), timeChange=True))))
    # Creates the arrays for the required point positions
    points = []

    # Creates a temporary locator to find the world space values of the controller
    cmds.spaceLocator( n="tempLoc" )
    cmds.parentConstraint( obj, 'tempLoc', n='temp_PRT_CST' )

    #for step in range( startFrame, endFrame+2, int(curveCVstep)):
    for step in range(len(keyframes)):
        # Moves throughout the specified timeline to find point results
        cmds.currentTime( keyframes[step] )
        # Queries the position of the controller to draw the curve
        # Adds the position of the controller in world space to draw it relative to the control
        pos = cmds.xform( "tempLoc",q=True,ws=True,t=True )
        pos[0] = pos[0]
        pos[1] = pos[1]
        pos[2] = pos[2]
        # convert the tuple (vector) to a string
        points.append(pos)
        print pos

    print "Creating the basic motion curve"
    cur = cmds.curve(d=2, ws=True, p=points, n=obj[:-3]+'Path')
    cmds.setAttr(cur + '.overrideEnabled', 1)
    cmds.setAttr(cur + '.overrideColor', color)
    print cur
    cmds.move(points[0][0], points[0][1], points[0][2], cur+".scalePivot", cur+".rotatePivot", absolute=True)
    # command that runs through each cv of the curve and returns their position within a list.
    cvs = cmds.getAttr( obj[:-3]+'Path.cv[*]' )
    print cvs

    # Deletes the temp locator
    cmds.select("temp_PRT_CST")
    cmds.delete()
    cmds.select("tempLoc")
    cmds.delete()

    global initCVS
    initCVS = cvs
    # Create a locator for the motion path that the controller will now follow
    locate = cmds.spaceLocator( n=obj[:-3]+"Path_LOC" )
    #for step in range( startFrame, endFrame+2, int(curveCVstep)):
    for step in range(len(keyframes)):
        # Moves throughout the specified timeline to find point results
        cmds.currentTime( keyframes[step] )
        # Moves the locator to match the position of the controller
        cmds.move( cvs[step][0], cvs[step][1], cvs[step][2], locate)
        # Keyframes the locator
        cmds.setKeyframe( locate )
    # Position obj at the location of locate.
    cmds.pointConstraint( locate, obj, n=obj[:-3]+"LOC1_PNT" )
    # keys the weight of the point constraint to 0 before and after time frame (set to 1 during time frame)
    #Before startFrame
    cmds.currentTime( startFrame - 1 )
    cmds.setAttr(obj+'.blendPoint1', 0 )
    cmds.setKeyframe(obj+'.blendPoint1' )
    #After startframe
    cmds.currentTime( startFrame )
    cmds.setAttr(obj+'.blendPoint1', 1 )
    cmds.setKeyframe(obj+'.blendPoint1' )
    #Before endframe
    cmds.currentTime( endFrame )
    cmds.setAttr(obj+'.blendPoint1', 1 )
    cmds.setKeyframe(obj+'.blendPoint1' )
    #After endframe
    cmds.currentTime( endFrame + 1 )
    cmds.setAttr(obj+'.blendPoint1', 0 )
    cmds.setKeyframe(obj+'.blendPoint1' )
    cmds.select(obj)
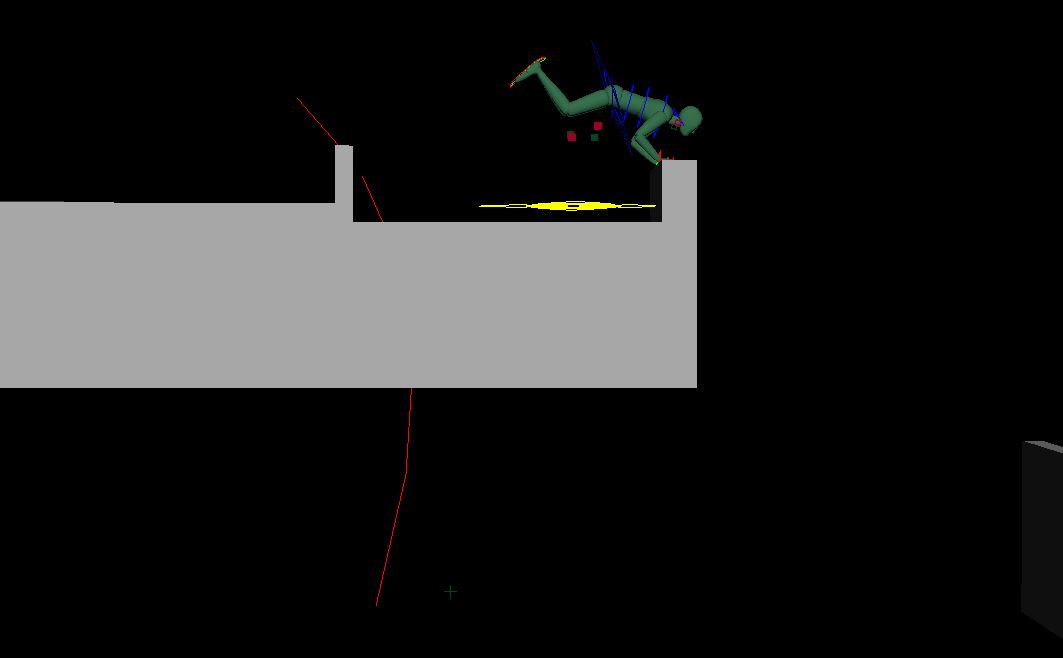
Вот как выглядит траектория движения 
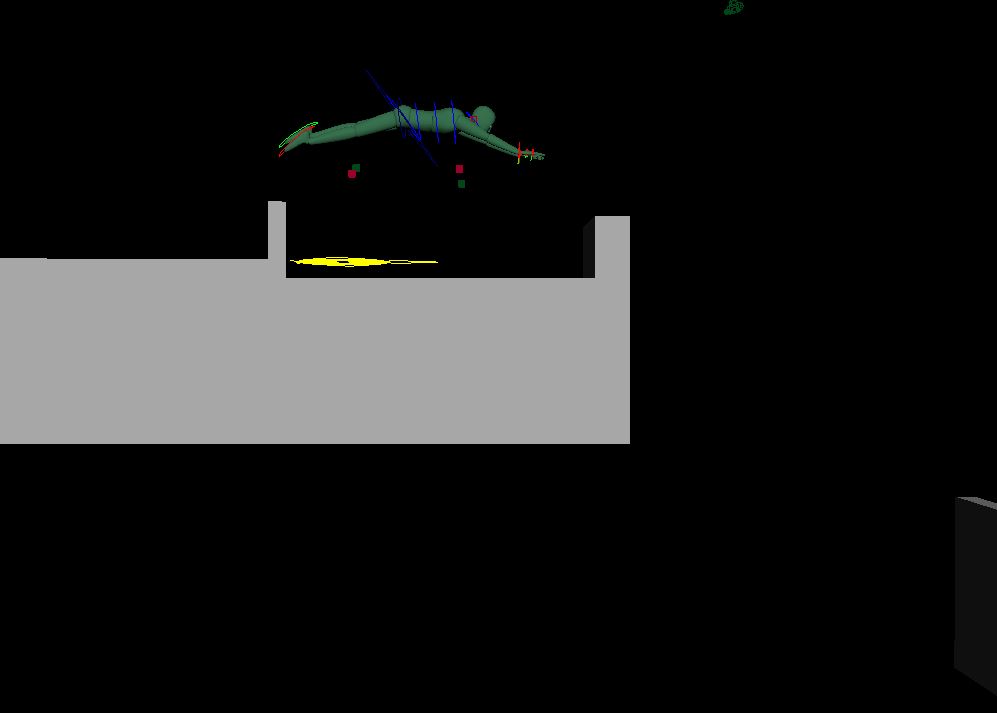
Вот что должна следовать правильная дуга 
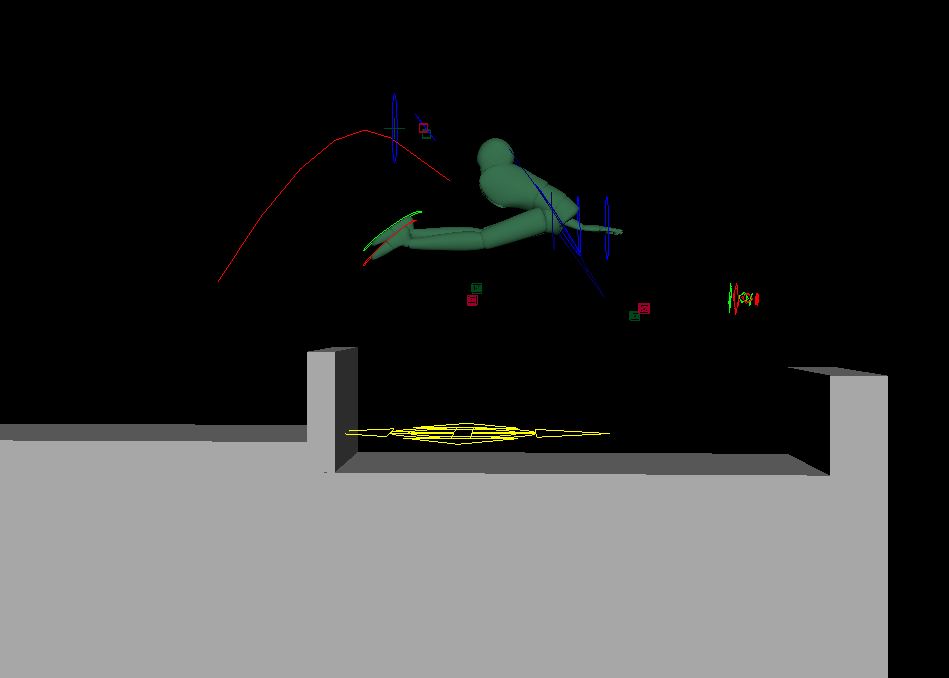
Вот новая кривая, основанная на новом коде. Кажется, что он идет по пути движения, но он сжат. 
2 ответа
Еще одна мысль, которая у меня только что была, - привязать временный локатор к вашим элементам управления (расположенным в центре элемента управления). Тогда вы можете использовать worldPosition Значения xyz attr из локатора для построения точек кривой. Вы можете удалить локатор после того, как у вас есть кривая.
Позиционируя локатор по центру элемента управления для построения кривой, он должен позволить вам выполнять ограничивающие действия без особой головной боли (по крайней мере, в теории). Это также менее интенсивно по математике, так как локатор уже имеет "простое для запроса" значение позиции в мировом пространстве.
Конечно, это не так круто, как делать все математические вычисления, но если это работает...
Если вы просто пытаетесь получить что-то в мировом пространстве, вы можете использовать:
position = cmds.xform(item, q=True, ws=True, t=True)
и затем использовать эти данные о положении по мере необходимости - они должны работать независимо от того, как повернуты какие-либо родители... Команда xform также может использоваться для задания положения вещей в мировом пространстве:
cmds.xform(item, ws=True, t=position)
Я не уверен, что это действительно отвечает на ваш вопрос - немного неясно, чего вы пытаетесь достичь в своем коде; Я не могу полностью понять причину, по которой локатор и ограничение точки включаются / выключаются. Вы пытаетесь создать редактируемый след движения?
Если да, пробовали ли вы использовать встроенный редактируемый инструмент отслеживания движения Maya?
Если по какой-то причине вы пытаетесь создать свой собственный, я полагаю, что вы могли бы использовать двухэтапный подход, при котором вы сначала создаете кривую, в которой каждое резюме находится в положении элемента управления в мировом пространстве в течение заданного вами времени начала / окончания. Затем отредактируйте положения кривой cv, чтобы очистить дугу, и запустите отдельную функцию, которая запрашивает позицию в мировом пространстве каждого резюме, затем применяет их к элементу управления и устанавливает ключевой кадр в соответствующее время. Поскольку вы делаете все это в позициях мирового пространства, вам не нужно беспокоиться о каких-либо родительских позициях / поворотах (к счастью, это должно сделать код относительно простым).