ImageView в цикле через XML
Я хотел бы сделать любое изображение из моего ImageView быть круглым с бордюром.
Я искал, но не мог найти никакой полезной информации (все, что я пробовал, не работало).
Как я могу добиться этого с помощью XML: создать ImageView с определенным src и сделать его круглым с рамкой?
33 ответа
Вы можете сделать простой круг с белой рамкой и прозрачным содержимым с формой.
// res/drawable/circle.xml

<shape xmlns:android="http://schemas.android.com/apk/res/android"
    android:innerRadius="0dp"
    android:shape="ring"
    android:thicknessRatio="1.9"
    android:useLevel="false" >
    <solid android:color="@android:color/transparent" />

    <stroke
        android:width="10dp"
        android:color="@android:color/white" />
</shape>
Затем сделайте список слоев пригодным для рисования и поместите его в качестве фона для вашего изображения.
// res/drawable/img.xml

<?xml version="1.0" encoding="utf-8"?>
<layer-list xmlns:android="http://schemas.android.com/apk/res/android" >

    <item android:drawable="@drawable/ic_launcher"/>
    <item android:drawable="@drawable/circle"/>

</layer-list>
и поместите его в качестве фона для вашего изображения.
   <ImageView
        android:layout_width="wrap_content"
        android:layout_height="wrap_content"
        android:background="@drawable/img"/>
У тебя будет что-то подобное.

Это самый простой способ, который я разработал. Попробуй это.
dependencies: compile 'com.android.support:appcompat-v7:23.1.1'
              compile 'com.android.support:design:23.1.1'
              compile 'com.android.support:cardview-v7:23.1.1'

<android.support.v7.widget.CardView
    android:layout_width="80dp"
    android:layout_height="80dp"
    android:elevation="12dp"
    android:id="@+id/view2"
   app:cardCornerRadius="40dp"
    android:layout_centerHorizontal="true"
    android:innerRadius="0dp"
    android:shape="ring"
    android:thicknessRatio="1.9">
    <ImageView
        android:layout_height="80dp"
        android:layout_width="match_parent"
        android:id="@+id/imageView1"
        android:src="@drawable/YOUR_IMAGE"
        android:layout_alignParentTop="true"
        android:layout_centerHorizontal="true">
    </ImageView>
 </android.support.v7.widget.CardView>
Если вы работаете над версиями Android выше Lollipop
<android.support.v7.widget.CardView
android:layout_width="80dp"
android:layout_height="80dp"
android:elevation="12dp"
android:id="@+id/view2"
app:cardCornerRadius="40dp"
android:layout_centerHorizontal="true">
<ImageView
    android:layout_height="80dp"
    android:layout_width="match_parent"
    android:id="@+id/imageView1"
    android:src="@drawable/YOUR_IMAGE"
    android:scaleType="centerCrop"/>
  </android.support.v7.widget.CardView>
Просто используйте ShapeableImageView предоставленный библиотекой компонентов материала.
Что-то вроде:
<com.google.android.material.imageview.ShapeableImageView
    app:shapeAppearanceOverlay="@style/roundedImageViewRounded"
    app:strokeColor="@color/....."
    app:strokeWidth="1dp"
    ...
    />
с:
  <style name="roundedImageViewRounded">
    <item name="cornerFamily">rounded</item>
    <item name="cornerSize">50%</item>
  </style>
Примечание: требуется как минимум версия1.2.0-alpha03.
Я надеюсь, что это может помочь вам.
1) Со сторонней библиотекой

 <de.hdodenhof.circleimageview.CircleImageView
        xmlns:app="http://schemas.android.com/apk/res-auto"
        android:id="@+id/profile_image"
        android:layout_width="120dp"
        android:layout_height="120dp"
        android:layout_centerInParent="true"
        android:src="@drawable/your_picture"
        app:civ_border_color="@color/colorAccent"
        app:civ_border_width="3dp" />
Примечание. В вашем проекте откройте your_app > Gradle Scripts > build.gradle (Module: app) и добавьте следующий оператор реализации в зависимости {}
implementation 'de.hdodenhof:circleimageview:2.2.0'
Для полного описания, пожалуйста, проверьте: Источник здесь.
2) Без сторонней библиотеки
package com.mypackage.custom;

import android.content.Context;
import android.content.res.TypedArray;
import android.graphics.Bitmap;
import android.graphics.BitmapShader;
import android.graphics.Canvas;
import android.graphics.Color;
import android.graphics.ColorFilter;
import android.graphics.Matrix;
import android.graphics.Paint;
import android.graphics.Shader;
import android.graphics.drawable.BitmapDrawable;
import android.graphics.drawable.Drawable;
import android.support.v7.widget.AppCompatImageView;
import android.util.AttributeSet;

import com.mypackage.R;

import static android.widget.ImageView.ScaleType.CENTER_CROP;
import static android.widget.ImageView.ScaleType.CENTER_INSIDE;


public class CircularImageView extends AppCompatImageView {

    // Default Values
    private static final float DEFAULT_BORDER_WIDTH = 4;
    private static final float DEFAULT_SHADOW_RADIUS = 8.0f;

    // Properties
    private float borderWidth;
    private int canvasSize;
    private float shadowRadius;
    private int shadowColor = Color.BLACK;
    private ShadowGravity shadowGravity = ShadowGravity.BOTTOM;
    private ColorFilter colorFilter;

    // Object used to draw
    private Bitmap image;
    private Drawable drawable;
    private Paint paint;
    private Paint paintBorder;
    private Paint paintBackground;

    //region Constructor & Init Method
    public CircularImageView(final Context context) {
        this(context, null);
    }

    public CircularImageView(Context context, AttributeSet attrs) {
        this(context, attrs, 0);
    }

    public CircularImageView(Context context, AttributeSet attrs, int defStyleAttr) {
        super(context, attrs, defStyleAttr);
        init(context, attrs, defStyleAttr);
    }

    private void init(Context context, AttributeSet attrs, int defStyleAttr) {
        // Init paint
        paint = new Paint();
        paint.setAntiAlias(true);

        paintBorder = new Paint();
        paintBorder.setAntiAlias(true);

        paintBackground = new Paint();
        paintBackground.setAntiAlias(true);

        // Load the styled attributes and set their properties
        TypedArray attributes = context.obtainStyledAttributes(attrs, R.styleable.CircularImageView, defStyleAttr, 0);

        // Init Border
        if (attributes.getBoolean(R.styleable.CircularImageView_civ_border, true)) {
            float defaultBorderSize = DEFAULT_BORDER_WIDTH * getContext().getResources().getDisplayMetrics().density;
            setBorderWidth(attributes.getDimension(R.styleable.CircularImageView_civ_border_width, defaultBorderSize));
            setBorderColor(attributes.getColor(R.styleable.CircularImageView_civ_border_color, Color.WHITE));
        }

        setBackgroundColor(attributes.getColor(R.styleable.CircularImageView_civ_background_color, Color.WHITE));

        // Init Shadow
        if (attributes.getBoolean(R.styleable.CircularImageView_civ_shadow, false)) {
            shadowRadius = DEFAULT_SHADOW_RADIUS;
            drawShadow(attributes.getFloat(R.styleable.CircularImageView_civ_shadow_radius, shadowRadius),
                    attributes.getColor(R.styleable.CircularImageView_civ_shadow_color, shadowColor));
            int shadowGravityIntValue = attributes.getInteger(R.styleable.CircularImageView_civ_shadow_gravity, ShadowGravity.BOTTOM.getValue());
            shadowGravity = ShadowGravity.fromValue(shadowGravityIntValue);
        }

        attributes.recycle();
    }
    //endregion

    //region Set Attr Method
    public void setBorderWidth(float borderWidth) {
        this.borderWidth = borderWidth;
        requestLayout();
        invalidate();
    }

    public void setBorderColor(int borderColor) {
        if (paintBorder != null)
            paintBorder.setColor(borderColor);
        invalidate();
    }

    public void setBackgroundColor(int backgroundColor) {
        if (paintBackground != null)
            paintBackground.setColor(backgroundColor);
        invalidate();
    }

    public void addShadow() {
        if (shadowRadius == 0)
            shadowRadius = DEFAULT_SHADOW_RADIUS;
        drawShadow(shadowRadius, shadowColor);
        invalidate();
    }

    public void setShadowRadius(float shadowRadius) {
        drawShadow(shadowRadius, shadowColor);
        invalidate();
    }

    public void setShadowColor(int shadowColor) {
        drawShadow(shadowRadius, shadowColor);
        invalidate();
    }

    public void setShadowGravity(ShadowGravity shadowGravity) {
        this.shadowGravity = shadowGravity;
        invalidate();
    }

    @Override
    public void setColorFilter(ColorFilter colorFilter) {
        if (this.colorFilter == colorFilter)
            return;
        this.colorFilter = colorFilter;
        drawable = null; // To force re-update shader
        invalidate();
    }

    @Override
    public ScaleType getScaleType() {
        ScaleType currentScaleType = super.getScaleType();
        return currentScaleType == null || currentScaleType != CENTER_INSIDE ? CENTER_CROP : currentScaleType;
    }

    @Override
    public void setScaleType(ScaleType scaleType) {
        if (scaleType != CENTER_CROP && scaleType != CENTER_INSIDE) {
            throw new IllegalArgumentException(String.format("ScaleType %s not supported. " +
                    "Just ScaleType.CENTER_CROP & ScaleType.CENTER_INSIDE are available for this library.", scaleType));
        } else {
            super.setScaleType(scaleType);
        }
    }
    //endregion

    //region Draw Method
    @Override
    public void onDraw(Canvas canvas) {
        // Load the bitmap
        loadBitmap();

        // Check if image isn't null
        if (image == null)
            return;

        if (!isInEditMode()) {
            canvasSize = Math.min(canvas.getWidth(), canvas.getHeight());
        }

        // circleCenter is the x or y of the view's center
        // radius is the radius in pixels of the cirle to be drawn
        // paint contains the shader that will texture the shape
        int circleCenter = (int) (canvasSize - (borderWidth * 2)) / 2;
        float margeWithShadowRadius = shadowRadius * 2;

        // Draw Border
        canvas.drawCircle(circleCenter + borderWidth, circleCenter + borderWidth, circleCenter + borderWidth - margeWithShadowRadius, paintBorder);
        // Draw Circle background
        canvas.drawCircle(circleCenter + borderWidth, circleCenter + borderWidth, circleCenter - margeWithShadowRadius, paintBackground);
        // Draw CircularImageView
        canvas.drawCircle(circleCenter + borderWidth, circleCenter + borderWidth, circleCenter - margeWithShadowRadius, paint);
    }

    private void loadBitmap() {
        if (drawable == getDrawable())
            return;

        drawable = getDrawable();
        image = drawableToBitmap(drawable);
        updateShader();
    }

    @Override
    protected void onSizeChanged(int w, int h, int oldw, int oldh) {
        super.onSizeChanged(w, h, oldw, oldh);
        canvasSize = Math.min(w, h);
        if (image != null)
            updateShader();
    }

    private void drawShadow(float shadowRadius, int shadowColor) {
        this.shadowRadius = shadowRadius;
        this.shadowColor = shadowColor;
        setLayerType(LAYER_TYPE_SOFTWARE, paintBorder);

        float dx = 0.0f;
        float dy = 0.0f;

        switch (shadowGravity) {
            case CENTER:
                dx = 0.0f;
                dy = 0.0f;
                break;
            case TOP:
                dx = 0.0f;
                dy = -shadowRadius / 2;
                break;
            case BOTTOM:
                dx = 0.0f;
                dy = shadowRadius / 2;
                break;
            case START:
                dx = -shadowRadius / 2;
                dy = 0.0f;
                break;
            case END:
                dx = shadowRadius / 2;
                dy = 0.0f;
                break;
        }

        paintBorder.setShadowLayer(shadowRadius, dx, dy, shadowColor);
    }

    private void updateShader() {
        if (image == null)
            return;

        // Create Shader
        BitmapShader shader = new BitmapShader(image, Shader.TileMode.CLAMP, Shader.TileMode.CLAMP);

        // Center Image in Shader
        float scale = 0;
        float dx = 0;
        float dy = 0;

        switch (getScaleType()) {
            case CENTER_CROP:
                if (image.getWidth() * getHeight() > getWidth() * image.getHeight()) {
                    scale = getHeight() / (float) image.getHeight();
                    dx = (getWidth() - image.getWidth() * scale) * 0.5f;
                } else {
                    scale = getWidth() / (float) image.getWidth();
                    dy = (getHeight() - image.getHeight() * scale) * 0.5f;
                }
                break;
            case CENTER_INSIDE:
                if (image.getWidth() * getHeight() < getWidth() * image.getHeight()) {
                    scale = getHeight() / (float) image.getHeight();
                    dx = (getWidth() - image.getWidth() * scale) * 0.5f;
                } else {
                    scale = getWidth() / (float) image.getWidth();
                    dy = (getHeight() - image.getHeight() * scale) * 0.5f;
                }
                break;
        }

        Matrix matrix = new Matrix();
        matrix.setScale(scale, scale);
        matrix.postTranslate(dx, dy);
        shader.setLocalMatrix(matrix);

        // Set Shader in Paint
        paint.setShader(shader);

        // Apply colorFilter
        paint.setColorFilter(colorFilter);
    }

    private Bitmap drawableToBitmap(Drawable drawable) {
        if (drawable == null) {
            return null;
        } else if (drawable instanceof BitmapDrawable) {
            return ((BitmapDrawable) drawable).getBitmap();
        }

        try {
            // Create Bitmap object out of the drawable
            Bitmap bitmap = Bitmap.createBitmap(drawable.getIntrinsicWidth(), drawable.getIntrinsicHeight(), Bitmap.Config.ARGB_8888);
            Canvas canvas = new Canvas(bitmap);
            drawable.setBounds(0, 0, canvas.getWidth(), canvas.getHeight());
            drawable.draw(canvas);
            return bitmap;
        } catch (Exception e) {
            e.printStackTrace();
            return null;
        }
    }
    //endregion

    //region Measure Method
    @Override
    protected void onMeasure(int widthMeasureSpec, int heightMeasureSpec) {
        int width = measureWidth(widthMeasureSpec);
        int height = measureHeight(heightMeasureSpec);
        setMeasuredDimension(width, height);
    }

    private int measureWidth(int measureSpec) {
        int result;
        int specMode = MeasureSpec.getMode(measureSpec);
        int specSize = MeasureSpec.getSize(measureSpec);

        if (specMode == MeasureSpec.EXACTLY) {
            // The parent has determined an exact size for the child.
            result = specSize;
        } else if (specMode == MeasureSpec.AT_MOST) {
            // The child can be as large as it wants up to the specified size.
            result = specSize;
        } else {
            // The parent has not imposed any constraint on the child.
            result = canvasSize;
        }

        return result;
    }

    private int measureHeight(int measureSpecHeight) {
        int result;
        int specMode = MeasureSpec.getMode(measureSpecHeight);
        int specSize = MeasureSpec.getSize(measureSpecHeight);

        if (specMode == MeasureSpec.EXACTLY) {
            // We were told how big to be
            result = specSize;
        } else if (specMode == MeasureSpec.AT_MOST) {
            // The child can be as large as it wants up to the specified size.
            result = specSize;
        } else {
            // Measure the text (beware: ascent is a negative number)
            result = canvasSize;
        }

        return result + 2;
    }
    //endregion

    public enum ShadowGravity {
        CENTER,
        TOP,
        BOTTOM,
        START,
        END;

        public int getValue() {
            switch (this) {
                case CENTER:
                    return 1;
                case TOP:
                    return 2;
                case BOTTOM:
                    return 3;
                case START:
                    return 4;
                case END:
                    return 5;
            }
            throw new IllegalArgumentException("Not value available for this ShadowGravity: " + this);
        }

        public static ShadowGravity fromValue(int value) {
            switch (value) {
                case 1:
                    return CENTER;
                case 2:
                    return TOP;
                case 3:
                    return BOTTOM;
                case 4:
                    return START;
                case 5:
                    return END;
            }
            throw new IllegalArgumentException("This value is not supported for ShadowGravity: " + value);
        }

    }
}
RES / значения /attrs.xml
<?xml version="1.0" encoding="utf-8"?>
<resources>
    <declare-styleable name="CircularImageView">
        <attr name="civ_border" format="boolean" />
        <attr name="civ_border_width" format="dimension" />
        <attr name="civ_border_color" format="color" />
        <attr name="civ_background_color" format="color" />
        <attr name="civ_shadow" format="boolean" />
        <attr name="civ_shadow_color" format="color" />
        <attr name="civ_shadow_radius" format="float" />
        <attr name="civ_shadow_gravity">
            <flag name="center" value="1" />
            <flag name="top" value="2" />
            <flag name="bottom" value="3" />
            <flag name="start" value="4" />
            <flag name="end" value="5" />
        </attr>
    </declare-styleable>
</resources>
раскладка
<com.mypackage.CircularImageView
        android:id="@+id/iv_profile"
        android:layout_width="120dp"
        android:layout_height="120dp"
        android:layout_centerInParent="true"
        android:src="@drawable/your_picture"
        app:civ_border="true"
        app:civ_border_color="@color/colorAccent"
        app:civ_border_width="3dp"/>
С помощью библиотеки скольжения и класса RoundedBitmapDrawableFactory этого легко достичь. Возможно, вам потребуется создать круглое изображение заполнителя.
Glide V4:
Glide.with(context).load(url).apply(RequestOptions.circleCropTransform()).into(imageView);
Glide V3:
    Glide.with(context)
        .load(imgUrl)
        .asBitmap()
        .placeholder(R.drawable.placeholder)
        .error(R.drawable.placeholder)
        .into(new BitmapImageViewTarget(imgProfilePicture) {
            @Override
            protected void setResource(Bitmap resource) {
                RoundedBitmapDrawable drawable = RoundedBitmapDrawableFactory.create(context.getResources(),
                        Bitmap.createScaledBitmap(resource, 50, 50, false));
                drawable.setCircular(true);
                imgProfilePicture.setImageDrawable(drawable);
            }
        });
Вышеуказанные методы не работают, если вы используете src приписывать. То, что я сделал, это поместил два изображения в макет фрейма один над другим, вот так:
<FrameLayout android:id="@+id/frame"
             android:layout_width="40dp"
             android:layout_height="40dp">

    <ImageView android:id="@+id/pic"
               android:layout_width="40dp"
               android:layout_height="40dp"
               android:src="@drawable/my_picture" />

    <ImageView android:id="@+id/circle_crop"
               android:layout_width="40dp"
               android:layout_height="40dp"
               android:src="@drawable/circle_crop" />

</FrameLayout>
Просто поместите файл circle_crop.png в папку для рисования, которая имеет форму размеров вашего изображения (квадрат в моем случае) с белым фоном и прозрачным кружком в центре. Вы можете использовать это изображение, если хотите иметь квадратное изображение.

Просто скачайте картинку выше.
Ниже приведен один из самых простых способов сделать это, используя следующий код:
зависимости
dependencies {
    ...
    compile 'de.hdodenhof:circleimageview:2.1.0'      // use this or use the latest compile version. In case u get bug.
}
XML-код
<de.hdodenhof.circleimageview.CircleImageView
    xmlns:app="http://schemas.android.com/apk/res-auto"
    android:id="@+id/profile_image"
    android:layout_width="96dp"             //  here u can adjust the width
    android:layout_height="96dp"            //  here u can adjust the height
    android:src="@drawable/profile"         //  here u can change the image
    app:civ_border_width="2dp"              //  here u can adjust the border of the circle.
    app:civ_border_color="#FF000000"/>      //  here u can adjust the border color
Скриншот:

Источник: Circular ImageView GitHub Repository
Вам не нужна сторонняя библиотека.
вы можете использовать
ShapeableImageView в материале.
implementation 'com.google.android.material:material:1.2.0'
style.xml
<style name="ShapeAppearanceOverlay.App.CornerSize">
     <item name="cornerSize">50%</item>
</style>
в макете
<com.google.android.material.imageview.ShapeableImageView
     android:layout_width="100dp"
     android:layout_height="100dp"
     app:srcCompat="@drawable/ic_profile"
     app:shapeAppearanceOverlay="@style/ShapeAppearanceOverlay.App.CornerSize"
/>
ты можешь видеть это
https://developer.android.com/reference/com/google/android/material/imageview/ShapeableImageView
или это
https://medium.com/android-beginners/shapeableimageview-material-components-for-android-cac6edac2c0d
Вы можете просто использовать AndroidX ImageFilterView.
       <androidx.constraintlayout.utils.widget.ImageFilterView
        android:layout_width="48dp"
        android:layout_height="48dp"
        android:layout_marginStart="@dimen/margin_medium"
        android:layout_marginBottom="@dimen/margin_medium"
        android:background="@color/white"
        android:padding="@dimen/margin_small"
        app:layout_constraintBottom_toBottomOf="parent"
        app:layout_constraintStart_toStartOf="parent"
        app:roundPercent="1"
        app:srcCompat="@drawable/ic_gallery" />

Вы можете просто использовать CardView без какой-либо внешней библиотеки
  <androidx.cardview.widget.CardView
                    android:id="@+id/roundCardView"
                    android:layout_width="40dp"
                    android:layout_height="40dp"
                    android:layout_centerHorizontal="true"
                    android:elevation="0dp"
                    app:cardCornerRadius="20dp">

                    <ImageView
                        android:layout_width="40dp"
                        android:layout_height="40dp"
                        android:src="@drawable/profile" />
</androidx.cardview.widget.CardView>
Публикация этого ответа для дальнейшего использования. Вы можете использовать
ShapeableImageViewдоступно в
com.google.android.material:material.
      <com.google.android.material.imageview.ShapeableImageView
    android:id="@+id/img_launcher_icon"
    android:layout_width="wrap_content"
    android:layout_height="wrap_content"
    android:layout_centerHorizontal="true"
    android:layout_margin="5dp"
    android:adjustViewBounds="true"
    android:background="@android:color/transparent"
    android:elevation="5dp"
    android:maxWidth="50dp"
    android:maxHeight="50dp"
    android:scaleType="fitXY"
    android:src="@mipmap/ic_launcher"
    app:shapeAppearance="?attr/actionButtonStyle"
    app:shapeAppearanceOverlay="@style/imageViewRounded"
    app:strokeColor="@android:color/white" />
Добавлять
imageViewRoundedстиль в вашем файле styles.xml
      <style name="imageViewRounded">
    <item name="cornerFamily">rounded</item>
    <item name="cornerSize">51%</item>
</style>
Вы можете добавить зависимость от материального дизайна, если она не добавлена.
implementation 'com.google.android.material:material:1.4.0'
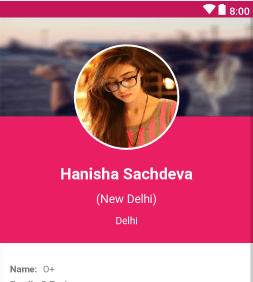
Дизайн выглядит как

Это сделает свое дело:
rectangle.xml
<?xml version="1.0" encoding="UTF-8"?>
<shape xmlns:android="http://schemas.android.com/apk/res/android"
    android:shape="rectangle">
    <solid android:color="@android:color/transparent" />
    <padding android:bottom="-14dp" android:left="-14dp" android:right="-14dp" android:top="-14dp" />

</shape>
circle.xml
<shape xmlns:android="http://schemas.android.com/apk/res/android"
    android:innerRadius="0dp"
    android:shape="oval"

    android:useLevel="false" >
    <solid android:color="@android:color/transparent" />

    <stroke
        android:width="15dp"
        android:color="@color/verification_contact_background" />

</shape>
profile_image.xml (Список слоев)
<?xml version="1.0" encoding="utf-8"?>
<layer-list xmlns:android="http://schemas.android.com/apk/res/android" >

    <item android:drawable="@drawable/rectangle" />
    <item android:drawable="@drawable/circle"/>

</layer-list>
Ваш макет
 <ImageView
        android:id="@+id/profile_image"
        android:layout_width="match_parent"
        android:layout_height="match_parent"
        android:background="@drawable/default_org"
        android:src="@drawable/profile_image"/>
Лучшее решение любезно предоставлено https://www.youtube.com/watch?v=0MHoNU7ytaw ширина и высота представления карты определяют размер изображений, которые она содержит, настроена следующим образом:
- Добавить зависимость в Gradle(модуль)
- Добавьте xml-код в файл activity.xml или fragment.xml.
    implementation 'androidx.cardview:cardview:1.0.0'

   <androidx.cardview.widget.CardView
      android:layout_width="300dp"
      android:layout_height="270dp"
      android:layout_gravity="center"
      app:cardCornerRadius="150dp"
      app:cardBackgroundColor="@color/trans"
      >
    <ImageView
        android:id="@+id/resultImage"
        android:layout_width="match_parent"
        android:layout_height="match_parent"
        android:src="@drawable/congrats"
        android:layout_gravity="center">

    </ImageView>


  </androidx.cardview.widget.CardView>```
Обновление 2021: использование Glide v4 CircleCrop см. Https://bumptech.github.io/glide/doc/generatedapi.html
          implementation 'com.github.bumptech.glide:glide:4.11.0'
    annotationProcessor 'com.github.bumptech.glide:compiler:4.11.0'
XML
      <ImageView
    android:id="@+id/vinyl"
    android:layout_width="match_parent"
    android:layout_height="match_parent"
    tools:ignore="ContentDescription" />
В коде
          Glide.with(this)
            .load("https://images.pexels.com/photos/3828241/pexels-photo-3828241.jpeg")
            .transform(CircleCrop())
            .into(rootView.findViewById<ImageView>(R.id.vinyl))

Я использую shape = "oval" вместо "ring" ниже. Это сработало для меня. Чтобы изображение не выходило за рамки, я использую <padding> и установить <adjustViewBounds> правда в моем <ImageView>, Я пробовал с изображениями размером от 50 х 50 пикселей до 200x200 пикселей.
@Jyotman Singh, ответ очень хороший (для сплошных фонов), поэтому я хотел бы улучшить его, поделившись векторной графикой, которую можно перекрасить в соответствии с вашими потребностями, также это удобно, поскольку цельная векторная форма хорошо масштабируется.
Это прямоугольник (@drawable/shape_round_profile_pic):
<?xml version="1.0" encoding="utf-8"?>
<vector xmlns:android="http://schemas.android.com/apk/res/android"
    android:viewportWidth="284"
    android:viewportHeight="284"
    android:width="284dp"
    android:height="284dp">
    <path
        android:pathData="M0 142L0 0l142 0 142 0 0 142 0 142 -142 0 -142 0zm165 137.34231c26.06742 -4.1212 52.67405 -17.543 72.66855 -36.65787 11.82805 -11.30768 20.55487 -22.85153 27.7633 -36.72531C290.23789 158.21592 285.62874 101.14121 253.48951 58.078079 217.58149 9.9651706 154.68849 -10.125717 98.348685 8.5190299 48.695824 24.95084 12.527764 67.047123 3.437787 118.98655 1.4806194 130.16966 1.511302 152.96723 3.4990422 164.5 12.168375 214.79902 47.646316 256.70775 96 273.76783c21.72002 7.66322 44.26673 9.48476 69 5.57448z"
        android:fillColor="#ffffff" /> // you can change frame color
</vector>
Использование такое же:
<FrameLayout
        android:layout_width="70dp"
        android:layout_height="70dp">

        <ImageView
            android:layout_width="match_parent"
            android:layout_height="match_parent"
            android:background="@drawable/YOUR_PICTURE" />

        <ImageView
            android:layout_width="match_parent"
            android:layout_height="match_parent"
            android:background="@drawable/shape_round_profile_pic"/>

    </FrameLayout>
Если вы используете Material Design в своем приложении, используйте это
<com.google.android.material.card.MaterialCardView
            android:layout_width="75dp"
            android:layout_height="75dp"
            app:cardCornerRadius="50dp"
            app:strokeWidth="1dp"
            app:strokeColor="@color/black">
            <ImageView
                android:layout_width="fill_parent"
                android:layout_height="fill_parent"
                android:id="@+id/circular_image"
                android:scaleType="fitCenter"
                android:src="@drawable/your_img" />
        </com.google.android.material.card.MaterialCardView>
Другой метод без использования какой-либо библиотеки - использовать ImageFilterView, и установка круглого процента для представления сделает круг круглым
Приложение: RoundPercent= "1"
        <androidx.constraintlayout.utils.widget.ImageFilterView
        android:id="@+id/ivProfile"
        android:layout_width="150dp"
        android:layout_height="150dp"
        android:src="@drawable/custom_button_1"
        app:roundPercent="1"
        android:scaleType="fitXY"
        app:layout_constraintTop_toTopOf="parent"
        app:layout_constraintStart_toStartOf="parent"
        app:layout_constraintEnd_toEndOf="parent"
        app:layout_constraintBottom_toTopOf="@+id/etName"/>
Просто используйте эти строки кода, и все готово:
<de.hdodenhof.circleimageview.CircleImageView
            xmlns:app="http://schemas.android.com/apk/res-auto"
            android:clickable="true"
            app:civ_border_width="3dp"
            app:civ_border_color="#FFFFFFFF"
            android:id="@+id/profile"
            android:layout_width="200dp"
            android:layout_height="200dp"
            android:layout_below="@+id/header_cover_image"
            android:layout_centerHorizontal="true"
            android:layout_marginTop="-130dp"
            android:elevation="5dp"
            android:padding="20dp"
            android:scaleType="centerCrop"
            android:src="@drawable/profilemain" />
Не забудьте импортировать:
import de.hdodenhof.circleimageview.CircleImageView;
Добавьте эту библиотеку в build.gradle:
compile 'de.hdodenhof:circleimageview:2.1.0'
Попробуй это.
public class RoundedImageView extends android.support.v7.widget.AppCompatImageView {

    private int borderWidth = 4;
    private int viewWidth;
    private int viewHeight;
    private Bitmap image;
    private Paint paint;
    private Paint paintBorder;
    private BitmapShader shader;

    public RoundedImageView(Context context)
    {
        super(context);
        setup();
    }

    public RoundedImageView(Context context, AttributeSet attrs)
    {
        super(context, attrs);
        setup();
    }

    public RoundedImageView(Context context, AttributeSet attrs, int defStyle)
    {
        super(context, attrs, defStyle);
        setup();
    }

    private void setup()
    {
        paint = new Paint();
        paint.setAntiAlias(true);

        paintBorder = new Paint();
        setBorderColor(Color.WHITE);
        paintBorder.setAntiAlias(true);
        this.setLayerType(LAYER_TYPE_SOFTWARE, paintBorder);

        paintBorder.setShadowLayer(4.0f, 0.0f, 2.0f, Color.WHITE);
    }

    public void setBorderWidth(int borderWidth)
    {
        this.borderWidth = borderWidth;
        this.invalidate();
    }

    public void setBorderColor(int borderColor)
    {
        if (paintBorder != null)
            paintBorder.setColor(borderColor);

        this.invalidate();
    }

    private void loadBitmap()
    {
        BitmapDrawable bitmapDrawable = (BitmapDrawable) this.getDrawable();

        if (bitmapDrawable != null)
            image = bitmapDrawable.getBitmap();
    }

    @SuppressLint("DrawAllocation")
    @Override
    public void onDraw(Canvas canvas)
    {
        loadBitmap();

        if (image != null)
        {
            shader = new BitmapShader(Bitmap.createScaledBitmap(image, canvas.getWidth(), canvas.getHeight(), false), Shader.TileMode.CLAMP, Shader.TileMode.CLAMP);
            paint.setShader(shader);
            int circleCenter = viewWidth / 2;
            canvas.drawCircle(circleCenter + borderWidth, circleCenter + borderWidth, circleCenter + borderWidth - 4.0f, paintBorder);
            canvas.drawCircle(circleCenter + borderWidth, circleCenter + borderWidth, circleCenter - 4.0f, paint);
        }
    }

    @Override
    protected void onMeasure(int widthMeasureSpec, int heightMeasureSpec)
    {
        int width = measureWidth(widthMeasureSpec);
        int height = measureHeight(heightMeasureSpec, widthMeasureSpec);

        viewWidth = width - (borderWidth * 2);
        viewHeight = height - (borderWidth * 2);

        setMeasuredDimension(width, height);
    }

    private int measureWidth(int measureSpec)
    {
        int result = 0;
        int specMode = MeasureSpec.getMode(measureSpec);
        int specSize = MeasureSpec.getSize(measureSpec);

        if (specMode == MeasureSpec.EXACTLY)
        {
            result = specSize;
        }
        else
        {
            // Measure the text
            result = viewWidth;
        }

        return result;
    }

    private int measureHeight(int measureSpecHeight, int measureSpecWidth)
    {
        int result = 0;
        int specMode = MeasureSpec.getMode(measureSpecHeight);
        int specSize = MeasureSpec.getSize(measureSpecHeight);

        if (specMode == MeasureSpec.EXACTLY)
        {
            result = specSize;
        }
        else
        {
            result = viewHeight;
        }

        return (result + 2);
     }
 }
и использовать этот ImageView в макете, как:
<com.app.Demo.RoundedImageView
     android:id="@+id/iv_profileImage"
     android:layout_width="70dp"
     android:layout_height="70dp"
     android:layout_centerHorizontal="true"
    />
Я так и сделал, я использовал свой цвет фона в своем векторном изображении
ic_bg_picture.xml
 <vector xmlns:android="http://schemas.android.com/apk/res/android"
    android:width="100dp"
    android:height="100dp"
    android:viewportWidth="100"
    android:viewportHeight="100">
  <path
      android:pathData="M100.6,95.5c0,-0.4 -0.1,-0.7 0,-1.1c-0.2,-0.7 -0.2,-1.4 -0.1,-2.1c0,-0.1 0,-0.2 0,-0.3c-0.1,-0.6 -0.1,-1.2 0,-1.8c-1,-1.3 -0.3,-2.9 -0.3,-4.3c-0.1,-28.7 -0.1,-57.3 -0.1,-86C68,-0.1 35.9,-0.1 3.8,-0.2C0.7,-0.2 0,0.5 0,3.6c0.1,32.1 0.1,64.2 0.1,96.2c31,0 62,-0.1 92.9,0.1c3.6,0 6.3,-0.2 7.5,-3.2C100.5,96.4 100.5,95.9 100.6,95.5zM46.3,95.2C26.4,94 2,74.4 3.8,46.8C5.1,27.2 24.4,2.7 52.6,4.6c20.2,1.4 43,21.3 41.5,45.1C96.1,72.4 73,96.8 46.3,95.2z"
      android:fillColor="#6200EE"/>
</vector>
в моем случае я создал вектор и изменил android:fillColor="#6200EE"
по цвету моего фона
  <ImageView
    android:id="@+id/iv_profile_image"
    android:layout_width="100dp"
    android:layout_height="100dp"
    android:contentDescription="@string/app_name"
    app:srcCompat="@color/colorPrimaryDark" />

<ImageView
    android:id="@+id/container_profile_image"
    android:layout_width="100dp"
    android:layout_height="100dp"
    android:contentDescription="@string/app_name"
    app:srcCompat="@drawable/ic_bg_picture"/>
У меня есть простое решение. Создайте новый ресурс изображения, щелкнув правой кнопкой мыши имя вашего пакета и выбрав New->Image asset. Введите имя (любое имя) и путь (расположение изображения в вашей системе). Затем нажмите "Далее" и "Готово". Если вы вводите имя изображения как "img", в папке mipmap автоматически создается круглое изображение с именем "img_round".
Затем сделайте это:
<ImageView
        android:layout_width="100dp"
        android:layout_height="100dp"
        android:src="@mipmap/img_round"/>
В предварительном просмотре все еще может отображаться прямоугольное изображение. Но если вы запустите приложение на своем устройстве, оно будет круглым.
Создайте CustomImageview, который просто onDraw() метод следует:
@Override
protected void onDraw(Canvas canvas) {

    float radius = this.getHeight()/2;
    Path path = new Path();
    RectF rect = new RectF(0, 0, this.getWidth(), this.getHeight());
    path.addRoundRect(rect, radius, radius, Path.Direction.CW);
    canvas.clipPath(path);
    super.onDraw(canvas);

}
На самом деле вы можете использовать то, что Google предоставляет через библиотеку поддержки RoundedBitmapDrawableFactory ( здесь и здесь), вместо использования сторонней библиотеки:
Gradle:
implementation 'androidx.appcompat:appcompat:1.0.0-beta01'
MainActivity.kt
class MainActivity : AppCompatActivity() {

    override fun onCreate(savedInstanceState: Bundle?) {
        super.onCreate(savedInstanceState)
        setContentView(R.layout.activity_main)
        val originalDrawable = ContextCompat.getDrawable(this, R.drawable.avatar_1)!!
        val bitmap = convertDrawableToBitmap(originalDrawable)
        val drawable = RoundedBitmapDrawableFactory.create(resources, bitmap)
        drawable.setAntiAlias(true)
        drawable.cornerRadius = Math.max(bitmap.width, bitmap.height) / 2.0f
        avatarImageView.setImageDrawable(drawable)
    }

    companion object {
        @JvmStatic
        fun convertDrawableToBitmap(drawable: Drawable): Bitmap {
            if (drawable is BitmapDrawable)
                return drawable.bitmap
            // We ask for the bounds if they have been set as they would be most
            // correct, then we check we are  > 0
            val bounds = drawable.bounds
            val width = if (!bounds.isEmpty) bounds.width() else drawable.intrinsicWidth
            val height = if (!bounds.isEmpty) bounds.height() else drawable.intrinsicHeight
            // Now we check we are > 0
            val bitmap = Bitmap.createBitmap(if (width <= 0) 1 else width, if (height <= 0) 1 else height,
                    Bitmap.Config.ARGB_8888)
            val canvas = Canvas(bitmap)
            drawable.setBounds(0, 0, canvas.width, canvas.height)
            drawable.draw(canvas)
            return bitmap
        }
    }
}
разреш / макет /activity_main.xml
<FrameLayout
    xmlns:android="http://schemas.android.com/apk/res/android" xmlns:app="http://schemas.android.com/apk/res-auto"
    xmlns:tools="http://schemas.android.com/tools" android:layout_width="match_parent"
    android:layout_height="match_parent" tools:context=".MainActivity">

    <androidx.appcompat.widget.AppCompatImageView
        android:id="@+id/avatarImageView" android:layout_width="100dp" android:layout_height="100dp"
        android:layout_gravity="center"/>

</FrameLayout>
Рез / рисуем /avatar_1.xml
<vector xmlns:android="http://schemas.android.com/apk/res/android" android:width="128dp" android:height="128dp"
        android:viewportHeight="128.0" android:viewportWidth="128.0">
    <path
        android:fillColor="#FF8A80" android:pathData="M0 0h128v128h-128z"/>
    <path
        android:fillColor="#FFE0B2"
        android:pathData="M36.3 94.8c6.4 7.3 16.2 12.1 27.3 12.4 10.7,-.3 20.3,-4.7 26.7,-11.6l.2.1c-17,-13.3,-12.9,-23.4,-8.5,-28.6 1.3,-1.2 2.8,-2.5 4.4,-3.9l13.1,-11c1.5,-1.2 2.6,-3 2.9,-5.1.6,-4.4,-2.5,-8.4,-6.9,-9.1,-1.5,-.2,-3 0,-4.3.6,-.3,-1.3,-.4,-2.7,-1.6,-3.5,-1.4,-.9,-2.8,-1.7,-4.2,-2.5,-7.1,-3.9,-14.9,-6.6,-23,-7.9,-5.4,-.9,-11,-1.2,-16.1.7,-3.3 1.2,-6.1 3.2,-8.7 5.6,-1.3 1.2,-2.5 2.4,-3.7 3.7l-1.8 1.9c-.3.3,-.5.6,-.8.8,-.1.1,-.2 0,-.4.2.1.2.1.5.1.6,-1,-.3,-2.1,-.4,-3.2,-.2,-4.4.6,-7.5 4.7,-6.9 9.1.3 2.1 1.3 3.8 2.8 5.1l11 9.3c1.8 1.5 3.3 3.8 4.6 5.7 1.5 2.3 2.8 4.9 3.5 7.6 1.7 6.8,-.8 13.4,-5.4 18.4,-.5.6,-1.1 1,-1.4 1.7,-.2.6,-.4 1.3,-.6 2,-.4 1.5,-.5 3.1,-.3 4.6.4 3.1 1.8 6.1 4.1 8.2 3.3 3 8 4 12.4 4.5 5.2.6 10.5.7 15.7.2 4.5,-.4 9.1,-1.2 13,-3.4 5.6,-3.1 9.6,-8.9 10.5,-15.2m-14.4,-49.8c.9 0 1.6.7 1.6 1.6 0 .9,-.7 1.6,-1.6 1.6,-.9 0,-1.6,-.7,-1.6,-1.6,-.1,-.9.7,-1.6 1.6,-1.6zm-25.7 0c.9 0 1.6.7 1.6 1.6 0 .9,-.7 1.6,-1.6 1.6,-.9 0,-1.6,-.7,-1.6,-1.6,-.1,-.9.7,-1.6 1.6,-1.6z"/>
    <path
        android:fillColor="#E0F7FA"
        android:pathData="M105.3 106.1c-.9,-1.3,-1.3,-1.9,-1.3,-1.9l-.2,-.3c-.6,-.9,-1.2,-1.7,-1.9,-2.4,-3.2,-3.5,-7.3,-5.4,-11.4,-5.7 0 0 .1 0 .1.1l-.2,-.1c-6.4 6.9,-16 11.3,-26.7 11.6,-11.2,-.3,-21.1,-5.1,-27.5,-12.6,-.1.2,-.2.4,-.2.5,-3.1.9,-6 2.7,-8.4 5.4l-.2.2s-.5.6,-1.5 1.7c-.9 1.1,-2.2 2.6,-3.7 4.5,-3.1 3.9,-7.2 9.5,-11.7 16.6,-.9 1.4,-1.7 2.8,-2.6 4.3h109.6c-3.4,-7.1,-6.5,-12.8,-8.9,-16.9,-1.5,-2.2,-2.6,-3.8,-3.3,-5z"/>
    <path
        android:fillColor="#444" android:pathData="M76.3,47.5 m-2.0, 0 a 2.0,2.0 0 1,1 4.0,0 a2.0,2.0 0 1,1 -4.0,0"/>
    <path
        android:fillColor="#444" android:pathData="M50.7,47.6 m-2.0, 0 a 2.0,2.0 0 1,1 4.0,0 a2.0,2.0 0 1,1 -4.0,0"/>
    <path
        android:fillColor="#444"
        android:pathData="M48.1 27.4c4.5 5.9 15.5 12.1 42.4 8.4,-2.2,-6.9,-6.8,-12.6,-12.6,-16.4 17.2 1.5 14.1,-9.4 14.1,-9.4,-1.4 5.5,-11.1 4.4,-11.1 4.4h-18.8c-1.7,-.1,-3.4 0,-5.2.3,-12.8 1.8,-22.6 11.1,-25.7 22.9 10.6,-1.9 15.3,-7.6 16.9,-10.2z"/>
</vector>
Результат:

И, предположим, вы хотите добавить границу поверх него, вы можете использовать это, например:
stroke_drawable.xml
<shape xmlns:android="http://schemas.android.com/apk/res/android" android:shape="oval">
    <stroke
        android:width="4dp" android:color="@android:color/black"/>
</shape>
И добавить android:foreground="@drawable/stroke_drawable" в ImageView в файле макета XML, и вы получите это:
Я не уверен, как добавить тень (это будет работать на старых версиях Android), хотя. Используя FloatingActionButton (из зависимости "com.google.android.material:material"), мне не удалось заставить растровое изображение заполнить сам FAB. Использование вместо этого могло бы быть даже лучше, если бы это работало.
РЕДАКТИРОВАТЬ: если вы хотите добавить тень возвышения (доступно из API 21), вы можете немного изменить то, что я написал:
Внутри XML-файла макета:
<androidx.appcompat.widget.AppCompatImageView android:padding="4dp"
    android:id="@+id/avatarImageView" android:layout_width="100dp" android:layout_height="100dp" android:elevation="8dp"
    android:layout_gravity="center" android:background="@drawable/stroke_drawable" tools:srcCompat="@drawable/avatar_1"/>
CircularShadowViewOutlineProvider.kt
@TargetApi(Build.VERSION_CODES.LOLLIPOP)
class CircularShadowViewOutlineProvider : ViewOutlineProvider() {
    override fun getOutline(view: View, outline: Outline) {
        val size = Math.max(view.width, view.height)
        outline.setRoundRect(0, 0, size, size, size / 2f)
    }
}
В коде:
    if (Build.VERSION.SDK_INT >= Build.VERSION_CODES.LOLLIPOP)
        avatarImageView.outlineProvider = CircularShadowViewOutlineProvider()
Результат:
Этот класс является пользовательским круговым изображением с тенью, обводкой, насыщенностью, и с помощью этого пользовательского кругового изображения вы можете сделать изображение в круговой форме с радиусом. Ребята для Circular Shadow ImageView Нет необходимости Github этого класса достаточно.
Добавление Circular ImageView в ваш макет
CircularImageView c=new CircularImageView(this,screen width,screen height,Bitmap myimage);
yourLayout.addView(c);**


public class CircularImageView extends android.support.v7.widget.AppCompatImageView
{
    private final Context context;
    private final int width, height;
    private final Paint paint;
    private final Paint paintBorder,imagePaint;
    private final Bitmap bitmap2;
    private final Paint paint3;
    private Bitmap bitmap;
    private BitmapShader shader;
    private float radius = 4.0f;
    float x = 0.0f;
    float y = 8.0f;
    private float stroke;
    private float strokeWidth = 0.0f;
    private Bitmap bitmap3;
    private int corner_radius=50;


    public CircularImageView(Context context, int width, int height, Bitmap bitmap)     {
        super(context);
        this.context = context;
        this.width = width;
        this.height = height;

   //here "bitmap" is the square shape(width* width) scaled bitmap ..

        this.bitmap = bitmap;


        paint = new Paint(Paint.ANTI_ALIAS_FLAG);
        paint.setAntiAlias(true);
        paint.setFilterBitmap(true);
        paint.setDither(true);


        paint3=new Paint();
        paint3.setStyle(Paint.Style.STROKE);
        paint3.setColor(Color.WHITE);
        paint3.setAntiAlias(true);

        paintBorder = new Paint();
        imagePaint= new Paint();

        paintBorder.setColor(Color.WHITE);
        paintBorder.setAntiAlias(true);
        this.setLayerType(LAYER_TYPE_SOFTWARE, paintBorder);


        this.bitmap2 = Bitmap.createScaledBitmap(bitmap, (bitmap.getWidth() - 40), (bitmap.getHeight() - 40), true);


        imagePaint.setAntiAlias(true);


        invalidate();
    }

    @Override
    protected void onDraw(Canvas canvas)
    {
        super.onDraw(canvas);
        Shader b;
         if (bitmap3 != null)
            b = new BitmapShader(bitmap3, Shader.TileMode.CLAMP, Shader.TileMode.CLAMP);
         else
            b = new BitmapShader(bitmap2, Shader.TileMode.CLAMP, Shader.TileMode.CLAMP);
        imagePaint.setShader(b);
        canvas.drawBitmap(maskedBitmap(), 20, 20, null);
    }

    private Bitmap maskedBitmap()
    {
        Bitmap l1 = Bitmap.createBitmap(width,width, Bitmap.Config.ARGB_8888);
        Canvas canvas = new Canvas(l1);
        paintBorder.setShadowLayer(radius, x, y, Color.parseColor("#454645"));
        paint.setXfermode(new PorterDuffXfermode(PorterDuff.Mode.SRC_IN));
        final RectF rect = new RectF();
        rect.set(20, 20, bitmap2.getWidth(), bitmap2.getHeight());

        canvas.drawRoundRect(rect, corner_radius, corner_radius, paintBorder);

        canvas.drawRoundRect(rect, corner_radius, corner_radius, imagePaint);

        if (strokeWidth!=0.0f)
        {
            paint3.setStrokeWidth(strokeWidth);
            canvas.drawRoundRect(rect, corner_radius, corner_radius, paint3);
        }

         paint.setXfermode(null);
        return l1;
    }


     // use seekbar here, here you have to pass  "0 -- 250"  here corner radius will change

    public void setCornerRadius(int corner_radius)
    {
        this.corner_radius = corner_radius;
        invalidate();
    }


    -------->use seekbar here, here you have to pass  "0 -- 10.0f"  here shadow radius will change

    public void setShadow(float radius)
    {
        this.radius = radius;
        invalidate();
    }

   // use seekbar here, here you have to pass  "0 -- 10.0f"  here stroke size  will change

    public void setStroke(float stroke)
    {
        this.strokeWidth = stroke;
        invalidate();
    }

    private Bitmap updateSat(Bitmap src, float settingSat)
    {

        int w = src.getWidth();
        int h = src.getHeight();

        Bitmap bitmapResult =
                Bitmap.createBitmap(w, h, Bitmap.Config.ARGB_8888);
        Canvas canvasResult = new Canvas(bitmapResult);
        Paint paint = new Paint();
        ColorMatrix colorMatrix = new ColorMatrix();
        colorMatrix.setSaturation(settingSat);
        ColorMatrixColorFilter filter = new ColorMatrixColorFilter(colorMatrix);
        paint.setColorFilter(filter);
        canvasResult.drawBitmap(src, 0, 0, paint);

        return bitmapResult;
    }


  // use seekbar here, here you have to pass  "0 -- 2.0f"  here saturation  will change

    public void setSaturation(float sat)
    {
        System.out.println("qqqqqqqqqq            "+sat);
        bitmap3=updateSat(bitmap2, sat);

        invalidate();
    }


}


        // Seekbar to change radius

                  radius_seekbar.setOnSeekBarChangeListener(new SeekBar.OnSeekBarChangeListener() {
                        @Override
                        public void onProgressChanged(SeekBar seekBar, int progress, boolean fromUser)
                        {
                            text_radius.setText(""+progress);
                            circularImageView.setCornerRadius(progress);
                        }

                        @Override
                        public void onStartTrackingTouch(SeekBar seekBar) {

                        }

                        @Override
                        public void onStopTrackingTouch(SeekBar seekBar) {

                        }
                    });


     // Seekbar to change shadow

                    shadow_seekbar.setOnSeekBarChangeListener(new SeekBar.OnSeekBarChangeListener() {
                        @Override
                        public void onProgressChanged(SeekBar seekBar, int progress, boolean fromUser)
                        {
                            float f= 4+progress/10.0f;
                            text_shadow.setText(""+progress);
                            circularImageView.setShadow(f);
                        }

                        @Override
                        public void onStartTrackingTouch(SeekBar seekBar) {

                        }

                        @Override
                        public void onStopTrackingTouch(SeekBar seekBar) {

                        }
                    });


           // Seekbar to change saturation

                    saturation_seekbar.setOnSeekBarChangeListener(new SeekBar.OnSeekBarChangeListener() {
                        @Override
                        public void onProgressChanged(SeekBar seekBar, int progress, boolean fromUser)
                        {
                            int progressSat = saturation_seekbar.getProgress();
                            float sat = (float) ((progressSat*4 / 100.0f)-1.0f);
                            circularImageView.setSaturation(sat);

                            text_saturation.setText(""+progressSat);
                        }

                        @Override
                        public void onStartTrackingTouch(SeekBar seekBar) {

                        }

                        @Override
                        public void onStopTrackingTouch(SeekBar seekBar) {

                        }
                    });


    // Seekbar to change stroke

                    stroke_seekbar.setOnSeekBarChangeListener(new SeekBar.OnSeekBarChangeListener() {
                        @Override
                        public void onProgressChanged(SeekBar seekBar, int progress, boolean fromUser)
                        {
                            if (progress==0)
                            {
                                float f=(progress*10.0f/100.0f);
                                circularImageView.setStroke(f);
                            }
                            else
                            {
                                float f=(progress*10.0f/100.0f);
                                circularImageView.setStroke(f);
                            }

                            text_stroke.setText(""+progress);
                        }

                        @Override
                        public void onStartTrackingTouch(SeekBar seekBar) {

                        }

                        @Override
                        public void onStopTrackingTouch(SeekBar seekBar) {

                        }
                    });


             //radius seekbar in xml file

             <SeekBar
                android:layout_width="match_parent"
                android:layout_gravity="center"
                android:progress="50"
                android:max="250"
                android:id="@+id/radius_seekbar"
                android:layout_height="wrap_content" />


          //saturation seekbar in xml file

             <SeekBar
                android:layout_width="match_parent"
                android:layout_gravity="center"
                android:progress="50"
                android:max="100"
                android:id="@+id/saturation_seekbar"
                android:layout_height="wrap_content" />


    //shadow seekbar in xml file

             <SeekBar
                android:layout_width="match_parent"
                android:layout_gravity="center"
                android:progress="0"
                android:max="100"
                android:id="@+id/shadow_seekbar"
                android:layout_height="wrap_content" />


         //stroke seekbar in xml file

             <SeekBar
                android:layout_width="match_parent"
                android:layout_gravity="center"
                android:progress="0"
                android:max="100"
                android:id="@+id/stroke _seekbar"
                android:layout_height="wrap_content" />
Это относительно старый вопрос, но вы можете просто сделать рамку круга в папке с возможностью переноса (предположим, что файл xml будет вызываться circle_border)
<?xml version="1.0" encoding="utf-8"?>
<shape xmlns="http://schemas.android.com/apk/res/android"
    android:shape="oval">

    <solid android:color="@android:color/transparent" />

    <!-- If you want a padding -->
    <padding android:top="4dp" android:left="4dp" android:right="4dp" android:bottom="4dp" />

    <!-- If you want the circle border to have a color -->
    <strong android:width="1dp" android:color="#FFFFFF" />

</shape>
Затем вы можете использовать его в качестве фона для ImageView
<ImageView
    android:background="@drawable/circle_border"
    <!-- other attributes here -->
/>
if you want to set edit icon on to circle imageview than put this below code.

 <FrameLayout
                android:layout_width="@dimen/_100sdp"
                android:layout_height="@dimen/_100sdp"
                android:layout_gravity="center"
                android:layout_marginTop="10dp">

                <de.hdodenhof.circleimageview.CircleImageView
                    android:id="@+id/profilePic"
                    android:layout_width="@dimen/_100sdp"
                    android:layout_height="@dimen/_100sdp"
                    android:layout_gravity="bottom|center_horizontal"
                    android:src="@drawable/ic_upload" />

                <de.hdodenhof.circleimageview.CircleImageView
                    android:id="@+id/iv_camera"
                    android:layout_width="@dimen/_30sdp"
                    android:layout_height="@dimen/_30sdp"
                    android:layout_gravity="top|right"
                    android:src="@drawable/edit"/>
            </FrameLayout>
Другая идея - использовать clipToOutline собственность ImageView.
Вот пример макета:
<androidx.constraintlayout.widget.ConstraintLayout
    android:layout_width="match_parent"
    android:layout_height="match_parent">

    <!-- Simple view to draw borders for an image,
         borders will be rounded because of the oval-shaped background. -->
    <View
        android:id="@+id/v_border"
        android:layout_width="50dp"
        android:layout_height="50dp"
        android:background="@drawable/shape_border"
        app:layout_constraintStart_toStartOf="parent"
        app:layout_constraintTop_toTopOf="parent" />

    <!-- Image itself: fits the border view,
         a margin serves as a border width;
         the key point here - is a background shape which will clip the view to its forms. -->
    <ImageView
        android:id="@+id/iv_image"
        android:layout_width="0dp"
        android:layout_height="0dp"
        android:layout_margin="4dp"
        android:background="@drawable/shape_oval"
        android:src="@mipmap/ic_launcher"
        app:layout_constraintBottom_toBottomOf="@+id/v_border"
        app:layout_constraintEnd_toEndOf="@+id/v_border"
        app:layout_constraintStart_toStartOf="@+id/v_border"
        app:layout_constraintTop_toTopOf="@+id/v_border" />

</androidx.constraintlayout.widget.ConstraintLayout>
А вот и наши shape_border вытягиваемый:
<?xml version="1.0" encoding="utf-8"?>
<shape xmlns:android="http://schemas.android.com/apk/res/android" android:shape="oval">
    <solid android:color="#FF00FF" />
</shape>
А также shape_oval вытягиваемый:
<?xml version="1.0" encoding="utf-8"?>
<shape xmlns:android="http://schemas.android.com/apk/res/android" android:shape="oval" />
Единственное, что вам нужно сделать в коде - это включить clipToOutline свойство:
binding.ivImage.clipToOutline = true
И, конечно, вы можете избежать даже этой строки кода с помощью некоторого BindingAdapter.
Если вы предпочитаете вырезать изображение для отображения по кругу, вот и все
public static Bitmap getCircularBitmap(Bitmap bitmap) {
        Bitmap output;

        if (bitmap.getWidth() > bitmap.getHeight()) {
            output = Bitmap.createBitmap(bitmap.getHeight(), bitmap.getHeight(), Bitmap.Config.ARGB_8888);
        } else {
            output = Bitmap.createBitmap(bitmap.getWidth(), bitmap.getWidth(), Bitmap.Config.ARGB_8888);
        }

        Canvas canvas = new Canvas(output);

        final int color = 0xff424242;
        final Paint paint = new Paint();
        final Rect rect = new Rect(0, 0, bitmap.getWidth(), bitmap.getHeight());

        float r = 0;

        if (bitmap.getWidth() > bitmap.getHeight()) {
            r = bitmap.getHeight() / 2;
        } else {
            r = bitmap.getWidth() / 2;
        }

        paint.setAntiAlias(true);
        canvas.drawARGB(0, 0, 0, 0);
        paint.setColor(color);
        canvas.drawCircle(r, r, r, paint);
        paint.setXfermode(new PorterDuffXfermode(PorterDuff.Mode.SRC_IN));
        canvas.drawBitmap(bitmap, rect, rect, paint);
        return output;
    }
Просто используйте этот простой код: сначала добавьте зависимость:
implementation 'de.hdodenhof:circleimageview:2.2.0'
затем добавьте в макет XML следующий код:-
<de.hdodenhof.circleimageview.CircleImageView xmlns:app="http://schemas.android.com/apk/res-auto"
                                        android:id="@+id/Imgshaligram"
                                        android:layout_width="96dp"
                                        android:layout_height="96dp"
                                        android:src="@drawable/shaligram"
                                        app:civ_border_color="#d1b1b1"

                                        android:foregroundGravity="center"/>