Вставка изображения в ggplot2
Можно ли вставить растровое или PDF-изображение под geom_line() на ggplot2 сюжет?
Я хотел, чтобы у меня была возможность быстро выводить данные на ранее рассчитанный график, на создание которого уходит много времени, поскольку он использует большой объем данных.
Я прочитал этот пример. Тем не менее, поскольку ему больше года, я подумал, что сейчас может быть другой способ сделать это.
4 ответа
Пытаться ?annotation_custom в ggplot2
пример,
library(png)
library(grid)
img <- readPNG(system.file("img", "Rlogo.png", package="png"))
g <- rasterGrob(img, interpolate=TRUE)

qplot(1:10, 1:10, geom="blank") +
  annotation_custom(g, xmin=-Inf, xmax=Inf, ymin=-Inf, ymax=Inf) +
  geom_point()
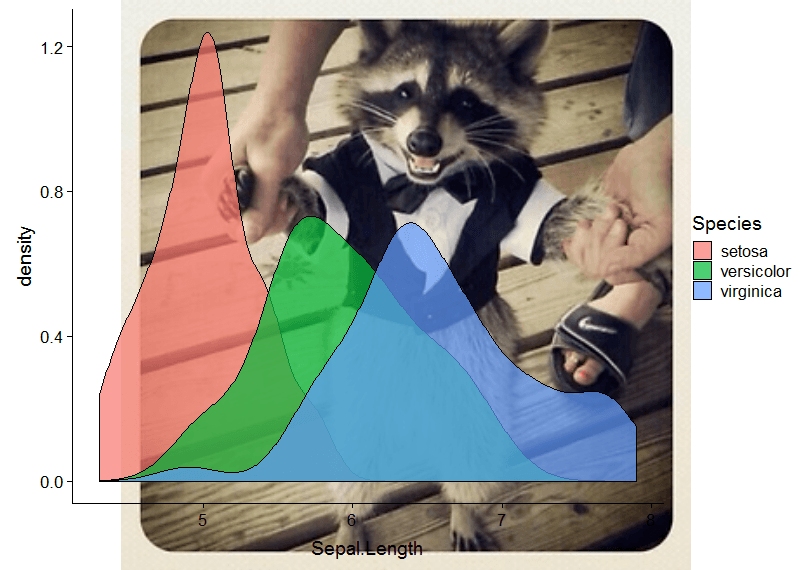
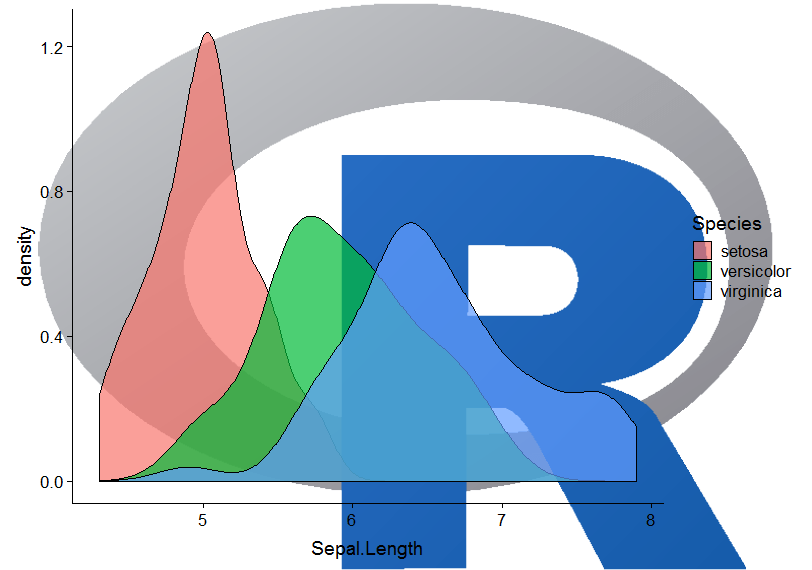
Можно также использовать cowplot R пакет (cowplot является мощным продолжением ggplot2). Также понадобится magick пакет. Проверьте это введение к виньетке коровьего сюжета.
Вот пример для фоновых изображений в формате PNG и PDF.
library(cowplot)
library(magick)

my_plot <-
  ggplot(data    = iris,
         mapping = aes(x    = Sepal.Length,
                       fill = Species)) +
  geom_density(alpha = 0.7)

# Example with PNG (for fun, the OP's avatar - I love the raccoon)
ggdraw() +
  draw_image("https://stackru.com/images/5a675c9e763ace9b7763450ba94e6241e04dcd0b.jpg?s=328&g=1") +
  draw_plot(my_plot)
# Example with PDF
ggdraw() +
  draw_image(file.path(R.home(), "doc", "html", "Rlogo.pdf")) +
  draw_plot(my_plot)
Просто добавив обновление из потрясающего пакета Magick:
library(ggplot2)
library(magick)
library(here) # For making the script run without a wd
library(magrittr) # For piping the logo

# Make a simple plot and save it
ggplot(mpg, aes(displ, hwy, colour = class)) +
  geom_point() +
  ggtitle("Cars") +
  ggsave(filename = paste0(here("/"), last_plot()$labels$title, ".png"),
         width = 5, height = 4, dpi = 300)

# Call back the plot
plot <- image_read(paste0(here("/"), "Cars.png"))
# And bring in a logo
logo_raw <- image_read("http://hexb.in/hexagons/ggplot2.png")

# Scale down the logo and give it a border and annotation
# This is the cool part because you can do a lot to the image/logo before adding it
logo <- logo_raw %>%
  image_scale("100") %>%
  image_background("grey", flatten = TRUE) %>%
  image_border("grey", "600x10") %>%
  image_annotate("Powered By R", color = "white", size = 30,
                 location = "+10+50", gravity = "northeast")

# Stack them on top of each other
final_plot <- image_append(image_scale(c(plot, logo), "500"), stack = TRUE)
# And overwrite the plot without a logo
image_write(final_plot, paste0(here("/"), last_plot()$labels$title, ".png"))

Следуя ответу @baptiste, вам не нужно загружать пакет grob и преобразовывать изображение, если вы используете более конкретную функцию аннотации
annotation_raster().
Этот более быстрый вариант может выглядеть так:
      # read picture
library(png)
img <- readPNG(system.file("img", "Rlogo.png", package = "png"))
# plot with picture as layer
library(ggplot2)
ggplot(mapping = aes(1:10, 1:10)) +
  annotation_raster(img, xmin = -Inf, xmax = Inf, ymin = -Inf, ymax = Inf) +
  geom_point()

Создано 16.02.2021 пакетом REPEX (v1.0.0)