Можно ли реализовать панель навигации с помощью пакета GoRouter?
Я пытаюсь реализовать NavigationBar, используя новый Material You API.
https://api.flutter.dev/flutter/material/NavigationBar-class.html
Мне просто было любопытно узнать, можем ли мы реализовать то же самое с помощью пакета Go_Router.
3 ответа
Да, это возможно.
Давайте воспользуемся примером из документации GoRouter в качестве отправной точки.
- Нам нужно создать несколько базовых моделей для хранения данных:
      /// Just a generic model that will be used to present some data on the screen.
class Person {
  final String id;
  final String name;

  Person({required this.id, required this.name});
}

/// Family will be the model that represents our tabs. We use the properties `icon` and `name` in the `NavigationBar`.
class Family {
  final String id;
  final String name;
  final List<Person> people;
  final Icon icon;

  Family({
    required this.id,
    required this.name,
    required this.people,
    required this.icon,
  });
}

/// Families will be used to store the tabs to be easily accessed anywhere. In a real application you would use something fancier.
class Families {
  static const List<Icon> icons = [
    Icon(Icons.looks_one),
    Icon(Icons.looks_two),
    Icon(Icons.looks_3)
  ];

  static final List<Family> data = List.generate(
    3,
    (fid) => Family(
      id: '$fid',
      name: 'Family $fid',
      people: List.generate(
        10,
        (id) => Person(id: '$id', name: 'Family $fid Person $id'),
      ),
      icon: icons[fid],
    ),
  );
}
- Теперь мы создадим основные представления, которые будут отображать данные модели:
      /// Used to present Person's data.
class PersonView extends StatelessWidget {
  const PersonView({required this.person, Key? key}) : super(key: key);
  final Person person;

  @override
  Widget build(BuildContext context) {
    return Scaffold(
      appBar: AppBar(),
      body: Center(
        child: Text(person.name),
      ),
    );
  }
}

/// This is the view that will be used by each application's tab.
class FamilyView extends StatefulWidget {
  const FamilyView({required this.family, Key? key}) : super(key: key);
  final Family family;

  @override
  State<FamilyView> createState() => _FamilyViewState();
}


class _FamilyViewState extends State<FamilyView>
    with AutomaticKeepAliveClientMixin {
  @override
  bool get wantKeepAlive => true;

  @override
  Widget build(BuildContext context) {
    super.build(context);
    return ListView(
      children: [
        for (final p in widget.family.people)
          ListTile(
            title: Text(p.name),
            onTap: () =>
                context.go('/family/${widget.family.id}/person/${p.id}'),
          ),
      ],
    );
  }
}
- До сих пор мы ничего не делали по сравнению с документацией, поэтому давайте, наконец, создадим виджет, который будет отображать:
      class FamilyTabsScreen extends StatefulWidget {
  final int index;
  FamilyTabsScreen({required Family currentFamily, Key? key})
      : index = Families.data.indexWhere((f) => f.id == currentFamily.id),
        super(key: key) {
    assert(index != -1);
  }

  @override
  _FamilyTabsScreenState createState() => _FamilyTabsScreenState();
}

class _FamilyTabsScreenState extends State<FamilyTabsScreen>
    with TickerProviderStateMixin {
  @override
  Widget build(BuildContext context) => Scaffold(
        appBar: AppBar(
          title: Text(_title(context)),
        ),
        body: FamilyView(family: Families.data[widget.index]),
        bottomNavigationBar: NavigationBar(
          destinations: [
            for (final f in Families.data)
              NavigationDestination(
                icon: f.icon,
                label: f.name,
              )
          ],
          onDestinationSelected: (index) => _tap(context, index),
          selectedIndex: widget.index,
        ),
      );

  void _tap(BuildContext context, int index) =>
      context.go('/family/${Families.data[index].id}');

  String _title(BuildContext context) =>
      (context as Element).findAncestorWidgetOfExactType<MaterialApp>()!.title;
}
Это важная часть приведенного выше кода:
      /// [...] suppressed code
bottomNavigationBar: NavigationBar(
  destinations: [
    for (final f in Families.data)
      NavigationDestination(
        icon: f.icon,
        label: f.name,
      )
  ],
  onDestinationSelected: (index) => _tap(context, index),
  selectedIndex: widget.index,
),
/// [...] suppressed code
Итак, в основном мы используем
NavigationBarпочти так же, как мы использовали бы
TabBarView.
- Наконец, это будет работать только в том случае, если мы определим маршруты приложения и установим
GoRouterкак навигатор приложения:
void main() {
  GoRouter.setUrlPathStrategy(UrlPathStrategy.path);
  runApp(const MyApp());
}

final _router = GoRouter(
  routes: [
    GoRoute(
      path: '/',
      redirect: (_) => '/family/${Families.data[0].id}',
    ),
    GoRoute(
        path: '/family/:fid',
        builder: (context, state) {
          final fid = state.params['fid']!;
          final family = Families.data.firstWhere((f) => f.id == fid,
              orElse: () => throw Exception('family not found: $fid'));

          return FamilyTabsScreen(key: state.pageKey, currentFamily: family);
        },
        routes: [
          GoRoute(
            path: 'person/:id',
            builder: (context, state) {
              final fid = state.params['fid']!;
              final id = state.params['id'];

              final person = Families.data
                  .firstWhere((f) => f.id == fid,
                      orElse: () => throw Exception('family not found: $fid'))
                  .people
                  .firstWhere(
                    ((p) => p.id == id),
                    orElse: () => throw Exception('person not found: $id'),
                  );

              return PersonView(key: state.pageKey, person: person);
            },
          ),
        ]),
  ],
);

class MyApp extends StatelessWidget {
  const MyApp({Key? key}) : super(key: key);

  @override
  Widget build(BuildContext context) {
    return MaterialApp.router(
      title: 'Flutter Demo',
      routeInformationParser: _router.routeInformationParser,
      routerDelegate: _router.routerDelegate,
      theme: ThemeData(
        primarySwatch: Colors.blue,
      ),
    );
  }
}
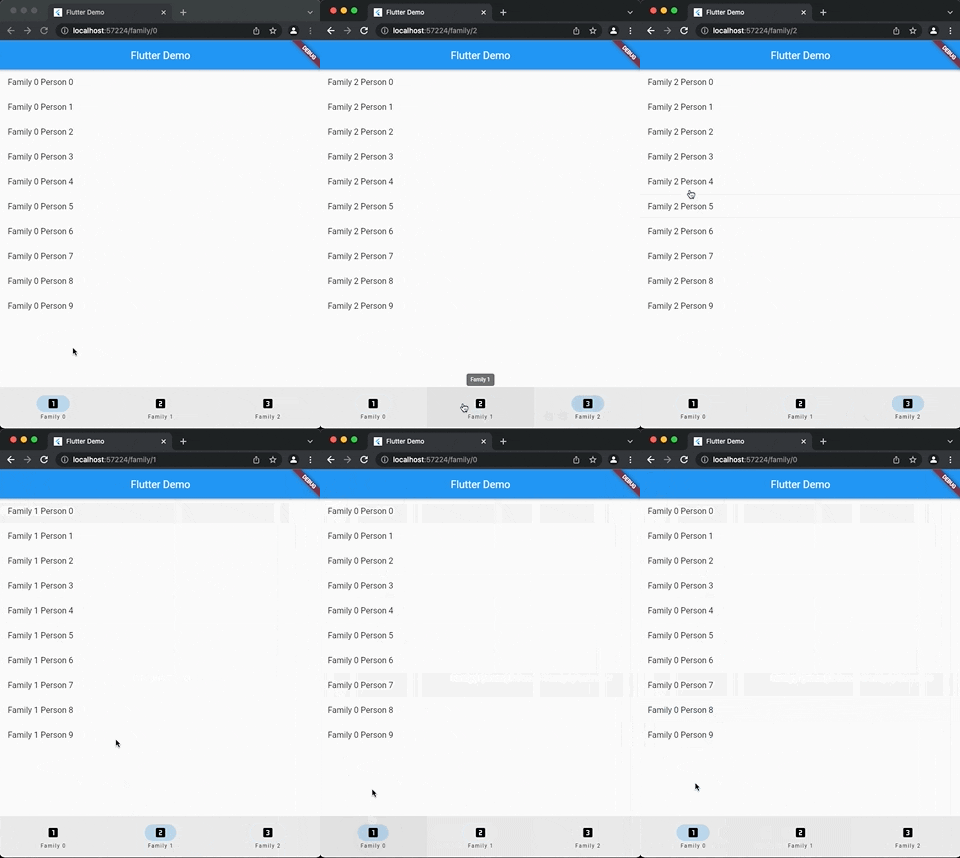
Со всеми этими шагами у вас будет это:
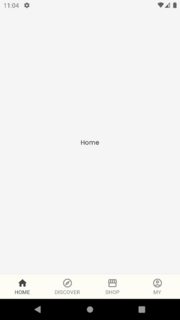
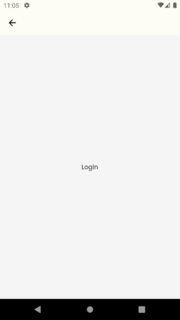
Для тех, кто ищет постоянный BottomNavBar на всех страницах, это активно обсуждается на Github,
Теперь вы можете использоватьShellRouterсGoRouterсоздаватьNavigation Bar
Объяснение:
О чем следует помнить при использовании отShellRouteк
- Указать
parentNavigatorKeyопора в каждомGoRoute - Использовать
context.go()заменить страницу ,context.push()поместить страницу в стек
Структура кода:
final _parentKey = GlobalKey<NavigatorState>();
final _shellKey = GlobalKey<NavigatorState>();

|_ GoRoute
  |_ parentNavigatorKey = _parentKey    Specify key here
|_ ShellRoute
  |_ GoRoute                            // Needs Bottom Navigation
    |_ parentNavigatorKey = _shellKey
  |_ GoRoute                            // Needs Bottom Navigation
    |_ parentNavigatorKey = _shellKey
|_ GoRoute                              // Full Screen which doesn't need Bottom Navigation
  |_parentNavigatorKey = _parentKey
Код имеет следующие особенности:
- Активный значок
navbar - Сохраняется
navBarфокус элемента при переходе на новую страницу -
back buttonна переведенной странице
Код:
Маршрутизатор
final _rootNavigatorKey = GlobalKey<NavigatorState>();
final _shellNavigatorKey = GlobalKey<NavigatorState>();

final router = GoRouter(
  initialLocation: '/',
  navigatorKey: _rootNavigatorKey,
  routes: [
    ShellRoute(
      navigatorKey: _shellNavigatorKey,
      pageBuilder: (context, state, child) {
        print(state.location);
        return NoTransitionPage(
            child: ScaffoldWithNavBar(
          location: state.location,
          child: child,
        ));
      },
      routes: [
        GoRoute(
          path: '/',
          parentNavigatorKey: _shellNavigatorKey,
          pageBuilder: (context, state) {
            return const NoTransitionPage(
              child: Scaffold(
                body: Center(child: Text("Home")),
              ),
            );
          },
        ),
        GoRoute(
          path: '/discover',
          parentNavigatorKey: _shellNavigatorKey,
          pageBuilder: (context, state) {
            return const NoTransitionPage(
              child: Scaffold(
                body: Center(child: Text("Discover")),
              ),
            );
          },
        ),
        GoRoute(
            parentNavigatorKey: _shellNavigatorKey,
            path: '/shop',
            pageBuilder: (context, state) {
              return const NoTransitionPage(
                child: Scaffold(
                  body: Center(child: Text("Shop")),
                ),
              );
            }),
      ],
    ),
    GoRoute(
      parentNavigatorKey: _rootNavigatorKey,
      path: '/login',
      pageBuilder: (context, state) {
        return NoTransitionPage(
          key: UniqueKey(),
          child: Scaffold(
            appBar: AppBar(),
            body: const Center(
              child: Text("Login"),
            ),
          ),
        );
      },
    ),
  ],
);
НижняяНавигацияБар
      class ScaffoldWithNavBar extends StatefulWidget {
  String location;
  ScaffoldWithNavBar({super.key, required this.child, required this.location});

  final Widget child;

  @override
  State<ScaffoldWithNavBar> createState() => _ScaffoldWithNavBarState();
}

class _ScaffoldWithNavBarState extends State<ScaffoldWithNavBar> {
  int _currentIndex = 0;

  static const List<MyCustomBottomNavBarItem> tabs = [
    MyCustomBottomNavBarItem(
      icon: Icon(Icons.home),
      activeIcon: Icon(Icons.home),
      label: 'HOME',
      initialLocation: '/',
    ),
    MyCustomBottomNavBarItem(
      icon: Icon(Icons.explore_outlined),
      activeIcon: Icon(Icons.explore),
      label: 'DISCOVER',
      initialLocation: '/discover',
    ),
    MyCustomBottomNavBarItem(
      icon: Icon(Icons.storefront_outlined),
      activeIcon: Icon(Icons.storefront),
      label: 'SHOP',
      initialLocation: '/shop',
    ),
    MyCustomBottomNavBarItem(
      icon: Icon(Icons.account_circle_outlined),
      activeIcon: Icon(Icons.account_circle),
      label: 'MY',
      initialLocation: '/login',
    ),
  ];

  @override
  Widget build(BuildContext context) {
    const labelStyle = TextStyle(fontFamily: 'Roboto');
    return Scaffold(
      body: SafeArea(child: widget.child),
      bottomNavigationBar: BottomNavigationBar(
        selectedLabelStyle: labelStyle,
        unselectedLabelStyle: labelStyle,
        selectedItemColor: const Color(0xFF434343),
        selectedFontSize: 12,
        unselectedItemColor: const Color(0xFF838383),
        showUnselectedLabels: true,
        type: BottomNavigationBarType.fixed,
        onTap: (int index) {
          _goOtherTab(context, index);
        },
        currentIndex: widget.location == '/'
            ? 0
            : widget.location == '/discover'
                ? 1
                : widget.location == '/shop'
                    ? 2
                    : 3,
        items: tabs,
      ),
    );
  }

  void _goOtherTab(BuildContext context, int index) {
    if (index == _currentIndex) return;
    GoRouter router = GoRouter.of(context);
    String location = tabs[index].initialLocation;

    setState(() {
      _currentIndex = index;
    });
    if (index == 3) {
      context.push('/login');
    } else {
      router.go(location);
    }
  }
}

class MyCustomBottomNavBarItem extends BottomNavigationBarItem {
  final String initialLocation;

  const MyCustomBottomNavBarItem(
      {required this.initialLocation,
      required Widget icon,
      String? label,
      Widget? activeIcon})
      : super(icon: icon, label: label, activeIcon: activeIcon ?? icon);
}


