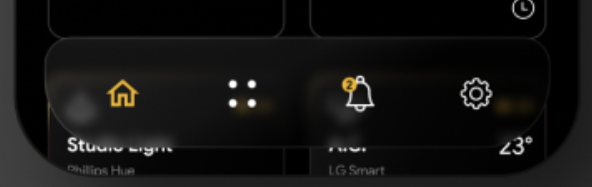
Можно ли придать эффект градиентного размытия в пользовательской краске во Flutter, как показано на рисунке ниже?
Я кодирую приведенный ниже вывод и получаю дизайн, который хочу, но не могу получить эффект размытия внутри холста.
Это вывод, который я пытаюсь построить,
Это то, что я пробовал, 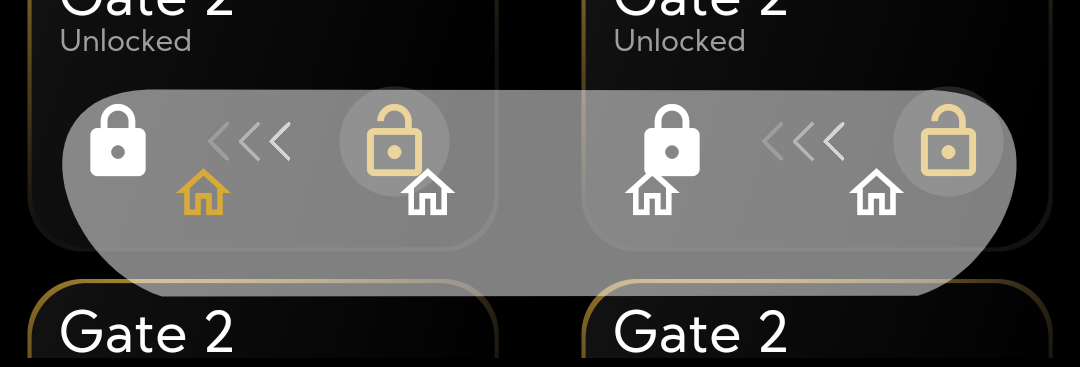
Вот Кодекс,
      class MyCustomPainter extends CustomPainter {

@override


 void paint(Canvas canvas, Size size) {
    Paint paint0 = Paint()
      ..color = const Color.fromARGB(128,255,255,255)
    ..style = PaintingStyle.fill
    ..strokeWidth = 2.0;

Path path0 = Path();
path0.moveTo(size.width * 0.1500300, size.height * 0.1238500);
path0.cubicTo(
    size.width * 0.0037200,
    size.height * 0.1023500,
    size.width * 0.0522600,
    size.height * 0.7552500,
    size.width * 0.1500500,
    size.height * 0.8761750);
path0.cubicTo(
    size.width * 0.2767600,
    size.height * 0.8761750,
    size.width * 0.7234100,
    size.height * 0.8735500,
    size.width * 0.8501100,
    size.height * 0.8735500);
path0.cubicTo(
    size.width * 0.9464300,
    size.height * 0.7575750,
    size.width * 0.9946900,
    size.height * 0.0944750,
    size.width * 0.8496900,
    size.height * 0.1268750);
path0.cubicTo(
    size.width * 0.7230200,
    size.height * 0.1268750,
    size.width * 0.5303400,
    size.height * 0.1263500,
    size.width * 0.1500300,
    size.height * 0.1238500);
path0.close();
canvas.drawPath(path0, paint0);


}

  @override
  bool shouldRepaint(covariant CustomPainter oldDelegate) {
    return true;
  }
}
Заранее спасибо!
5 ответов
Вам не нужно утруждать себяCustomPainterвсе можно сделать сContainerиBackdropFilterвиджеты.
Пример кода
      class BlurredBottomBar extends StatelessWidget {
  const BlurredBottomBar({
    super.key,
    required this.items,
    required this.currentIndex,
    required this.onItemTapped,
  });

  final int currentIndex;
  final void Function(int index) onItemTapped;
  final List<IconData> items;

  @override
  Widget build(BuildContext context) {
    final theme = Theme.of(context);
    final bottomNavigationBarTheme = theme.bottomNavigationBarTheme;

    return Container(
      margin: const EdgeInsets.all(12),
      padding: const EdgeInsets.all(12),
      clipBehavior: Clip.antiAlias,
      decoration: BoxDecoration(
        border: Border.all(
          color: Colors.white,
          strokeAlign: BorderSide.strokeAlignOutside,
        ),
        borderRadius: const BorderRadius.vertical(
          top: Radius.circular(9),
          bottom: Radius.circular(36),
        ),
      ),
      child: BackdropFilter(
        filter: ImageFilter.blur(sigmaX: 2, sigmaY: 2),
        child: Row(
          mainAxisAlignment: MainAxisAlignment.spaceBetween,
          children: [
            for (int i = 0; i < items.length; i++)
              IconButton(
                onPressed: () => onItemTapped(i),
                icon: Icon(
                  items[i],
                  color: i == currentIndex
                      ? bottomNavigationBarTheme.selectedItemColor
                      : bottomNavigationBarTheme.unselectedItemColor,
                ),
              ),
          ],
        ),
      ),
    );
  }
}
Применение
      Scaffold(
  extendBody: true,
  bottomNavigationBar: BlurredBottomBar(
    currentIndex: 0,
    items: const [
      Icons.home,
      Icons.grid_view,
      Icons.notifications_outlined,
      Icons.settings_outlined,
    ],
    onItemTapped: (index) {
      // ...
    },
  ),
  body: ...,
);
Скриншот
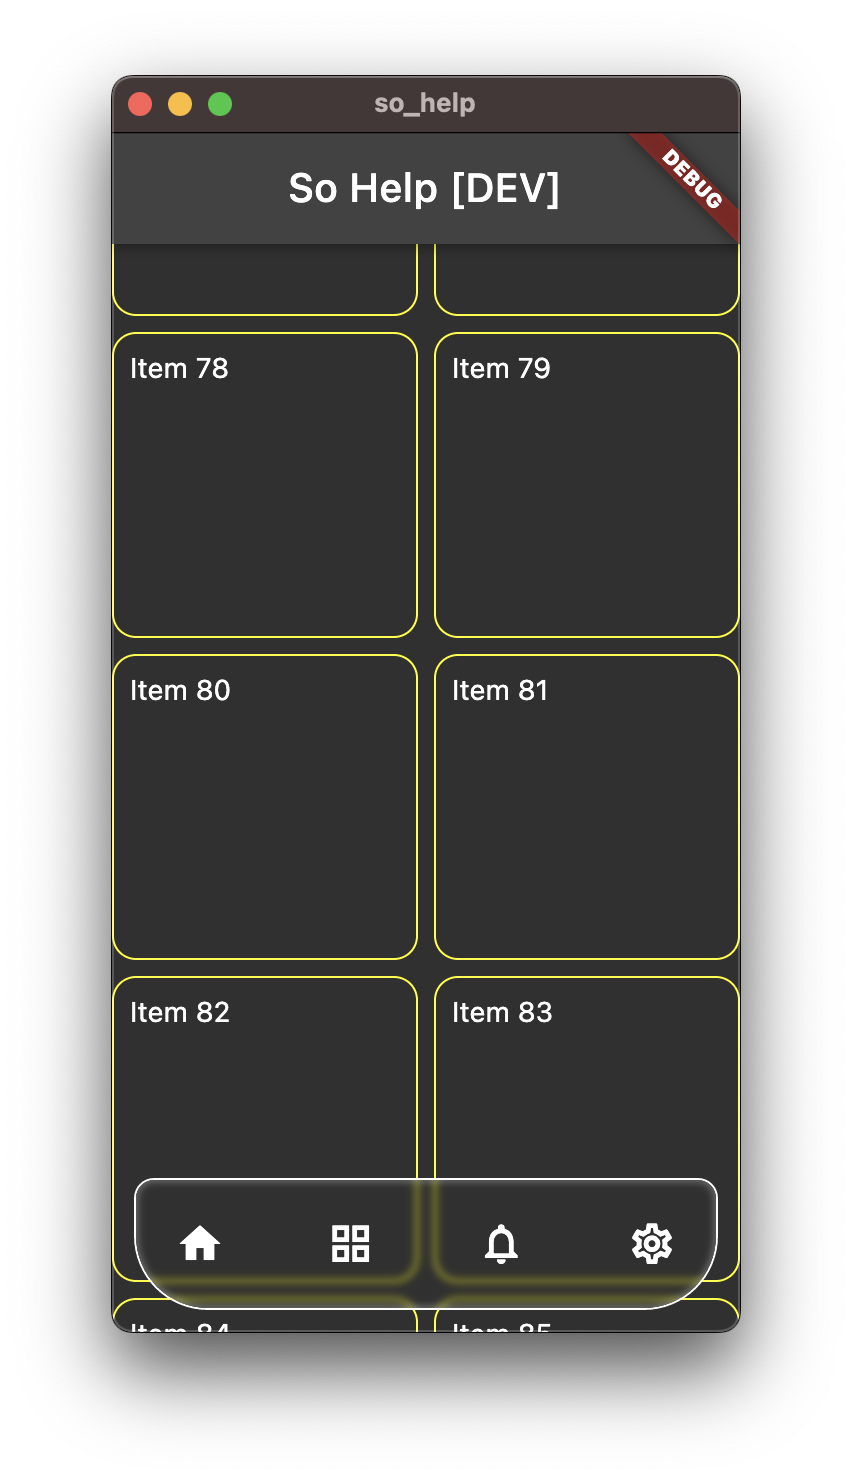
Мне удалось получить очень близкий результат, который вам нужен. Особенно эффект размытия. Используемые ключевые элементы — ClipRRect, ClipPath, BackdropFilter . Я использовал и другие элементы, но решать вам. Идея состоит в том, чтобы обрезать прямоугольник по диагонали, чтобы одна сторона была размыта, а другая прозрачна. Также обрезка ограничивает эффект фонового фильтра за пределами прямоугольника, в противном случае возникает эффект размытия на всем экране. Если вы немного поиграете с различными значениями цвета и непрозрачностью, то сможете получить точный результат. Вы также можете посмотреть результаты по этой ссылке на Dartpad.
main.dart file.
      import 'dart:ui';

import 'package:flutter/material.dart';

void main() {
  runApp(const MyApp());
}

class MyApp extends StatelessWidget {
  const MyApp({super.key});

  // This widget is the root of your application.
  @override
  Widget build(BuildContext context) {
    return MaterialApp(
      title: 'Flutter Demo',
      theme: ThemeData(
        colorScheme: ColorScheme.fromSeed(seedColor: Colors.deepPurple),
        useMaterial3: false,
      ),
      home: const MyHomePage(),
    );
  }
}

class MyHomePage extends StatelessWidget {
  const MyHomePage({super.key});

  Widget drawRowItem(BuildContext context) {
    return Expanded(
      child: Container(
        margin: const EdgeInsets.symmetric(vertical: 12),
        decoration: BoxDecoration(
            borderRadius: const BorderRadius.all(Radius.circular(16)),
            border: Border.all(
                width: 2, color: const Color.fromARGB(255, 40, 40, 40))),
        height: 200,
        child: const Padding(
          padding: EdgeInsets.all(16.0),
          child: Column(
            crossAxisAlignment: CrossAxisAlignment.start,
            children: [
              Icon(
                Icons.home_filled,
                color: Colors.white,
              ),
              SizedBox(height: 8),
              Text(
                "Samle Item",
                style: TextStyle(
                  color: Colors.white,
                ),
              ),
            ],
          ),
        ),
      ),
    );
  }

  Widget drawRowItems(BuildContext context) {
    return Container(
      height: MediaQuery.of(context).size.width / 2 - 56,
      width: MediaQuery.of(context).size.width / 2 - 56,
      margin: const EdgeInsets.symmetric(horizontal: 22),
      child: Row(
        mainAxisSize: MainAxisSize.max,
        mainAxisAlignment: MainAxisAlignment.spaceEvenly,
        children: [
          drawRowItem(context),
          const SizedBox(
            width: 16,
          ),
          drawRowItem(context)
        ],
      ),
    );
  }

  @override
  Widget build(BuildContext context) {
    List<int> items = List.filled(40, 0);
    return Scaffold(
      backgroundColor: Colors.black,
      body: Stack(
        fit: StackFit.expand,
        children: [
          ListView(
            children: items.map((e) {
              return drawRowItems(context);
            }).toList(),
          ),
          Positioned(
            bottom: 18,
            left: 18,
            right: 18,
            height: 86,
            child: Container(
              decoration: BoxDecoration(
                  border: Border.all(
                      width: 2, color: const Color.fromARGB(255, 40, 40, 40)),
                  borderRadius: const BorderRadius.only(
                      topRight: Radius.circular(24),
                      topLeft: Radius.circular(24),
                      bottomLeft: Radius.circular(52),
                      bottomRight: Radius.circular(52)),
                 color: const Color.fromARGB(100, 40, 40, 40)
              ),
              child: ClipRRect(
                borderRadius: const BorderRadius.only(
                    topRight: Radius.circular(24),
                    topLeft: Radius.circular(24),
                    bottomLeft: Radius.circular(52),
                    bottomRight: Radius.circular(52)),
                child: ClipPath(
                  clipper: MyCustomClipper(),
                  child: BackdropFilter(
                    filter: ImageFilter.blur(sigmaY: 5, sigmaX: 5),
                    child: Container(),
                  ),
                ),
              ),
            ),
          ),
          const Positioned(
            bottom: 18,
            left: 22,
            right: 22,
            height: 86,
            child: Row(
              mainAxisSize: MainAxisSize.max,
              mainAxisAlignment: MainAxisAlignment.spaceEvenly,
              crossAxisAlignment: CrossAxisAlignment.stretch,
              children: [
                Icon(
                  Icons.home_outlined,
                  color: Colors.amber,
                ),
                Icon(
                  Icons.apps,
                  color: Colors.white,
                ),
                Icon(
                  Icons.notifications_outlined,
                  color: Colors.white,
                ),
                Icon(
                  Icons.settings_outlined,
                  color: Colors.white,
                ),
              ],
            ),
          ),
        ],
      ),
    );
  }
}

class MyCustomClipper extends CustomClipper<Path> {
  @override
  Path getClip(Size size) {
    Path path = Path();
    path.moveTo(0, 0);
    path.lineTo(size.width, 0);
    path.lineTo(64,size.height);
    path.lineTo(0,size.height);
    path.lineTo(0,0);
    path.close();
    return path;
  }

  @override
  bool shouldReclip(covariant CustomClipper<Path> oldClipper) {
    return true;
  }
}
Сначала вам придется пройтиextendBodyкакtrueв Scaffold, чтобы тело выходило за нижнюю панель навигации, затем добавьте нижнюю панель навигации с помощью BackDropFilter, вот так:
      bottomNavigationBar: Container(
        margin: const EdgeInsets.all(12.0),
        child: ClipRRect(
          borderRadius: const BorderRadius.only(
            topLeft: Radius.circular(12.0),
            topRight: Radius.circular(12.0),
            bottomLeft: Radius.circular(36.0),
            bottomRight: Radius.circular(36.0),
          ),
          child: BackdropFilter(
            filter: ImageFilter.blur(
              sigmaX: 2.0,
              sigmaY: 2.0,
            ),
            child: Container(
              decoration: BoxDecoration(color: Colors.orange.withOpacity(0.4)),
              child: BottomNavigationBar(
                elevation: 0,
                type: BottomNavigationBarType.fixed,
                unselectedItemColor: Colors.blue,
                backgroundColor: Colors.transparent,
                onTap: (int index) {
                  setState(() {
                    selectedIndex = index;
                  });
                },
                currentIndex: selectedIndex,
                items: const <BottomNavigationBarItem>[
                  BottomNavigationBarItem(
                      icon: Icon(Icons.home), label: "Home"),
                  BottomNavigationBarItem(
                      icon: Icon(Icons.person), label: "Profile"),
                ],
              ),
            ),
          ),
        ),
      ),
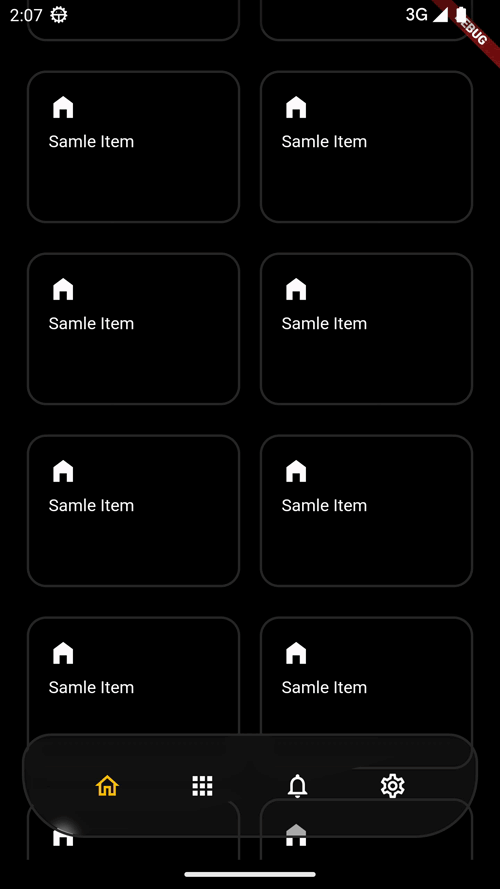
Здесь я попытался создать пользовательский интерфейс, общий для вопроса, я добавил 2BottomNavigationBarItemвнутриBackDropFilterчтобы размыть фон нижней панели навигации. вот полный код для справки.
Я не знаю, есть ли у вас строгое требование использовать нестандартную краску, но вы можете добиться этого эффекта, используя
BackdropFilterи используя
ImageFilter.blurкак значение вашего фильтра.
Использовать
BackdropFilter. Демонстрационное использование:
                  BackdropFilter(
                filter: ImageFilter.blur(sigmaX: 3.0, sigmaY: 3.0),
                child: Container(
                  width: 334.66,
                  height: 212.66,
                  color: Colors.black.withOpacity(0.2),
                  child: Center(
                    child: Text(
                      'Demo Text',
                  ),
                ),
              ),