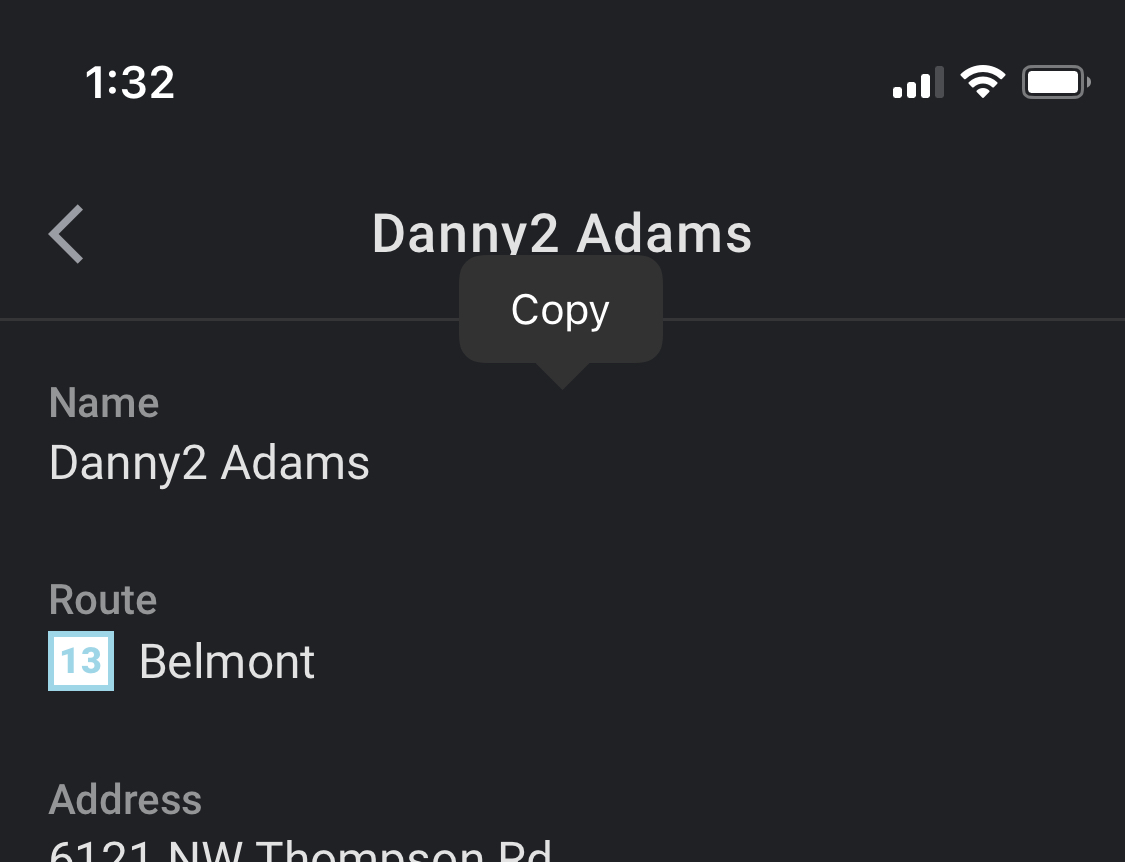
UIViewControllerRepresentable неправильно занимает место
Я пытаюсь использовать обычай в представлении SwiftUI. Я создал класс, который создает в
makeUIViewControllerметод. Это создает и отображает кнопку, однако не занимает места.
Я пробовал использовать
UIImagePickerControllerвместо моего настраиваемого контроллера, и это правильно. Единственный способ заставить мой контроллер занимать место - это установить фиксированную рамку на
UIViewControllerRepresentable в моем представлении SwiftUI, чего я совершенно не хочу делать.
Примечание: мне нужно использовать
UIViewController потому что я пытаюсь реализовать
UIMenuControllerв SwiftUI. У меня все это работает, кроме этой проблемы, с которой я столкнулся с неправильным размером.
Вот мой код:
      struct ViewControllerRepresentable: UIViewControllerRepresentable {
    func makeUIViewController(context: Context) -> MenuViewController {
        let controller = MenuViewController()
        return controller
    }

    func updateUIViewController(_ uiViewController: MenuViewController, context: Context) {

    }
}

class MenuViewController: UIViewController {
    override func viewDidLoad() {
        let button = UIButton()
        button.setTitle("Test button", for: .normal)
        button.setTitleColor(.red, for: .normal)

        self.view.addSubview(button)
        button.translatesAutoresizingMaskIntoConstraints = false
        button.leadingAnchor.constraint(equalTo: self.view.leadingAnchor).isActive = true
        button.trailingAnchor.constraint(equalTo: self.view.trailingAnchor).isActive = true
        button.topAnchor.constraint(equalTo: self.view.topAnchor).isActive = true
        button.bottomAnchor.constraint(equalTo: self.view.bottomAnchor).isActive = true
    }
}
Мое представление SwiftUI:
      struct ClientView: View {
    var body: some View {
        VStack(spacing: 0) {
            EntityViewItem(copyValue: "copy value", label: {
                Text("Name")
            }, content: {
                Text("Random name")
            })
            .border(Color.green)

            ViewControllerRepresentable()
                .border(Color.red)

            EntityViewItem(copyValue: "copy value", label: {
                Text("Route")
            }, content: {
                HStack(alignment: .center) {
                    Text("Random route name")
                }
            })
            .border(Color.blue)
        }
    }
}
Скриншот:
У меня нет большого опыта работы с UIKit - мой единственный опыт - это написание представлений UIKit для использования в SwiftUI. Проблема может быть связана с отсутствием у меня знаний о UIKit.
Заранее спасибо!
Редактировать:
Вот код для
EntityViewItem. Я также предоставлю представление контейнера, которое находится в -
EntityView.
Я также очистил остальную часть кода и заменил ссылки на
Entity с жестко запрограммированными значениями.
      struct EntityViewItem<Label: View, Content: View>: View {
    var copyValue: String
    var label: Label
    var content: Content
    var action: (() -> Void)?

    init(copyValue: String, @ViewBuilder label: () -> Label, @ViewBuilder content: () -> Content, action: (() -> Void)? = nil) {
        self.copyValue = copyValue
        self.label = label()
        self.content = content()
        self.action = action
    }

    var body: some View {
        VStack(alignment: .leading, spacing: 2) {
            label
                .opacity(0.6)
            content
                .onTapGesture {
                    guard let unwrappedAction = action else {
                        return
                    }
                    unwrappedAction()
                }
                .contextMenu {
                    Button(action: {
                        UIPasteboard.general.string = copyValue
                    }) {
                        Text("Copy to clipboard")
                        Image(systemName: "doc.on.doc")
                    }
                }
        }
        .padding([.top, .leading, .trailing])
        .frame(maxWidth: .infinity, alignment: .leading)
    }
}
Контейнер
ClientView:
      struct EntityView: View {
    let headerHeight: CGFloat = 56

    var body: some View {
        ZStack {
            ScrollView(showsIndicators: false) {
                VStack(spacing: 0) {
                    Color.clear.frame(
                        height: headerHeight
                    )
                    ClientView()
                }
            }
            VStack(spacing: 0) {
                HStack {
                    Button(action: {
                    }, label: {
                        Text("Back")
                    })
                    Spacer()
                    Text("An entity name")
                        .lineLimit(1)
                        .minimumScaleFactor(0.5)

                    Spacer()
                    Color.clear
                        .frame(width: 24, height: 0)
                }
                .frame(height: headerHeight)
                .padding(.leading)
                .padding(.trailing)
                .background(
                    Color.white
                        .ignoresSafeArea()
                        .opacity(0.95)
                )
                Spacer()
            }
        }
    }
}
4 ответа
Если кто-то еще пытается найти более простое решение, которое берет любой контроллер представления и изменяет размер в соответствии с его содержимым:
      struct ViewControllerContainer: UIViewControllerRepresentable {
    let content: UIViewController

    class Coordinator: NSObject {
        var parent: ViewControllerContainer

        init(_ pageViewController: ViewControllerContainer) {
            self.parent = pageViewController
        }
    }

    init(_ content: UIViewController) {
        self.content = content
    }

    func makeCoordinator() -> Coordinator {
        Coordinator(ViewControllerContainer(content))
    }

    func makeUIViewController(context: UIViewControllerRepresentableContext<ViewControllerContainer>) -> UIViewController {
        let size = content.view.systemLayoutSizeFitting(UIView.layoutFittingCompressedSize)
        content.preferredContentSize = size
        return content
    }

    func updateUIViewController(_ uiViewController: UIViewController,
                                context: UIViewControllerRepresentableContext<ViewControllerContainer>) {

    }
}
И затем, когда вы используете его в SwiftUI, обязательно вызовите
.fixedSize():
      struct MainView: View {
    var body: some View {
        VStack(spacing: 0) {

            ViewControllerContainer(MenuViewController())
                .fixedSize()

        }
    }
}
Большое спасибо @udbhateja и @jnpdx за помощь. В этом есть смысл, почему рама сжимается внутри
ScrollView. В конце концов я нашел решение моей проблемы, которое заключалось в установке фиксированной высоты на. В основном я использовал
PreferenceKey чтобы найти высоту представления SwiftUI и установить рамку
UIViewControllerRepresentable чтобы соответствовать этому.
Если у кого-то есть такая же проблема, вот мой код:
      struct EntityViewItem<Label: View, Content: View>: View {
    var copyValue: String
    var label: Label
    var content: Content
    var action: (() -> Void)?

    @State var height: CGFloat = 0

    init(copyValue: String, @ViewBuilder label: () -> Label, @ViewBuilder content: () -> Content, action: (() -> Void)? = nil) {
        self.copyValue = copyValue
        self.label = label()
        self.content = content()
        self.action = action
    }

    var body: some View {
        ViewControllerRepresentable(copyValue: copyValue) {
            SizingView(height: $height) { // This calculates the height of the SwiftUI view and sets the binding
                VStack(alignment: .leading, spacing: 2) {
                    // Content
                }
                .padding([.leading, .trailing])
                .padding(.top, 10)
                .padding(.bottom, 10)
                .frame(maxWidth: .infinity, alignment: .leading)
            }
        }
        .frame(height: height) // Here I set the height to the value returned from the SizingView
    }
}
И код для
SizingView:
      struct SizingView<T: View>: View {

    let view: T
    @Binding var height: CGFloat

    init(height: Binding<CGFloat>, @ViewBuilder view: () -> T) {
        self.view = view()
        self._height = height
    }
    var body: some View {
        view.background(
            GeometryReader { proxy in
                Color.clear
                    .preference(key: SizePreferenceKey.self, value: proxy.size)
            }
        )
        .onPreferenceChange(SizePreferenceKey.self) { preferences in
            height = preferences.height
        }

    }

    func size(with view: T, geometry: GeometryProxy) -> T {
        height = geometry.size.height
        return view
    }
}

struct SizePreferenceKey: PreferenceKey {
    static var defaultValue: CGSize = .zero

    static func reduce(value: inout CGSize, nextValue: () -> CGSize) {
        value = nextValue()
    }
}
На этом мой
UIMenuControllerполностью функциональна. Это было много кода (если бы эта функция существовала в SwiftUI, мне, вероятно, пришлось бы написать около 5 строк кода), но он отлично работает. Если кому-то нужен код, прокомментируйте, и я поделюсь.
Как упоминалось в @jnpdx, вам необходимо указать явный размер через фрейм, чтобы представляемый объект был видимым, поскольку он вложен в VStack с другим представлением.
Если у вас есть конкретная причина использовать UIViewController, укажите явный фрейм или создайте представление SwiftUI.
      struct ClientView: View {
  var body: some View {
    VStack(spacing: 0) {
        EntityViewItem(copyValue: "copy value", label: {
            Text("Name")
        }, content: {
            Text("Random name")
        })
        .border(Color.green)

        ViewControllerRepresentable()
            .border(Color.red)
            .frame(height: 100.0)

        EntityViewItem(copyValue: "copy value", label: {
            Text("Route")
        }, content: {
            HStack(alignment: .center) {
                Text("Random route name")
            }
        })
        .border(Color.blue)
    }
  }
}
Для тех, кто ищет самое простое решение, это пара строк в ответе @Edudjr:
      let size = content.view.systemLayoutSizeFitting(UIView.layoutFittingCompressedSize)
content.preferredContentSize = size
Просто добавьте это в свой makeUIViewController!

