Как создать изображение определенного размера из UIView
Я работаю над приложением для iOS, которое должно позволить пользователям создавать фотографии историй из Instagram и экспортировать их в Instagram. В основном такие приложения, как Unfold, Stellar, Chroma Stories... Я подготовил интерфейс, в котором пользователь может выбирать из подготовленных шаблонов и добавлять к ним собственные фотографии с фильтрами, ярлыками и т. Д.
У меня вопрос - как лучше всего экспортировать созданный UIView в более крупное изображение? Я имею в виду, как получить лучшее качество, четкие пиксели этикеток и т. Д.? Поскольку представление шаблона с вложенными изображениями (добавленными фотографиями, ярлыками...) занимает +- половину экрана устройства. Но мне нужен больший размер для экспортируемого изображения. В настоящее время использую:
 func makeImageFromView() -> UIImage {
    let format = UIGraphicsImageRendererFormat()
    let size = CGSize(width: 1080 / format.scale, height: 1920 / format.scale)

    let renderer = UIGraphicsImageRenderer(size: size, format: format)
    let image = renderer.image { (ctx) in
        templateView.drawHierarchy(in: CGRect(origin: .zero, size: size), afterScreenUpdates: true)
    }
    return image
}
Полученное изображение имеет размер 1080 x 1920, но надписи нечеткие. Нужно ли мне как-то масштабировать фотографию и размер шрифта, прежде чем преобразовывать их в изображение? Благодарность!
1 ответ
So actually yes, before capturing image I need to scale whole view and it's subviews. Here are my findings (maybe obvious things but it took me a while to realize that – I'll be glad for any improvements)
Rendering image of the same size
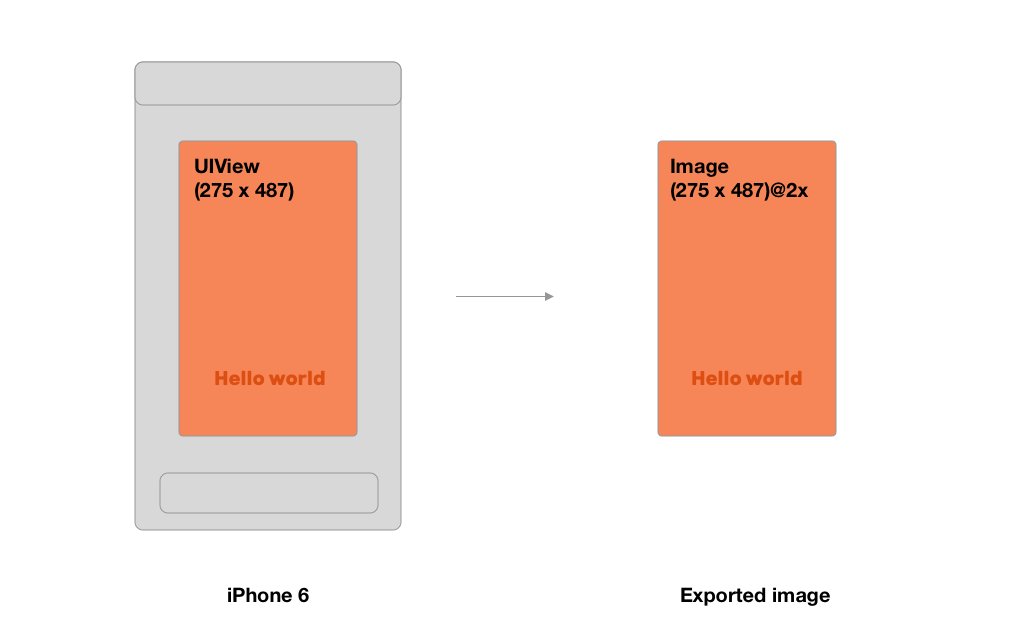
When you want to capture UIView as an image, you can simply use this function. Resulted image will have a same size as a view (scaled 2x / 3x depending on actual device)
 func makeImageFrom(_ desiredView: MyView) -> UIImage {
    let size = CGSize(width: desiredView.bounds.width, height: desiredView.bounds.height)
    let renderer = UIGraphicsImageRenderer(size: size)
    let image = renderer.image { (ctx) in
        desiredView.drawHierarchy(in: CGRect(origin: .zero, size: size), afterScreenUpdates: true)
    }
    return image
}
Rendering image of the different size
But what to do, when you want a specific size for your exported image? So from my use-case I wanted to render image of final size (1080 x 1920), but a view I wanted to capture had a smaller size (in my case 275 x 487). If you do such a rendering without anything, there must be a loss in quality.
If you want to avoid that and preserve sharp labels and other subviews, you need to try to scale the view ideally to the desired size. In my case, make it from 275 x 487 to 1080 x 1920.
func makeImageFrom(_ desiredView: MyView) -> UIImage {
    let format = UIGraphicsImageRendererFormat()
    // We need to divide desired size with renderer scale, otherwise you get output size larger @2x or @3x
    let size = CGSize(width: 1080 / format.scale, height: 1920 / format.scale)

    let renderer = UIGraphicsImageRenderer(size: size, format: format)
    let image = renderer.image { (ctx) in
    // remake constraints or change size of desiredView to 1080 x 1920
    // handle it's subviews (update font size etc.)
    // ...
    desiredView.drawHierarchy(in: CGRect(origin: .zero, size: size), afterScreenUpdates: true)
    // undo the size changes
    // ...
    }
    return image
}
My approach
Но поскольку я не хотел связываться с размером представления, отображаемого пользователю, я пошел другим путем и использовал второе представление, которое не отображается пользователю. Это означает, что непосредственно перед тем, как я захочу захватить изображение, я готовлю "дублированный" вид с тем же содержанием, но большего размера. Я не добавляю его в иерархию представлений контроллера представления, поэтому он не отображается.
Важная заметка!
Вам действительно нужно позаботиться о подпредставлениях. Это означает, что вам нужно увеличить размер шрифта, обновить положение перемещенных подвидов (например, их центр) и т. Д.! Вот несколько строк, чтобы проиллюстрировать это:
        // 1. Create bigger view
        let hdView = MyView()
        hdView.frame = CGRect(x: 0, y: 0, width: 1080, height: 1920)

        // 2. Load content according to the original view (desiredView)
        // set text, images...

        // 3. Scale subviews
        // Find out what scale we need
        let scaleMultiplier: CGFloat = 1080 / desiredView.bounds.width // 1080 / 275 = 3.927 ...

        // Scale everything, for examples label's font size
        [label1, label2].forEach { $0.font =  UIFont.systemFont(ofSize: $0.font.pointSize * scaleMultiplier, weight: .bold) }
        // or subview's center
        subview.center = subview.center.applying(.init(scaleX: scaleMultiplier, y: scaleMultiplier))

        // 4. Render image from hdView
        let hdImage = makeImageFrom(hdView)
Отличие в качестве от реального использования - увеличено до этикетки:
