Прокрутка макета при появлении клавиатуры
Когда у меня появляется клавиатура и скрывается панель инструментов (FrameLayout), размер моего экрана увеличивается до вершины, мне нужно просто прокрутить элементы чата вверх и удерживать макет рамки сверху. Я пробую несколько примеров из Google и SO, но мне ничего не помогает.
<activity
        android:name=".screen.workshiftscreen.WorkShiftActivity"
        android:launchMode="singleTop"
        android:windowSoftInputMode="adjustPan"
        android:screenOrientation="portrait" />
Мой фрагмент раскладки после некоторых правок:
<?xml version="1.0" encoding="utf-8"?>
<RelativeLayout xmlns:android="http://schemas.android.com/apk/res/android"
    xmlns:app="http://schemas.android.com/apk/res-auto"
    xmlns:tools="http://schemas.android.com/tools"
    android:layout_width="match_parent"
    android:layout_height="match_parent"
    android:background="?attr/bg_second"
    android:orientation="vertical">

    <FrameLayout
        android:id="@+id/title"
        android:layout_width="match_parent"
        android:layout_height="wrap_content"
        android:layout_alignParentTop="true"
        android:layout_marginBottom="@dimen/space_large_s"
        android:background="?attr/bg_main"
        android:padding="@dimen/space_small_m">

        <TextView
            *params* />

        <ImageView
            *params* />
    </FrameLayout>

    <android.support.v4.widget.SwipeRefreshLayout
        android:id="@+id/swipe_refresh_chat"
        android:layout_width="match_parent"
        android:layout_height="wrap_content"
        android:layout_above="@id/edit_bar"
        android:layout_below="@+id/title">

            <android.support.v7.widget.RecyclerView
                android:id="@+id/messages"
                android:layout_width="match_parent"
                android:layout_height="wrap_content"
                android:paddingLeft="@dimen/space_medium_l"
                android:paddingRight="@dimen/space_medium_l"
                android:scrollbars="vertical" />
    </android.support.v4.widget.SwipeRefreshLayout>

    <LinearLayout
        android:id="@+id/edit_bar"
        android:layout_width="match_parent"
        android:layout_height="60dp"
        android:layout_alignParentBottom="true"
        android:orientation="vertical"
        app:layout_constraintBottom_toBottomOf="parent"
        app:layout_constraintLeft_toLeftOf="parent"
        app:layout_constraintRight_toRightOf="parent">

        <View
            *params* />

        <LinearLayout
            *params*>

            <EditText
                android:id="@+id/message_input"
                android:layout_width="0dp"
                android:layout_height="wrap_content"
                android:layout_gravity="center"
                android:layout_marginLeft="16dp"
                android:layout_marginRight="16dp"
                android:layout_weight="1"
                android:background="@android:color/transparent"
                android:hint="@string/prompt_message"
                android:imeActionId="@+id/send"
                android:imeActionLabel="@string/action_send"
                android:imeOptions="actionSend"
                android:maxLines="6"
                tools:ignore="Autofill,InvalidImeActionId,TextFields" />

            <ImageButton
                android:id="@+id/send_button"
                android:layout_width="wrap_content"
                android:layout_height="wrap_content"
                android:layout_marginEnd="@dimen/space_small_l"
                android:background="@android:color/transparent"
                android:contentDescription="@string/action_send"
                android:src="@android:drawable/ic_menu_send" />

            <ImageButton
                android:id="@+id/bottom_buttom"
                android:layout_width="wrap_content"
                android:layout_height="wrap_content"
                android:layout_marginEnd="@dimen/space_small_l"
                android:background="@android:color/transparent"
                android:contentDescription="@string/action_send"
                android:src="@drawable/down_active" />
        </LinearLayout>
    </LinearLayout>
</RelativeLayout>
Также некоторые подробные снимки экрана:
Как я могу сделать это так? 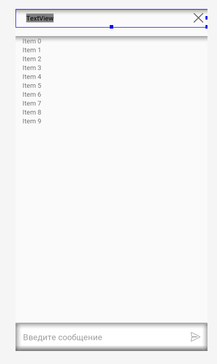
4 ответа
Использование android:windowSoftInputMode="adjustResize" в декларации за деятельность
и поместите содержимое, которое вы хотите прокрутить в Scrollview/NestedScrollView
и сделайте виды (те, которые вы хотите прикрепить внизу) ниже прокрутки как alignToBottom и укажите прокрутку, чтобы быть выше этих представлений.
Посмотрите пример ниже, вы можете создать похожий макет в соответствии с вашими требованиями.
Постарайтесь понять, как это работает, вы можете использовать любое представление контейнера вместо RelativeLayout.
Пример: (для макета Действия / Фрагмент)
<RelativeLayout xmlns:android="http://schemas.android.com/apk/res/android"
   android:id="@+id/rlRoot"
   android:layout_width="match_parent"
   android:layout_height="match_parent">

<!--Scrollable view: RecyclerView, NestedScrollView, Webview etc-->
<ScrollView
    android:id="@+id/nsScroll"
    android:layout_width="match_parent"
    android:layout_height="match_parent"
    android:layout_above="@+id/btnNext">

    <LinearLayout
        android:layout_width="match_parent"
        android:layout_height="wrap_content"
        android:orientation="vertical">
        .
        .
        .
        <AutoCompleteTextView
            android:id="@+id/etDob"
            android:layout_width="match_parent"
            android:layout_height="wrap_content"
            android:imeOptions="actionDone"
            android:inputType="date"
            android:maxLines="1" />
        .
        .
        .
    </LinearLayout>
</ScrollView>

<!--Sticks at the bottom-->
<Button
    android:id="@+id/btnNext"
    android:layout_width="match_parent"
    android:layout_height="wrap_content"
    android:layout_alignParentBottom="true"
    android:textColor="@android:color/white" />
В Манифесте вместо AdjustPan используйте AdjustResize
<activity
    android:name=".screen.workshiftscreen.WorkShiftActivity"
    android:launchMode="singleTop"
    android:windowSoftInputMode="adjustResize"
    android:screenOrientation="portrait" />
Во-первых, вам нужно определить внешний вид клавиатуры
      boolean isKeyboardShowing = false;
void onKeyboardVisibilityChanged(boolean opened) {
    print("keyboard " + opened);
}

// ContentView is the root view of the layout of this activity/fragment
contentView.getViewTreeObserver().addOnGlobalLayoutListener(
    new ViewTreeObserver.OnGlobalLayoutListener() {
@Override
public void onGlobalLayout() {

    Rect r = new Rect();
    contentView.getWindowVisibleDisplayFrame(r);
    int screenHeight = contentView.getRootView().getHeight();

    // r.bottom is the position above soft keypad or device button.
    // if keypad is shown, the r.bottom is smaller than that before.
    int keypadHeight = screenHeight - r.bottom;

    Log.d(TAG, "keypadHeight = " + keypadHeight);

    if (keypadHeight > screenHeight * 0.15) { // 0.15 ratio is perhaps enough to determine keypad height.
        // keyboard is opened
        if (!isKeyboardShowing) {
            isKeyboardShowing = true
        binding.scrollView.fullScroll(ScrollView.FOCUS_UP)
        }
    }
    else {
        // keyboard is closed
        if (isKeyboardShowing) {
            isKeyboardShowing = false
        binding.scrollView.fullScroll(ScrollView.FOCUS_UP)
        }
    }
}

});
когда появится клавиатура, измените прокрутку вверх
"adjustResize"
Главное окно действия всегда изменяется, чтобы освободить место для экранной клавиатуры.
"adjustPan"
Главное окно действия не изменено, чтобы освободить место для виртуальной клавиатуры. Скорее, содержимое окна автоматически панорамируется, так что текущий фокус никогда не скрывается клавиатурой, и пользователи всегда могут видеть, что они печатают. Как правило, это менее желательно, чем изменение размера, поскольку пользователю может потребоваться закрыть экранную клавиатуру, чтобы получить доступ к скрытым частям окна и взаимодействовать с ними.
Узнайте больше по этой ссылке и попробуйте различные режимы для ваших требований