Текстовая вставка для UITextField?
Я хотел бы вставить текст UITextField,
Это возможно?
31 ответ
Переопределение -textRectForBounds: только изменит вставку текста заполнителя. Чтобы изменить вставку редактируемого текста, необходимо также переопределить -editingRectForBounds:
// placeholder position
- (CGRect)textRectForBounds:(CGRect)bounds {
     return CGRectInset(bounds, 10, 10);
}

// text position
- (CGRect)editingRectForBounds:(CGRect)bounds {
     return CGRectInset(bounds, 10, 10);
}
Я смог сделать это через:
myTextField.layer.sublayerTransform = CATransform3DMakeTranslation(5, 0, 0);
Конечно, не забудьте импортировать QuartzCore, а также добавить Framework в ваш проект.
Если вам нужен только левый край, вы можете попробовать это:
UItextField *textField = [[UITextField alloc] initWithFrame:...];
UIView *leftView = [[UIView alloc] initWithFrame:CGRectMake(0, 0, 10, textField.frame.size.height)];
leftView.backgroundColor = textField.backgroundColor;
textField.leftView = leftView;
textField.leftViewMode = UITextFieldViewModeAlways;
Меня устраивает. Я надеюсь, что это может помочь.
В классе, производном от UITextField, переопределите по крайней мере эти два метода:
- (CGRect)textRectForBounds:(CGRect)bounds;
- (CGRect)editingRectForBounds:(CGRect)bounds;
Это может быть так просто, если у вас нет дополнительного контента:
return CGRectInset(bounds , 10, 10);
UITextField предоставляет несколько методов позиционирования, которые вы можете переопределить.
Как насчет @IBInspectable, @IBDesignable Свифт класс.
@IBDesignable
class TextField: UITextField {
    @IBInspectable var insetX: CGFloat = 6 {
       didSet {
         layoutIfNeeded()
       }
    }
    @IBInspectable var insetY: CGFloat = 6 {
       didSet {
         layoutIfNeeded()
       }
    }

    // placeholder position
    override func textRectForBounds(bounds: CGRect) -> CGRect {
        return CGRectInset(bounds , insetX , insetY)
    }

    // text position
    override func editingRectForBounds(bounds: CGRect) -> CGRect {
        return CGRectInset(bounds , insetX , insetY)
    }
}
Вы увидите это в своей раскадровке.

Обновление - Swift 3
@IBDesignable
class TextField: UITextField {
    @IBInspectable var insetX: CGFloat = 0
    @IBInspectable var insetY: CGFloat = 0

    // placeholder position
    override func textRect(forBounds bounds: CGRect) -> CGRect {
        return bounds.insetBy(dx: insetX, dy: insetY)
    }

    // text position
    override func editingRect(forBounds bounds: CGRect) -> CGRect {
        return bounds.insetBy(dx: insetX, dy: insetY)
    }
}
Если у вас есть кнопка очистки, принятый ответ не будет работать для вас. Мы также должны остерегаться того, чтобы Apple изменила ситуацию в будущем, позвонив super,
Итак, чтобы убедиться, что текст не перекрывает кнопку очистки, давайте получим значение "по умолчанию" из super Сначала отрегулируйте при необходимости.
Этот код добавит вставки размером 10px вверху, слева и внизу текстового поля:
@interface InsetTextField : UITextField

@end


@implementation InsetTextField

// Placeholder position
- (CGRect)textRectForBounds:(CGRect)bounds {
    CGRect rect = [super textRectForBounds:bounds];
    UIEdgeInsets insets = UIEdgeInsetsMake(10, 10, 10, 0);

    return UIEdgeInsetsInsetRect(rect, insets);
}

// Text position
- (CGRect)editingRectForBounds:(CGRect)bounds {
    CGRect rect = [super editingRectForBounds:bounds];
    UIEdgeInsets insets = UIEdgeInsetsMake(10, 10, 10, 0);

    return UIEdgeInsetsInsetRect(rect, insets);
}

// Clear button position
- (CGRect)clearButtonRectForBounds:(CGRect)bounds {
    CGRect rect = [super clearButtonRectForBounds:bounds];

    return CGRectOffset(rect, -5, 0);
}

@end
Примечание: UIEdgeInsetsMake принимает параметры в следующем порядке: сверху, слева, снизу, справа.
Думал, я бы поставил быстрое решение
import UIKit

class TextField: UITextField {
    let inset: CGFloat = 10

    // placeholder position
    override func textRectForBounds(bounds: CGRect) -> CGRect {
        return CGRectInset(bounds , inset , inset)
    }

    // text position
    override func editingRectForBounds(bounds: CGRect) -> CGRect {
        return CGRectInset(bounds , inset , inset)
    }

    override func placeholderRectForBounds(bounds: CGRect) -> CGRect {
        return CGRectInset(bounds, inset, inset)
    }
}
Версия Swift 3 для Xcode 8.3.1 по состоянию на май 2017 года:
 class TextField: UITextField {

    let inset: CGFloat = 8

    // placeholder position
    override func textRect(forBounds bounds: CGRect) -> CGRect {
        return bounds.insetBy(dx: inset, dy: inset)
    }

    // text position
    override func editingRect(forBounds bounds: CGRect) -> CGRect {
        return bounds.insetBy(dx: inset, dy: inset)
    }
}
Вы можете установить текстовую вставку для UITextField, установив leftView.
Как это:
UITextField *yourTextField = [[UITextField alloc] init];
UIView *leftView = [[UIView alloc] initWithFrame:CGRectMake(0, 0, 5, 5)];
leftView.backgroundColor = [UIColor clearColor];
yourTextField.leftViewMode = UITextFieldViewModeAlways;
yourTextField.leftView = leftView;
С помощью textRectForBounds: это правильный подход. Я завернул это в моем подклассе, чтобы вы могли просто использовать textEdgeInsets, Смотрите SSTextField.
Для людей, которые ищут более простое решение.
Добавить UITextField внутри UIView, Чтобы имитировать вставку вокруг текстового поля, я оставляю 10 пикселей влево, а ширина на 20 пикселей меньше, чем у вида. Для закругленной угловой границы вокруг текстового поля используйте границу представления
viewBG.layer.cornerRadius = 8.0;
viewBG.layer.borderColor = [UIColor darkGrayColor].CGColor;
viewBG.layer.borderWidth = 1.0;
стриж
    // adjust place holder text
    let paddingView = UIView(frame: CGRectMake(0, 0, 10, usernameOrEmailField.frame.height))
    usernameOrEmailField.leftView = paddingView
    usernameOrEmailField.leftViewMode = UITextFieldViewMode.Always
Хороший подход для добавления отступов в UITextField - это создать подкласс UITextField и добавить свойство edgeInsets. Затем вы устанавливаете edgeInsets, и UITextField будет отображаться соответственно. Это также будет работать правильно с пользовательским набором leftView или rightView.
OSTextField.h
#import <UIKit/UIKit.h>

@interface OSTextField : UITextField

@property (nonatomic, assign) UIEdgeInsets edgeInsets;

@end
OSTextField.m
#import "OSTextField.h"

@implementation OSTextField

- (id)initWithFrame:(CGRect)frame{
    self = [super initWithFrame:frame];
    if (self) {
        self.edgeInsets = UIEdgeInsetsMake(0, 0, 0, 0);
    }
    return self;
}

-(id)initWithCoder:(NSCoder *)aDecoder{
    self = [super initWithCoder:aDecoder];
    if(self){
        self.edgeInsets = UIEdgeInsetsMake(0, 0, 0, 0);
    }
    return self;
}

- (CGRect)textRectForBounds:(CGRect)bounds {
    return [super textRectForBounds:UIEdgeInsetsInsetRect(bounds, self.edgeInsets)];
}

- (CGRect)editingRectForBounds:(CGRect)bounds {
    return [super editingRectForBounds:UIEdgeInsetsInsetRect(bounds, self.edgeInsets)];
}

@end
Swift 5 версия ответа Кристофера с дополнительным образцом использования
import UIKit

private class InsetTextField: UITextField {
    var insets: UIEdgeInsets

    init(insets: UIEdgeInsets) {
        self.insets = insets
        super.init(frame: .zero)
    }

    required init(coder aDecoder: NSCoder) {
        fatalError("not intended for use from a NIB")
    }

    // placeholder position
    override func textRect(forBounds bounds: CGRect) -> CGRect {
         return super.textRect(forBounds: bounds.inset(by: insets))
    }

    // text position
    override func editingRect(forBounds bounds: CGRect) -> CGRect {
         return super.editingRect(forBounds: bounds.inset(by: insets))
    }
}

extension UITextField {

    class func textFieldWithInsets(insets: UIEdgeInsets) -> UITextField {
        return InsetTextField(insets: insets)
    }

}
Применение: -
class ViewController: UIViewController {

  private let passwordTextField: UITextField = {

        let textField = UITextField.textFieldWithInsets(insets: UIEdgeInsets(top: 10, left: 15, bottom: 10, right: 15))
     // ---

        return textField
    }()

}
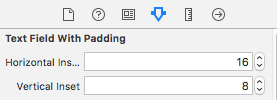
Swift 3 / Разработано в Интерфейсном мастере / Раздельные горизонтальные и вертикальные насекомые / можно использовать из коробки
@IBDesignable
class TextFieldWithPadding: UITextField {

@IBInspectable var horizontalInset: CGFloat = 0
@IBInspectable var verticalInset: CGFloat = 0

override func textRect(forBounds bounds: CGRect) -> CGRect {
    return bounds.insetBy(dx: horizontalInset, dy: verticalInset)
}

override func editingRect(forBounds bounds: CGRect) -> CGRect {
    return bounds.insetBy(dx: horizontalInset , dy: verticalInset)
}

override func placeholderRect(forBounds bounds: CGRect) -> CGRect {
    return bounds.insetBy(dx: horizontalInset, dy: verticalInset)
}
}
использование:

&
Я сделал это в IB, где я создал UIView позади textView, который был немного длиннее. С цветом фона textField установлен очистить. 
ВерсияSwift 4.2:
import UIKit

class InsetTextField: UITextField {

  let inset: CGFloat = 10

  override func textRect(forBounds bounds: CGRect) -> CGRect {
    return bounds.insetBy(dx: inset, dy: inset)
  }


  override func editingRect(forBounds bounds: CGRect) -> CGRect {
    return bounds.insetBy(dx: inset, dy: inset)
  }

  override func placeholderRect(forBounds bounds: CGRect) -> CGRect {
    return bounds.insetBy(dx: inset, dy: inset)
  }

}
Это самый быстрый способ, который я нашел без каких-либо подклассов:
UIView *spacerView = [[UIView alloc] initWithFrame:CGRectMake(0, 0, 10., 10.)];
[textField setLeftViewMode:UITextFieldViewModeAlways];
[textField setLeftView:spacerView];
В Свифте:
let spacerView = UIView(frame:CGRect(x:0, y:0, width:10, height:10))
textField.leftViewMode = UITextFieldViewMode.Always
textField.leftView = spacerView
Абсурдно, вы должны подкласс, так как UITextField уже реализует методы, как указывает @Adam Waite. Вот быстрое расширение, которое предоставляет фабричный метод, также доступный в репо наших категорий:
private class InsetTextField: UITextField {
    var insets: UIEdgeInsets

    init(insets: UIEdgeInsets) {
        self.insets = insets
        super.init(frame: CGRectZero)
    }

    required init(coder aDecoder: NSCoder) {
        fatalError("not intended for use from a NIB")
    }

    // placeholder position
    override func textRectForBounds(bounds: CGRect) -> CGRect {
        return super.textRectForBounds(UIEdgeInsetsInsetRect(bounds, insets))
    }

    // text position
    override func editingRectForBounds(bounds: CGRect) -> CGRect {
        return super.editingRectForBounds(UIEdgeInsetsInsetRect(bounds, insets))
    }
}

extension UITextField {

    class func textFieldWithInsets(insets: UIEdgeInsets) -> UITextField {
        return InsetTextField(insets: insets)
    }

}
Вот тот же подкласс UITextField, написанный на Swift 3. Он довольно сильно отличается от предыдущих версий Swift, как вы увидите:
import UIKit

class MyTextField: UITextField
    {
    let inset: CGFloat = 10

    // placeholder position
    override func textRect(forBounds bounds: CGRect) -> CGRect
        {
        return bounds.insetBy(dx: inset, dy: inset)
        }

    // text position
    override func editingRect(forBounds bounds: CGRect) -> CGRect
        {
        return bounds.insetBy(dx: inset, dy: inset)
        }

    override func placeholderRect(forBounds bounds: CGRect) -> CGRect
        {
        return bounds.insetBy(dx: inset, dy: inset)
        }
    }
Кстати, вы также можете сделать что-то вроде следующего, если вы хотите контролировать вставку только одной стороны. Этот конкретный пример настройки только левой вставки полезен, если вы помещаете изображение поверх UITextField, но хотите, чтобы оно отображалось пользователю в текстовом поле:
    override func editingRect(forBounds bounds: CGRect) -> CGRect
        {
        return CGRect.init(x: bounds.origin.x + inset, y: bounds.origin.y, width: bounds.width - inset, height: bounds.height)
        }
Вы можете настроить расположение текста в текстовом поле, сделав его подклассом UITextField и переопределяя -textRectForBounds: метод.
Это не так коротко, как в других примерах, но использует совершенно другой подход к решению этой проблемы. Обратите внимание, каретка по-прежнему будет заподлицо с левым краем, но при вводе / отображении текст будет иметь правильные отступы. Это работает без подклассов, если вы ищете только левое поле и вы уже используете UITextFieldDelegate для ваших текстовых полей. Вам необходимо установить как текстовые атрибуты по умолчанию, так и атрибуты набора текста. Вы устанавливаете текстовые атрибуты по умолчанию при создании текстового поля. Атрибуты набора, которые необходимо установить в делегате. Если вы также используете местозаполнитель, вы также захотите установить то же значение. В целом, вы получите что-то вроде этого.
Сначала создайте категорию на UITextField учебный класс.
//  UITextField+TextAttributes.h

#import <UIKit/UIKit.h>

@interface UITextField (TextAttributes)

- (void)setIndent:(CGFloat)indent;

@end


//  UITextField+TextAttributes.m
#import "UITextField+TextAttributes.h"

@implementation UITextField (TextAttributes)

- (void)setTextAttributes:(NSDictionary*)textAttributes indent:(CGFloat)indent
{
    if (!textAttributes) return;

    NSMutableParagraphStyle *paragraphStyle = [textAttributes objectForKey:NSParagraphStyleAttributeName];
    paragraphStyle.firstLineHeadIndent = indent;
    paragraphStyle.headIndent = indent;
}

- (void)setIndent:(CGFloat)indent
{
   [self setTextAttributes:self.defaultTextAttributes indent:indent];
   [self setTextAttributes:self.typingAttributes indent:indent];
}

@end
Затем, если вы используете размещенные держатели, убедитесь, что вы используете атрибут-заполнитель с тем же отступом. Создайте атрибутивный словарь по умолчанию с правильными атрибутами, примерно так:
NSMutableParagraphStyle *paragraphStyle = [[NSMutableParagraphStyle alloc] init];
paragraphStyle.firstLineHeadIndent = 7;
paragraphStyle.headIndent = 7;
NSDictionary *placeholderAttributes = [NSDictionary dictionaryWithObjectsAndKeys: paragraphStyle, NSParagraphStyleAttributeName, nil];
Затем импортируйте вышеуказанную категорию и при каждом создании текстового поля установите отступ по умолчанию, делегируйте и используйте атрибуты заполнителя по умолчанию, определенные выше. Например:
UITextField *textField = [[UITextField alloc] init];
textField.indent = 7;
textField.delegate = self;
textField.attributedPlaceholder = [[NSAttributedString alloc] initWithString:@"Placeholder Text" attributes:placeholderAttributes];
Наконец, в делегате реализовать textFieldDidBeginEditing метод, что-то вроде этого:
- (void)textFieldDidBeginEditing:(UITextField *)textField
{
    textField.indent = 7;
}
Я нашел вариант, опубликованный roberto.buratti, самым быстрым решением, вот он в Swift:
let leftView = UIView(frame: CGRect(x: 0, y: 0, width: 10, height: textField.frame.size.height))
leftView.backgroundColor = textField.backgroundColor
textField.leftView = leftView
textField.leftViewMode = UITextField.ViewMode.always
Решение, которое действительно работает и охватывает все случаи:
- Следует использовать
offsetByнеinsetBy. - Также следует вызвать суперфункцию, чтобы получить оригинал
Rect. - Границы ошибочные. вам необходимо сместить исходные X, Y. На границах X, Y равны нулю.
- Исходные x, y могут быть ненулевыми, например, при установке leftView UITextField.
Образец:
override func textRect(forBounds bounds: CGRect) -> CGRect {
    return super.textRect(forBounds: bounds).offsetBy(dx: 0.0, dy: 4)
}


override func editingRect(forBounds bounds: CGRect) -> CGRect {
    return super.editingRect(forBounds: bounds).offsetBy(dx: 0.0, dy: 4)
}
Я поместил UITextField в подпункт, чтобы обработать это, которое поддерживает левую, верхнюю, правую и нижнюю вставку, а также очистить расположение кнопок.
MRDInsetTextField.h
#import <UIKit/UIKit.h>

@interface MRDInsetTextField : UITextField

@property (nonatomic, assign) CGRect inset;

@end
MRDInsetTextField.m
#import "MRDInsetTextField.h"

@implementation MRDInsetTextField

- (id)init
{
    self = [super init];
    if (self) {
        _inset = CGRectZero;
    }
    return self;
}

- (id)initWithCoder:(NSCoder *)aDecoder
{
    self = [super initWithCoder:aDecoder];
    if (self) {
        _inset = CGRectZero;
    }
    return self;
}

- (id)initWithFrame:(CGRect)frame
{
    self = [super initWithFrame:frame];
    if (self) {
        _inset = CGRectZero;
    }
    return self;
}

- (void)setInset:(CGRect)inset {
    _inset = inset;

    [self setNeedsLayout];
}

- (CGRect)getRectForBounds:(CGRect)bounds withInset:(CGRect)inset {

    CGRect newRect = CGRectMake(
                         bounds.origin.x + inset.origin.x,
                         bounds.origin.y + inset.origin.y,
                         bounds.origin.x + bounds.size.width - inset.origin.x - inset.size.width,
                         bounds.origin.y + bounds.size.height - inset.origin.y - inset.size.height
                         );

    return newRect;
}

- (CGRect)textRectForBounds:(CGRect)bounds {
    return [self getRectForBounds:[super textRectForBounds:bounds] withInset:_inset];
}

- (CGRect)placeholderRectForBounds:(CGRect)bounds {
    return [self getRectForBounds:bounds withInset:_inset];
}

- (CGRect)editingRectForBounds:(CGRect)bounds {
    return [self getRectForBounds:[super editingRectForBounds:bounds] withInset:_inset];
}

- (CGRect)clearButtonRectForBounds:(CGRect)bounds {
    return CGRectOffset([super clearButtonRectForBounds:bounds], -_inset.size.width, _inset.origin.y/2 - _inset.size.height/2);
}

@end
Пример использования *_someTextField* из представления nib / storyboard с пользовательским классом MRDInsetTextField
[(MRDInsetTextField*)_someTextField setInset:CGRectMake(5, 0, 5, 0)]; // left, top, right, bottom inset
Чтобы добавить другое решение, которое не требует подклассов:
UITextField *txtField = [UITextField new];
txtField.borderStyle = UITextBorderStyleRoundedRect;

// grab BG layer
CALayer *bgLayer = txtField.layer.sublayers.lastObject;
bgLayer.opacity = 0.f;

// add new bg view
UIView *bgView = [UIView new];
bgView.backgroundColor = [UIColor whiteColor];
bgView.autoresizingMask = UIViewAutoresizingFlexibleHeight | UIViewAutoresizingFlexibleWidth;
bgView.userInteractionEnabled = NO;

[txtField addSubview: bgView];
[txtField sendSubviewToBack: bgView];


Протестировано с iOS 7 и iOS 8. Оба работают. Тем не менее, существует вероятность того, что Apple изменит иерархию слоев UITextField, что испортит ситуацию.
Вот исчерпывающий ответ Swift, который включает в себя leftView (пользовательский значок) и пользовательскую кнопку очистки, которые устанавливаются в Interface Builder с настраиваемыми вставками.
import UIKit

@IBDesignable
class InsetTextField: UITextField {
@IBInspectable var leftInset:CGFloat = 0
@IBInspectable var rightInset:CGFloat = 0
@IBInspectable var icon:UIImage? { didSet {
    let imageView = UIImageView(frame: CGRect(x: 0, y: 0, width: 16, height: 16))
    imageView.image = icon
    self.leftView = imageView
    self.leftViewMode = .Always
} }

@IBInspectable var clearButton:UIImage? { didSet {
    let button = UIButton(type: .Custom)
    button.setImage(clearButton, forState: .Normal)
    button.addTarget(self, action: "clear", forControlEvents: UIControlEvents.TouchUpInside)
    button.frame = CGRect(x: 0, y: 0, width: 18, height: 18)
    self.rightView = button
    self.rightViewMode = .WhileEditing
} }

func clear() {
    self.text = ""
}

override func leftViewRectForBounds(bounds: CGRect) -> CGRect {
    var height:CGFloat = 0
    var width:CGFloat = 0
    if let leftView = self.leftView {
        height = leftView.bounds.height
        width = leftView.bounds.width
    }

    return CGRect(x: leftInset, y: bounds.height/2 - height/2, width: width, height: height)
}

override func rightViewRectForBounds(bounds: CGRect) -> CGRect {
    var height:CGFloat = 0
    var width:CGFloat = 0
    if let rightView = self.rightView {
        height = rightView.bounds.height
        width = rightView.bounds.width
    }

    return CGRect(x: bounds.width - width - rightInset, y: bounds.height/2 - height/2, width: width, height: height)
}

}
Вам может понадобиться это решение, которое также поддерживает leftView и rightView. 😃
      class InsettedTextField: UITextField {

    private let textInset: UIEdgeInsets

    var rightViewInset: CGRect {
        rightView.flatMap { $0.frame } ?? .zero
    }

    var leftViewInset: CGRect {
        leftView.flatMap { $0.frame } ?? .zero
    }

    /// Init the text field with insets.
    init(textInset: UIEdgeInsets) {
        self.textInset = textInset
        super.init(frame: .zero)
    }

    required init?(coder: NSCoder) {
        fatalError("init(coder:) has not been implemented")
    }

    override func textRect(forBounds bounds: CGRect) -> CGRect {
        bounds
            .inset(by: textInset)
            .inset(by: UIEdgeInsets(top: 0, left: leftViewInset.width, bottom: 0, right: rightViewInset.width))
    }

    override func placeholderRect(forBounds bounds: CGRect) -> CGRect {
        bounds
            .inset(by: textInset)
            .inset(by: UIEdgeInsets(top: 0, left: leftViewInset.width, bottom: 0, right: rightViewInset.width))
    }

    override func editingRect(forBounds bounds: CGRect) -> CGRect {
        bounds
            .inset(by: textInset)
            .inset(by: UIEdgeInsets(top: 0, left: leftViewInset.width, bottom: 0, right: rightViewInset.width))
    }
}
Я обычно стараюсь избегать подклассов, но это работает, если у вас уже есть:
// add a property
@property (nonatomic) UIEdgeInsets edgeInsets;

// and override:

- (CGRect)textRectForBounds:(CGRect)bounds
{
    return [super textRectForBounds:UIEdgeInsetsInsetRect(bounds, self.edgeInsets)];
}

- (CGRect)editingRectForBounds:(CGRect)bounds
{
    return [super editingRectForBounds:UIEdgeInsetsInsetRect(bounds, self.edgeInsets)];
}
Если вы хотите изменить отступ TOP и LEFT только тогда
// позиция заполнителя
- (CGRect)textRectForBounds:(CGRect)bounds {

CGRect frame = bounds;
frame.origin.y = 3;
 frame.origin.x = 5;
bounds = frame;
return CGRectInset( bounds , 0 , 0 );
}
// текстовая позиция
- (CGRect)editingRectForBounds:(CGRect)bounds {

CGRect frame = bounds;
frame.origin.y = 3;
 frame.origin.x = 5;
bounds = frame;
return CGRectInset( bounds , 0 , 0 );
}