Как изменить тему для AlertDialog
Мне было интересно, если кто-нибудь может мне помочь. Я пытаюсь создать собственный AlertDialog. Для этого я добавил следующую строку кода в styles.xml
<resources>
 <style name="CustomAlertDialog" parent="android:Theme.Dialog.Alert">
  <item name="android:windowBackground">@drawable/color_panel_background</item>
 </style>
</resources>
- color_panel_background.9.png находится в папке для рисования. Это также доступно в папке Android SDK res.
Следующее является основным видом деятельности.
package com.customdialog;

import android.app.Activity;
import android.app.AlertDialog;
import android.app.Dialog;
import android.content.DialogInterface;
import android.os.Bundle;

public class CustomDialog extends Activity {
    /** Called when the activity is first created. */
    @Override
    public void onCreate(Bundle savedInstanceState) {
        super.onCreate(savedInstanceState);
        setContentView(R.layout.main);

        this.setTheme(R.style.CustomAlertDialog);
        AlertDialog.Builder builder = new AlertDialog.Builder(this);
        builder.setMessage("HELLO!");
        builder .setCancelable(false)
          .setPositiveButton("Yes", new DialogInterface.OnClickListener() {
           public void onClick(DialogInterface dialog, int id) {
               //MyActivity.this.finish();
           }
       })
       .setNegativeButton("No", new DialogInterface.OnClickListener() {
           public void onClick(DialogInterface dialog, int id) {
               //dialog.cancel();
           }
       });

        AlertDialog alertdialog = builder.create();
        alertdialog.show();
    }
}
Чтобы применить тему к AlertDialog, мне нужно было установить тему в текущем контексте.
Тем не менее, я просто не могу заставить приложение показывать настроенный AlertDialog. Кто-нибудь может мне помочь с этим?
13 ответов
В Dialog.java (Android src) используется ContextThemeWrapper. Таким образом, вы можете скопировать идею и сделать что-то вроде:
AlertDialog.Builder builder = new AlertDialog.Builder(new ContextThemeWrapper(this, R.style.AlertDialogCustom));
А затем сделайте стиль, как вы хотите:
<?xml version="1.0" encoding="utf-8"?>
<resources>
    <style name="AlertDialogCustom" parent="@android:style/Theme.Dialog">
        <item name="android:textColor">#00FF00</item>
        <item name="android:typeface">monospace</item>
        <item name="android:textSize">10sp</item>
    </style>
</resources>
У меня было это AlertDialog Тема связана с использованием SDK 1.6, как описано здесь: http://markmail.org/message/mj5ut56irkrkc4nr
Я решил проблему, выполнив следующее:
  new AlertDialog.Builder(
  new ContextThemeWrapper(context, android.R.style.Theme_Dialog))
Надеюсь это поможет.
Я написал в своем блоге статью о том, как настроить макет AlertDialog с помощью файлов стилей XML. Основная проблема заключается в том, что вам нужны разные определения стилей для разных параметров макета. Вот пример, основанный на стиле AlertDialog Holo Light Platform версии 19 для файла стиля, который должен охватывать множество стандартных аспектов макета, таких как размеры текста и цвета фона.
<style name="AppBaseTheme" parent="android:Theme.Holo.Light">
    ...
    <item name="android:alertDialogTheme">@style/MyAlertDialogTheme</item>
    <item name="android:alertDialogStyle">@style/MyAlertDialogStyle</item>
    ...
</style>

<style name="MyBorderlessButton">
    <!-- Set background drawable and text size of the buttons here -->
    <item name="android:background">...</item>
    <item name="android:textSize">...</item>
</style>

<style name="MyButtonBar">
    <!-- Define a background for the button bar and a divider between the buttons here -->
    <item name="android:divider">....</item>
    <item name="android:dividerPadding">...</item>
    <item name="android:showDividers">...</item>
    <item name="android:background">...</item>
</style>

<style name="MyAlertDialogTitle">
    <item name="android:maxLines">1</item>
    <item name="android:scrollHorizontally">true</item>
</style>

<style name="MyAlertTextAppearance">
    <!-- Set text size and color of title and message here -->
    <item name="android:textSize"> ... </item>
    <item name="android:textColor">...</item>
</style>

<style name="MyAlertDialogTheme">
    <item name="android:windowBackground">@android:color/transparent</item>
    <item name="android:windowTitleStyle">@style/MyAlertDialogTitle</item>
    <item name="android:windowContentOverlay">@null</item>
    <item name="android:windowMinWidthMajor">@android:dimen/dialog_min_width_major</item>
    <item name="android:windowMinWidthMinor">@android:dimen/dialog_min_width_minor</item>
    <item name="android:windowIsFloating">true</item>
    <item name="android:textAppearanceMedium">@style/MyAlertTextAppearance</item>
    <!-- If you don't want your own button bar style use
            @android:style/Holo.Light.ButtonBar.AlertDialog
            and
            ?android:attr/borderlessButtonStyle
         instead of @style/MyButtonBar and @style/MyBorderlessButton -->
    <item name="android:buttonBarStyle">@style/MyButtonBar</item>
    <item name="android:buttonBarButtonStyle">@style/MyBorderlessButton</item>
</style>

<style name="MyAlertDialogStyle">
    <!-- Define background colors of title, message, buttons, etc. here -->
    <item name="android:fullDark">...</item>
    <item name="android:topDark">...</item>
    <item name="android:centerDark">...</item>
    <item name="android:bottomDark">...</item>
    <item name="android:fullBright">...</item>
    <item name="android:topBright">...</item>
    <item name="android:centerBright">...</item>
    <item name="android:bottomBright">...</item>
    <item name="android:bottomMedium">...</item>
    <item name="android:centerMedium">...</item>
</style>
 <style name="AlertDialogCustom" parent="Theme.AppCompat.Light.Dialog.Alert">
    <!-- Used for the buttons -->
    <item name="colorAccent">@color/colorAccent</item>
    <!-- Used for the title and text -->
    <item name="android:textColorPrimary">#FFFFFF</item>
    <!-- Used for the background -->
    <item name="android:background">@color/teal</item>
</style>


new AlertDialog.Builder(new ContextThemeWrapper(context,R.style.AlertDialogCustom))
            .setMessage(Html.fromHtml(Msg))
            .setPositiveButton(posBtn, okListener)
            .setNegativeButton(negBtn, null)
            .create()
            .show();
Вы можете напрямую назначить тему при запуске Builder:
AlertDialog.Builder builder = new AlertDialog.Builder(
                    getActivity(), R.style.MyAlertDialogTheme);
Затем настройте свою тему в своем values/styles.xml
<!-- Alert Dialog -->
<style name="MyAlertDialogTheme" parent="Theme.AppCompat.Dialog.Alert">
    <item name="colorAccent">@color/colorAccent</item>
    <item name="android:colorBackground">@color/alertDialogBackground</item>
    <item name="android:windowBackground">@color/alertDialogBackground</item>
</style>
Я боролся с этим - вы можете стилизовать фон диалога, используя android:alertDialogStyle="@style/AlertDialog" в вашей теме, но игнорирует любые настройки текста, которые у вас есть. Как сказал @rflexor выше, это не может быть сделано с SDK до Honeycomb (хорошо, вы могли бы использовать Reflection).
Вкратце, мое решение состояло в том, чтобы стилизовать фон диалогового окна, используя описанное выше, а затем установить пользовательский заголовок и представление контента (используя макеты, такие же, как в SDK).
Моя обертка:
import com.mypackage.R;

import android.app.AlertDialog;
import android.content.Context;
import android.graphics.drawable.Drawable;
import android.view.View;
import android.widget.ImageView;
import android.widget.TextView;

public class CustomAlertDialogBuilder extends AlertDialog.Builder {

    private final Context mContext;
    private TextView mTitle;
    private ImageView mIcon;
    private TextView mMessage;

    public CustomAlertDialogBuilder(Context context) {
        super(context);
        mContext = context;

        View customTitle = View.inflate(mContext, R.layout.alert_dialog_title, null);
        mTitle = (TextView) customTitle.findViewById(R.id.alertTitle);
        mIcon = (ImageView) customTitle.findViewById(R.id.icon);
        setCustomTitle(customTitle);

        View customMessage = View.inflate(mContext, R.layout.alert_dialog_message, null);
        mMessage = (TextView) customMessage.findViewById(R.id.message);
        setView(customMessage);
    }

    @Override
    public CustomAlertDialogBuilder setTitle(int textResId) {
        mTitle.setText(textResId);
        return this;
    }
    @Override
    public CustomAlertDialogBuilder setTitle(CharSequence text) {
        mTitle.setText(text);
        return this;
    }

    @Override
    public CustomAlertDialogBuilder setMessage(int textResId) {
        mMessage.setText(textResId);
        return this;
    }

    @Override
    public CustomAlertDialogBuilder setMessage(CharSequence text) {
        mMessage.setText(text);
        return this;
    }

    @Override
    public CustomAlertDialogBuilder setIcon(int drawableResId) {
        mIcon.setImageResource(drawableResId);
        return this;
    }

    @Override
    public CustomAlertDialogBuilder setIcon(Drawable icon) {
        mIcon.setImageDrawable(icon);
        return this;
    }

}
alert_dialog_title.xml (взято из SDK)
<?xml version="1.0" encoding="utf-8"?>
<LinearLayout
    xmlns:android="http://schemas.android.com/apk/res/android"
    android:layout_width="fill_parent"
    android:layout_height="wrap_content"
    android:orientation="vertical"
    >
    <LinearLayout
            android:id="@+id/title_template"
            android:layout_width="fill_parent"
            android:layout_height="wrap_content"
            android:orientation="horizontal"
            android:gravity="center_vertical"
            android:layout_marginTop="6dip"
            android:layout_marginBottom="9dip"
            android:layout_marginLeft="10dip"
            android:layout_marginRight="10dip">

            <ImageView android:id="@+id/icon"
                android:layout_width="wrap_content"
                android:layout_height="wrap_content"
                android:layout_gravity="top"
                android:paddingTop="6dip"
                android:paddingRight="10dip"
                android:src="@drawable/ic_dialog_alert" />
            <TextView android:id="@+id/alertTitle"
                style="@style/?android:attr/textAppearanceLarge"
                android:singleLine="true"
                android:ellipsize="end"
                android:layout_width="fill_parent"
                android:layout_height="wrap_content" />
        </LinearLayout>
        <ImageView android:id="@+id/titleDivider"
            android:layout_width="fill_parent"
            android:layout_height="1dip"
            android:scaleType="fitXY"
            android:gravity="fill_horizontal"
            android:src="@drawable/divider_horizontal_bright" />
</LinearLayout>
alert_dialog_message.xml
<?xml version="1.0" encoding="utf-8"?>
<ScrollView xmlns:android="http://schemas.android.com/apk/res/android"
            android:id="@+id/scrollView"
            android:layout_width="fill_parent"
            android:layout_height="wrap_content"
            android:paddingTop="2dip"
            android:paddingBottom="12dip"
            android:paddingLeft="14dip"
            android:paddingRight="10dip">
    <TextView android:id="@+id/message"
                style="?android:attr/textAppearanceMedium"
                android:textColor="@color/dark_grey"
                android:layout_width="fill_parent"
                android:layout_height="wrap_content"
                android:padding="5dip" />
</ScrollView>
Тогда просто используйте CustomAlertDialogBuilder вместо AlertDialog.Builder чтобы создать свои диалоги, и просто позвонить setTitle а также setMessage по-прежнему.
Для Пользовательского Диалога:
просто позвони super(context,R.style.<dialog style>) вместо super(context) в диалоговом конструкторе
public class MyDialog extends Dialog
{
    public MyDialog(Context context)
    {
       super(context, R.style.Theme_AppCompat_Light_Dialog_Alert)
    }
}
Для AlertDialog:
Просто создайте alertDialog с помощью этого конструктора:
 new AlertDialog.Builder(
 new ContextThemeWrapper(context, android.R.style.Theme_Dialog))
Я думаю, что это не может быть сделано. По крайней мере, не с Строителем. Я работаю с 1.6 и реализация в Builder.create():
public AlertDialog create() {
    final AlertDialog dialog = new AlertDialog(P.mContext);
    P.apply(dialog.mAlert);
    [...]
}
который вызывает конструктор AlertDialog, не связанный с темой, который выглядит следующим образом:
protected AlertDialog(Context context) {
    this(context, com.android.internal.R.style.Theme_Dialog_Alert);
}
В AlertDialog есть второй конструктор для смены тем:
protected AlertDialog(Context context, int theme) {
    super(context, theme);
    [...]
}
что Строитель просто не звонит.
Если бы диалог в любом случае был довольно общим, я бы попытался написать подкласс AlertDialog, вызвать второй конструктор и использовать этот класс вместо механизма Builder.
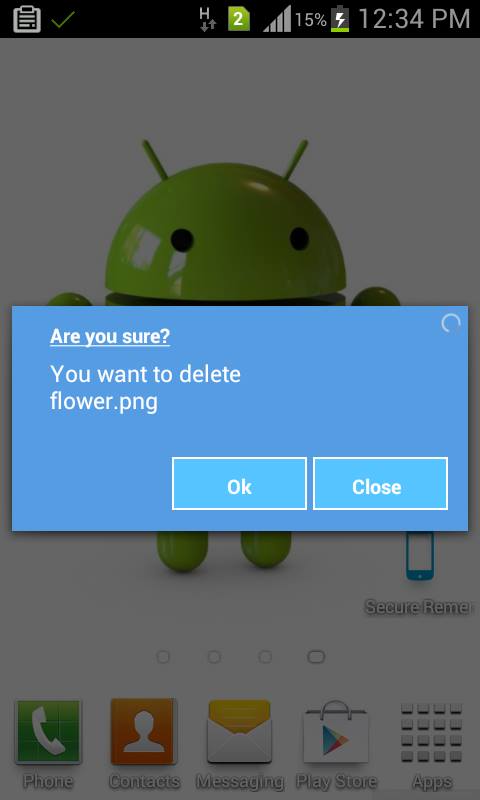
Лучший способ сделать это - использовать настраиваемое диалоговое окно и настраивать его в соответствии с вашими потребностями. Вот пример настраиваемого диалогового окна.....
public class CustomDialogUI {
Dialog dialog;
Vibrator vib;
RelativeLayout rl;

@SuppressWarnings("static-access")
public void dialog(final Context context, String title, String message,
        final Runnable task) {
    dialog = new Dialog(context);
    dialog.requestWindowFeature(Window.FEATURE_NO_TITLE);
    dialog.setContentView(R.layout.custom);
    dialog.setCancelable(false);
    TextView m = (TextView) dialog.findViewById(R.id.message);
    TextView t = (TextView) dialog.findViewById(R.id.title);
    final Button n = (Button) dialog.findViewById(R.id.button2);
    final Button p = (Button) dialog.findViewById(R.id.next_button);
    rl = (RelativeLayout) dialog.findViewById(R.id.rlmain);
    t.setText(bold(title));
    m.setText(message);
    dialog.show();
    n.setText(bold("Close"));
    p.setText(bold("Ok"));
    // color(context,rl);
    vib = (Vibrator) context.getSystemService(context.VIBRATOR_SERVICE);
    n.setOnClickListener(new OnClickListener() {
        @Override
        public void onClick(View arg0) {
            vib.vibrate(15);
            dialog.dismiss();
        }
    });
    p.setOnClickListener(new OnClickListener() {
        @Override
        public void onClick(View arg0) {
            vib.vibrate(20);
            dialog.dismiss();
            task.run();
        }
    });
}
 //customize text style bold italic....
public SpannableString bold(String s) {
    SpannableString spanString = new SpannableString(s);
    spanString.setSpan(new StyleSpan(Typeface.BOLD), 0,
            spanString.length(), 0);
    spanString.setSpan(new UnderlineSpan(), 0, spanString.length(), 0);
    // spanString.setSpan(new StyleSpan(Typeface.ITALIC), 0,
    // spanString.length(), 0);
    return spanString;
}
}
Вот макет XML
<?xml version="1.0" encoding="utf-8"?>
<RelativeLayout xmlns:android="http://schemas.android.com/apk/res/android"
android:layout_width="match_parent"
android:layout_height="match_parent"
android:background="#00000000"
>

<RelativeLayout
    android:id="@+id/rlmain"
    android:layout_width="fill_parent"
    android:layout_height="150dip"
    android:layout_alignParentLeft="true"
    android:layout_centerVertical="true"
    android:background="#569CE3" >

    <RelativeLayout
        android:id="@+id/relativeLayout1"
        android:layout_width="wrap_content"
        android:layout_height="wrap_content"
        android:layout_alignParentLeft="true"
        android:layout_alignParentTop="true"
        android:layout_centerHorizontal="true"
        android:layout_marginLeft="25dip"
        android:layout_marginTop="10dip" >

        <TextView
            android:id="@+id/title"
            android:layout_width="wrap_content"
            android:layout_height="wrap_content"
            android:layout_alignParentLeft="true"
            android:layout_alignParentTop="true"
            android:text="Are you Sure?"
            android:textAppearance="?android:attr/textAppearanceMedium"
            android:textColor="#ffffff"
            android:textSize="13dip" />
    </RelativeLayout>

    <RelativeLayout
        android:id="@+id/relativeLayout2"
        android:layout_width="wrap_content"
        android:layout_height="wrap_content"
        android:layout_alignLeft="@+id/relativeLayout1"
        android:layout_alignRight="@+id/relativeLayout1"
        android:layout_below="@+id/relativeLayout1"
        android:layout_marginTop="5dip" >
    </RelativeLayout>

    <ProgressBar
        android:id="@+id/process"
        style="?android:attr/progressBarStyleSmall"
        android:layout_width="wrap_content"
        android:layout_height="wrap_content"
        android:layout_alignParentRight="true"
        android:layout_alignParentTop="true"
        android:layout_marginRight="3dip"
        android:layout_marginTop="3dip" />

    <RelativeLayout
        android:id="@+id/relativeLayout3"
        android:layout_width="fill_parent"
        android:layout_height="wrap_content"
        android:layout_alignLeft="@+id/relativeLayout2"
        android:layout_below="@+id/relativeLayout2"
        android:layout_toLeftOf="@+id/process" >

        <TextView
            android:id="@+id/message"
            android:layout_width="wrap_content"
            android:layout_height="wrap_content"
            android:layout_alignParentLeft="true"
            android:layout_centerVertical="true"
            android:text="Medium Text"
            android:textAppearance="?android:attr/textAppearanceMedium"
            android:textColor="#ffffff"
            android:textSize="13dip"/>

    </RelativeLayout>

    <Button
        android:id="@+id/next_button"
        android:layout_width="90dip"
        android:layout_height="35dip"
        android:layout_alignParentBottom="true"
        android:textColor="@drawable/button_text_color"
         android:background="@drawable/blue_button"
         android:layout_marginBottom="5dp"
           android:textSize="10dp"

        android:layout_alignRight="@+id/relativeLayout3"
        android:text="Okay" />

    <Button
        android:id="@+id/button2"
        android:text="Cancel"
        android:textColor="@drawable/button_text_color"
        android:layout_width="90dip"
        android:layout_height="35dip"
        android:layout_marginBottom="5dp"
         android:background="@drawable/blue_button"
         android:layout_marginRight="7dp"
        android:textSize="10dp"
        android:layout_alignParentBottom="true"
        android:layout_toLeftOf="@+id/next_button"
         />

</RelativeLayout>
Любой, кто пытается сделать это во фрагменте (используя библиотеку поддержки, т.е. предварительно API 11), должен пойти с этим:
public class LoadingDialogFragment extends DialogFragment {
    public static final String ID = "loadingDialog";

    public static LoadingDialogFragment newInstance() {
        LoadingDialogFragment f = new LoadingDialogFragment();

        return f;
    }

    @Override
    public Dialog onCreateDialog(Bundle savedInstanceState) {
        StyleAlertDialog adb = new StyleAlertDialog(getActivity(), R.style.Your_Style);
        adb.setView(getActivity().getLayoutInflater().inflate(R.layout.fragment_dialog_layout, null));
        return adb;
    }

    private class StyleAlertDialog extends AlertDialog {
        protected StyleAlertDialog(Context context, int theme) {
            super(context, theme);
        }
    }
}
@Rflexor подтолкнул меня расширить AlertDialog и раскрыть конструктор, спасибо
Решение Арве Уолтина выглядит хорошо, хотя я еще не проверял его. Есть и другое решение, если у вас возникли проблемы с тем, чтобы заставить его работать.... Продлите AlertDialog.Builder и переопределить все методы (например, setText, setTitle, setViewи т. д.), чтобы не устанавливать текст / заголовок / представление самого диалога, а чтобы создать новое представление в представлении диалога, сделайте все в нем. Тогда вы можете оформить все как угодно.
Чтобы прояснить, что касается родительского класса, представление установлено, и ничего больше.
Что касается вашего пользовательского расширенного класса, все делается в этом представлении.
Вы можете переопределить тему по умолчанию, используемую DialogFragments, порожденными действием, изменив атрибуты темы действия....
установить тему занятия в
AndroidManifest.xml.
<?xml version="1.0" encoding="utf-8"?>
<manifest xmlns:android="http://schemas.android.com/apk/res/android"
    package="com.example.helloworld">

    <application
        android:name=".App"
        android:allowBackup="true"
        android:icon="@mipmap/ic_launcher"
        android:label="@string/app_name"
        android:roundIcon="@mipmap/ic_launcher_round"
        android:supportsRtl="true"
        android:theme="@style/AppTheme">     <!-- set all Activity themes to your custom theme -->

        .....

    </application>

</manifest>
в
values/styles.xml, переопределить элемент, используемый для определения того, какую тему использовать для созданных DialogFragments
<?xml version="1.0" encoding="utf-8"?>
<resources>

    <style name="AppTheme" parent="Theme.AppCompat">

        <!-- override the default theme for DialogFragments -->
        <item name="android:dialogTheme">@style/AppTheme.Dialog</item>

    </style>

    .....

</resources>
в
values/styles.xml, определите и настройте тему, которую вы хотите использовать для DialogFragments
<?xml version="1.0" encoding="utf-8"?>
<resources>

    .....

    <!--
        configure your custom theme for DialogFragments...
    -->
    <style name="AppTheme.Dialog" parent="Theme.AppCompat.Dialog.MinWidth">

        <!-- override the default theme for DialogFragments spawned by this DialogFragment -->
        <item name="android:dialogTheme">@style/AppTheme.Dialog</item>

        <!--
            OPTIONAL: override the background for the dialog...i am using a dark theme,
            and for some reason, there is no themes for dialogs with dark backgrounds,
            so, i made my own.
        -->
        <item name="android:windowBackground">@drawable/dialog__window_background</item>

        <!--
            add the title to the dialog's theme. you can remove it later by using
            DialogFragment.setStyle()
        -->
        <item name="android:windowNoTitle">false</item>
        <item name="windowNoTitle">?android:windowNoTitle</item>

    </style>

    .....

</resources>
ДОПОЛНИТЕЛЬНО: если вы используете темную тему и переопределяете
android:windowBackground как я делал в
AppTheme.Dialog, затем добавьте
drawable/dialog__window_background.xml файл с содержанием:
<?xml version="1.0" encoding="utf-8"?>
<inset xmlns:android="http://schemas.android.com/apk/res/android"
    android:insetLeft="16dp"
    android:insetTop="16dp"
    android:insetRight="16dp"
    android:insetBottom="16dp">
    <shape android:shape="rectangle">
        <corners android:radius="?dialogCornerRadius" />
        <solid android:color="?android:colorBackground" />
    </shape>
</inset>
Я не уверен, как решение Arve будет работать в настраиваемом диалоговом окне с построителем, где представление расширяется с помощью LayoutInflator.
Решение должно заключаться в том, чтобы вставить ContextThemeWrapper в инфлятор через cloneInContext():
View sensorView = LayoutInflater.from(context).cloneInContext(
     new ContextThemeWrapper(context, R.style.AppTheme_DialogLight)
).inflate(R.layout.dialog_fingerprint, null);
Это можно сделать просто с помощью setView() в Builder. Вы можете создать любой вид по вашему выбору и подать в строителя. Это хорошо работает. Я использую пользовательский TextView, который отображается в диалоговом окне. Я не устанавливаю сообщение, и это пространство используется, чтобы сделать мое обычное текстовое представление.
AlertDialog.Builder builder = new AlertDialog.Builder(this);
builder.setTitle("Title");
builder.setMessage("Description");
builder.setPositiveButton("OK", null);
builder.setNegativeButton("Cancel", null);
builder.show();