Python: Tkinter с Matplotlib: 1 окно в Ubuntu, но 2 в Windows
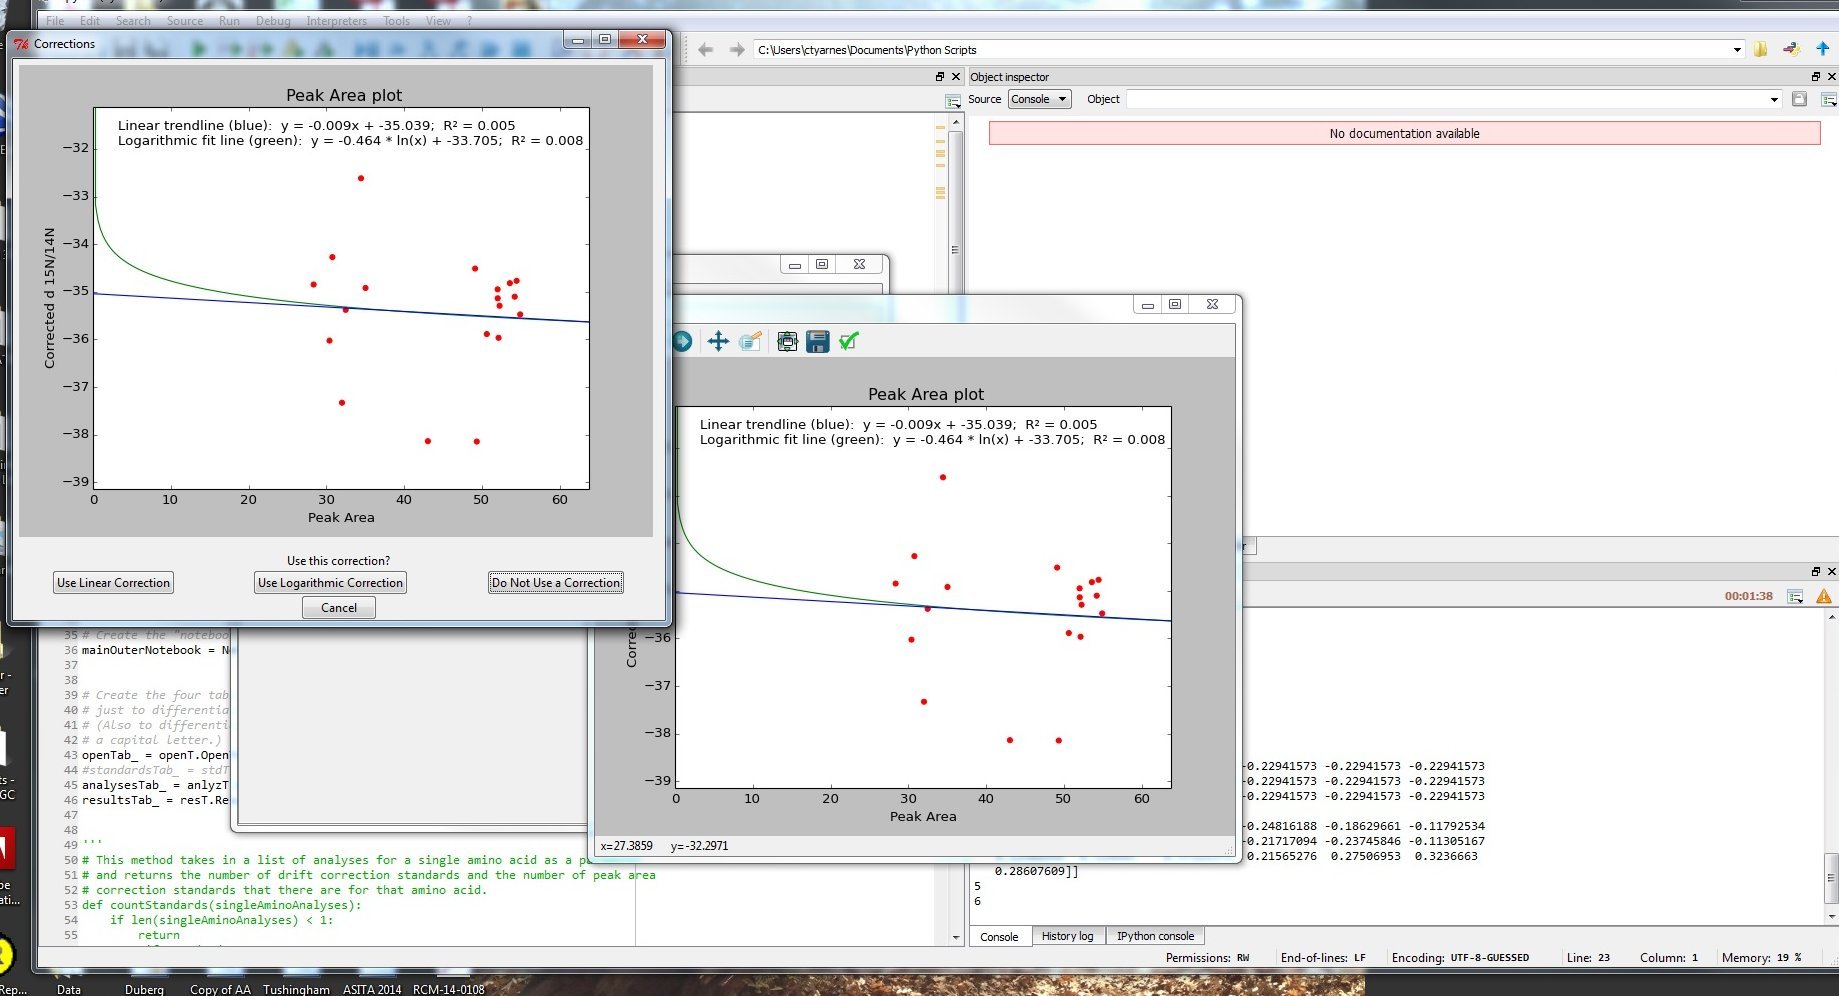
Я пишу программу на Python для Ubuntu, которая использует Matplotlib и Tkinter для отображения некоторых графиков. Проблема в том, что в Ubuntu он работает нормально, но в Windows, со Spyder (из которого пользователь собирается его запускать), он создает окно Tkinter с графиком, а также другое отдельное окно Matplotlib с таким же графиком. Я понятия не имею, как это исправить, поскольку обычно я вообще не имею дело с Windows.
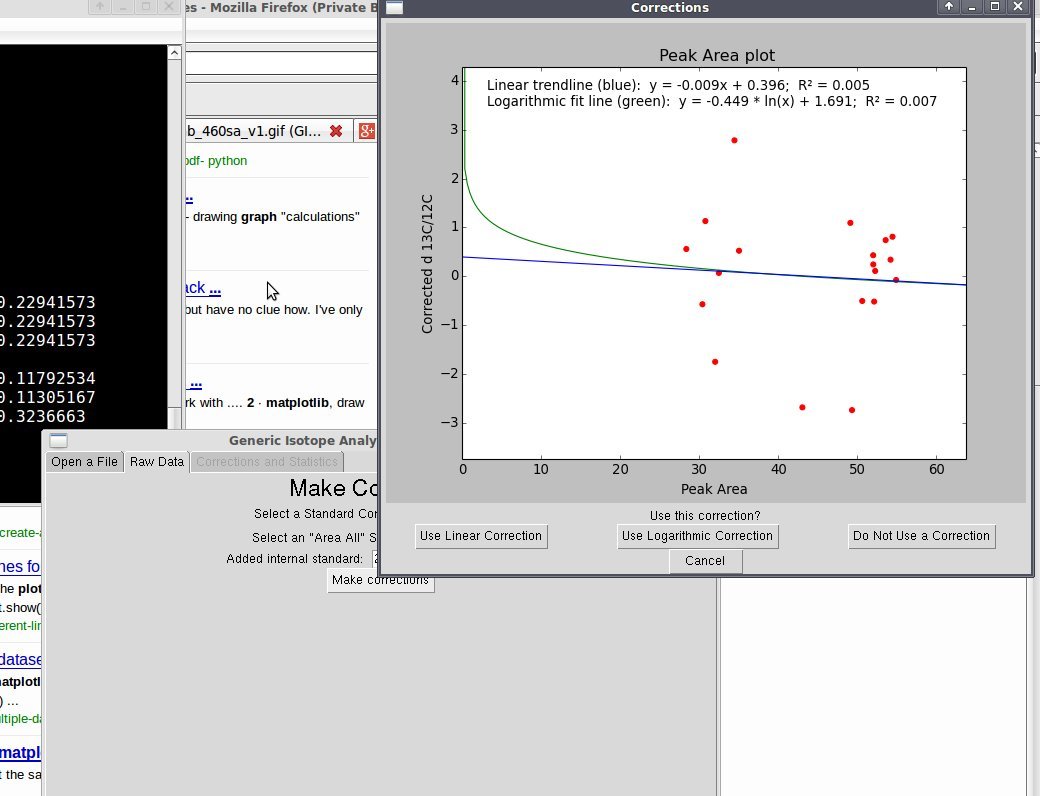
Вот скриншоты, которые показывают, что происходит:
Ubuntu:

Окна:

Вот код, который создает графики:
# This method takes in a lot of data and creates a plot with all the data.  It takes in the x and y data points
# (for the scatter plot), the slope and intercept of the linear best-fit line, the coefficients of the logarithmic
# best-fit curve, the range of the axes to display in the plot, and the titles for the plot and the axes.
# It generates the plot displaying all of this, as well as the equations of the best-fit curves, and their
# R-squared values.  To get the R-squared values, it calls the method which calculates them.

def plotForCorrections(scatterXs, scatterYs, trendlineSlope, trendlineIntercept, logA, logB, axesRange, title, xTitle, yTitle):

    # The linear fit is a straight line, and can be plotted with just two points.
    # The x-coordinates will be the two ends of the plot (the leftmost and rightmost points displayed).
    trendlineXs = numpy.array([axesRange[0], axesRange[1]])

    # We can apply the linear fit equation to the two x-coordinates to get the two y-coordinates.
    trendlineYs = numpy.multiply(trendlineSlope, trendlineXs) + trendlineIntercept

    # We need to clear the plot figure of anything that was on it before.
    plt.clf()

    # Plot the x and y data points
    plt.scatter(scatterXs, scatterYs, color='r')

    # For the x-coordinates for the logarithmic fit curve, we need much more than two, so we
    # create a set of 200 equally spaced points between the two ends of the visible plot.
    # The leftmost point will always be 0, which we can not take the logarithm of.  To remedy that,
    # we use 10^-300 instead of 0.
    logLineXs = numpy.linspace((1e-300 if axesRange[0] == 0 else axesRange[0]), axesRange[1],num=200)

    # We plot the logarithmic fit curve, calculating the y-values of the curve in the same line.
    plt.plot(logLineXs, logFitFun(logLineXs, logA, logB), color='g')

    # We plot the linear fit line.
    plt.plot(trendlineXs, trendlineYs, color='b')

    # We set the axis range of the plot.
    plt.axis(axesRange)

    # We calculate R squared values.
    linRSquared = numpy.round(calculateLinRSquared(scatterXs,scatterYs,trendlineSlope,trendlineIntercept),3)
    logRSquared = numpy.round(calculateLogRSquared(scatterXs,scatterYs,logA,logB),3)

    # We place the equations and R squared values on the plot.
    plt.annotate("Linear trendline (blue):  " + "y = " + str(numpy.round(trendlineSlope,3)) + "x + " +
                 str(numpy.round(trendlineIntercept,3)) + ";  R" + unichr(0x00b2) + " = " + str(linRSquared) +
                 "\nLogarithmic fit line (green):  " + "y = " + str(numpy.round(logA,3)) + " * ln(x) + " + str(numpy.round(logB,3)) +
                 ";  R" + unichr(0x00b2)+ " = " + str(logRSquared),
                 xy=(0.05,0.90),
                 xycoords="axes fraction")

    # We place the titles on the plot.
    plt.title(title)
    plt.xlabel(xTitle)
    plt.ylabel(yTitle)

    # We display the plot in its window.
    plt.gcf().canvas.draw()
И код для окна:
# What follows are GUI-specific things for the plot window
fig = plt.figure()
graphCanvas = FigureCanvasTkAgg(fig,master=window)
questionLabel = Label(window,text="Use this correction?")
linCorrectionButton = Button(window,text="Use Linear Correction",command=clickLinCorrection)
logCorrectionButton = Button(window,text="Use Logarithmic Correction",command=clickLogCorrection)
noCorrectionButton = Button(window,text="Do Not Use a Correction",command=clickNoCorrection)
graphCanvas.get_tk_widget().grid(row=0,column=0,columnspan=3)
questionLabel.grid(row=1,column=0,columnspan=3)
linCorrectionButton.grid(row=2,column=0)
logCorrectionButton.grid(row=2,column=1)
noCorrectionButton.grid(row=2,column=2)
cancelButton = Button(window,text="Cancel",command=destroyAndReturn)
cancelButton.grid(row=3,column=0,columnspan=3)
Если вам нужны другие примеры кода, пожалуйста, дайте мне знать. Большое спасибо всем вам!
1 ответ
закройте окно графика перед созданием нового графика.
      plt.close()
.... etc