Как настроить макет закусочной?
Есть ли способ изменить макет закусочной на пользовательский вид?
Теперь он черный, и мы можем изменить цвет фона. Но я не знаю, как правильно надуть новый макет и сделать его фоном закусочных?
Спасибо...
12 ответов
Снэк-бар не позволяет вам установить пользовательский макет. Однако, как предложил Primoz990, вы можете получить Snackbar's View. Функция getView возвращает Snackbar.SnackbarLayout, который является горизонтальным объектом LinearLayout, чьими дочерними элементами являются TextView и Button. Чтобы добавить свой собственный вид на панель Snackbar, вам просто нужно скрыть TextView и добавить свой вид в Snackbar.SnackbarLayout.
// Create the Snackbar
Snackbar snackbar = Snackbar.make(containerLayout, "", Snackbar.LENGTH_LONG);
// Get the Snackbar's layout view
Snackbar.SnackbarLayout layout = (Snackbar.SnackbarLayout) snackbar.getView();
// Hide the text
TextView textView = (TextView) layout.findViewById(android.support.design.R.id.snackbar_text);
textView.setVisibility(View.INVISIBLE);

// Inflate our custom view
View snackView = mInflater.inflate(R.layout.my_snackbar, null);
// Configure the view
ImageView imageView = (ImageView) snackView.findViewById(R.id.image);
imageView.setImageBitmap(image);
TextView textViewTop = (TextView) snackView.findViewById(R.id.text);
textViewTop.setText(text);
textViewTop.setTextColor(Color.WHITE);

//If the view is not covering the whole snackbar layout, add this line
layout.setPadding(0,0,0,0);

// Add the view to the Snackbar's layout
layout.addView(snackView, 0);
// Show the Snackbar
snackbar.show();
Это возможно начиная с версии 25.1.0 библиотеки поддержки Android
I. Объявите пользовательский макет в вашей папке значений / макета.
<?xml version="1.0" encoding="utf-8"?>
<LinearLayout xmlns:android="http://schemas.android.com/apk/res/android"
          android:orientation="horizontal"
          android:layout_width="match_parent"
          android:layout_height="wrap_content">

<Button
    android:id="@+id/snackbar_action"
    android:layout_width="wrap_content"
    android:layout_height="wrap_content"
    android:layout_marginLeft="@dimen/design_snackbar_extra_spacing_horizontal"
    android:layout_marginStart="@dimen/design_snackbar_extra_spacing_horizontal"
    android:layout_gravity="center_vertical|right|end"
    android:paddingTop="@dimen/design_snackbar_padding_vertical"
    android:paddingBottom="@dimen/design_snackbar_padding_vertical"
    android:paddingLeft="@dimen/design_snackbar_padding_horizontal"
    android:paddingRight="@dimen/design_snackbar_padding_horizontal"
    android:visibility="gone"
    android:textColor="?attr/colorAccent"
    style="?attr/borderlessButtonStyle"/>

<TextView
    android:gravity="center_vertical|right"
    android:id="@+id/snackbar_text"
    android:layout_width="wrap_content"
    android:layout_height="wrap_content"
    android:layout_weight="1"
    android:paddingTop="@dimen/design_snackbar_padding_vertical"
    android:paddingBottom="@dimen/design_snackbar_padding_vertical"
    android:paddingLeft="@dimen/design_snackbar_padding_horizontal"
    android:paddingRight="@dimen/design_snackbar_padding_horizontal"
    android:textAppearance="@style/TextAppearance.Design.Snackbar.Message"
    android:maxLines="@integer/design_snackbar_text_max_lines"
    android:layout_gravity="center_vertical|left|start"
    android:ellipsize="end"/>

</LinearLayout>
подсказки:
- использование
@dimen/design_snackbarзначения, соответствующие рекомендациям по дизайну материалов. - использование
?attr/colorAccentприменить изменения темы приложения к Snackbar.
II. Расширить класс BaseTransientBottomBar.
public class final CustomSnackbar extends BaseTransientBottomBar<CustomSnackbar> {

/**
 * Constructor for the transient bottom bar.
 *
 * @param parent The parent for this transient bottom bar.
 * @param content The content view for this transient bottom bar.
 * @param contentViewCallback The content view callback for this transient bottom bar.
 */
private CustomSnackbar(ViewGroup parent, View content,
            ContentViewCallback contentViewCallback) {
    super(parent, content, contentViewCallback);
}
}
III. Добавить BaseTransientBottomBar.ContentViewCallback
public class final CustomSnackbar ...{

...

private static class ContentViewCallback implements
                   BaseTransientBottomBar.ContentViewCallback {

  // view inflated from custom layout
  private View content;

  public ContentViewCallback(View content) {
      this.content = content;
  }

  @Override
  public void animateContentIn(int delay, int duration) {
      // add custom *in animations for your views
      // e.g. original snackbar uses alpha animation, from 0 to 1
      ViewCompat.setScaleY(content, 0f);
      ViewCompat.animate(content)
                .scaleY(1f).setDuration(duration)
                .setStartDelay(delay);
  }

  @Override
  public void animateContentOut(int delay, int duration) {
      // add custom *out animations for your views
      // e.g. original snackbar uses alpha animation, from 1 to 0
      ViewCompat.setScaleY(content, 1f);
      ViewCompat.animate(content)
                .scaleY(0f)
                .setDuration(duration)
                .setStartDelay(delay);
  }
}
}
Внутривенно Добавьте метод для создания Snackbar с пользовательским макетом и методы для его заполнения.
public class final CustomSnackbar ...{

...

public static CustomSnackbar make(ViewGroup parent, @Duration int duration) {
 // inflate custom layout
 LayoutInflater inflater = LayoutInflater.from(parent.getContext());
 View content = inflater.inflate(R.layout.snackbar_view, parent, false);

 // create snackbar with custom view
 ContentViewCallback callback= new ContentViewCallback(content);
 CustomSnackbar customSnackbar = new CustomSnackbar(parent, content, callback);
// Remove black background padding on left and right
customSnackbar.getView().setPadding(0, 0, 0, 0);


 // set snackbar duration
 customSnackbar.setDuration(duration);
 return customSnackbar;
 }

 // set text in custom layout
 public CustomSnackbar setText(CharSequence text) {
 TextView textView = (TextView) getView().findViewById(R.id.snackbar_text);
 textView.setText(text);
 return this;
 }

 // set action in custom layout
 public CustomSnackbar setAction(CharSequence text, final OnClickListener  listener) {
 Button actionView = (Button) getView().findViewById(R.id.snackbar_action);
 actionView.setText(text);
 actionView.setVisibility(View.VISIBLE);
 actionView.setOnClickListener(new View.OnClickListener() {
     @Override
     public void onClick(View view) {
         listener.onClick(view);
         // Now dismiss the Snackbar
         dismiss();
     }
 });
 return this;
}
}
V. Создать экземпляр CustomSnackbar и позвонить show() метод.
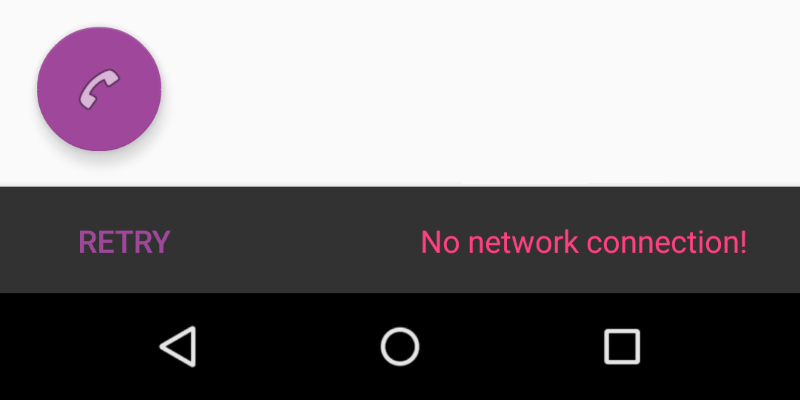
CustomSnackbar customSnackbar = CustomSnackbar.make(rooView,      CustomSnackbar.LENGTH_INDEFINITE);
customSnackbar.setText("No network connection!");
customSnackbar.setAction("Retry", new View.OnClickListener() {
    @Override
    public void onClick(View v) {
        // handle click here
    }
});
customSnackbar.show();
Узнайте больше о Snackbar и его настройках на http://www.materialdoc.com/snackbar/
Полный CustomSnackbar.class код:
import android.support.annotation.NonNull;
import android.support.design.widget.BaseTransientBottomBar;
import android.support.v4.view.ViewCompat;
import android.view.LayoutInflater;
import android.view.View;
import android.view.ViewGroup;
import android.widget.Button;
import android.widget.TextView;


public class CustomSnackbar extends BaseTransientBottomBar<CustomSnackbar> {

    /**
     * Constructor for the transient bottom bar.
     *
     * @param parent The parent for this transient bottom bar.
     * @param content The content view for this transient bottom bar.
     * @param callback The content view callback for this transient bottom bar.
     */
    private CustomSnackbar(ViewGroup parent, View content, ContentViewCallback callback) {
        super(parent, content, callback);
    }

    public static CustomSnackbar make(@NonNull ViewGroup parent, @Duration int duration) {
        final LayoutInflater inflater = LayoutInflater.from(parent.getContext());
        final View content = inflater.inflate(R.layout.snackbar_view, parent, false);
        final ContentViewCallback viewCallback = new ContentViewCallback(content);
        final CustomSnackbar customSnackbar = new CustomSnackbar(parent, content, viewCallback);

        customSnackbar.getView().setPadding(0, 0, 0, 0);
        customSnackbar.setDuration(duration);
        return customSnackbar;
    }

    public CustomSnackbar setText(CharSequence text) {
        TextView textView = (TextView) getView().findViewById(R.id.snackbar_text);
        textView.setText(text);
        return this;
    }

    public CustomSnackbar setAction(CharSequence text, final View.OnClickListener listener) {
        Button actionView = (Button) getView().findViewById(R.id.snackbar_action);
        actionView.setText(text);
        actionView.setVisibility(View.VISIBLE);
        actionView.setOnClickListener(new View.OnClickListener() {
            @Override
            public void onClick(View view) {
                listener.onClick(view);
                // Now dismiss the Snackbar
                dismiss();
            }
        });
        return this;
    }

    private static class ContentViewCallback implements BaseTransientBottomBar.ContentViewCallback {

        private View content;

        public ContentViewCallback(View content) {
            this.content = content;
        }

        @Override
        public void animateContentIn(int delay, int duration) {
            ViewCompat.setScaleY(content, 0f);
            ViewCompat.animate(content).scaleY(1f).setDuration(duration).setStartDelay(delay);
        }

        @Override
        public void animateContentOut(int delay, int duration) {
            ViewCompat.setScaleY(content, 1f);
            ViewCompat.animate(content).scaleY(0f).setDuration(duration).setStartDelay(delay);
        }
    }
}
Способ XML:
Исходный XML-файл макета, который используется для Snackbar это файл:
design_layout_snackbar_include.xml:
   <?xml version="1.0" encoding="utf-8"?>
    <merge xmlns:android="http://schemas.android.com/apk/res/android">

        <TextView
                android:id="@+id/snackbar_text"
                android:layout_width="wrap_content"
                android:layout_height="wrap_content"
                android:layout_weight="1"
                  ...
                android:ellipsize="end"/>

        <Button
                android:id="@+id/snackbar_action"
                android:layout_width="wrap_content"
                android:layout_height="wrap_content"
                android:visibility="gone"
                  ...
                android:textColor="?attr/colorAccent"
                style="?attr/borderlessButtonStyle"/>

    </merge>
Таким образом, чтобы переопределить этот макет, вы должны написать свой собственный макет с тем же android:id как в этом и в вашем refs.xml файл, который вы должны добавить эту строку:
<resources xmlns:tools="http://schemas.android.com/tools">
   ....
    <item name="design_layout_snackbar_include" tools:override="true" type="layout">
        @layout/my_layout_snackbar
    </item>
   ....
</resources>

private Snackbar showSnackbar(CoordinatorLayout, int duration ,int layout_id) { // Create the Snackbar
    Snackbar snackbar = Snackbar.make(coordinatorLayout, "", length);
    // 15 is margin from all the sides for snackbar
    int marginFromSides = 15;

    float height = 100;

    //inflate view
    View snackView = getLayoutInflater().inflate(R.layout.snackbar_layout, null);

    // White background
    snackbar.getView().setBackgroundColor(Color.WHITE);
    // for rounded edges
    snackbar.getView().setBackground(getResources().getDrawable(R.drawable.round_edges));

    Snackbar.SnackbarLayout snackBarView = (Snackbar.SnackbarLayout) snackbar.getView();
    FrameLayout.LayoutParams parentParams = (FrameLayout.LayoutParams) snackBarView.getLayoutParams();
    parentParams.setMargins(marginFromSides, 0, marginFromSides, marginFromSides);
    parentParams.height = (int) height;
    parentParams.width = FrameLayout.LayoutParams.MATCH_PARENT;
    snackBarView.setLayoutParams(parentParams);

    snackBarView.addView(snackView, 0);
    return snackbar;
}
В создании деятельности
CoordinatorLayout coordinatorLayout = findViewById(R.id.coordinator_layout);

final Snackbar snackbar = showSnackbar(coordinatorLayout,Snackbar.LENGTH_LONG, R.layout.snackbar_layout);
            snackbar.show();
            View view = snackbar.getView();
            TextView tv = (TextView) view.findViewById(R.id.snackbar_action);
            tv.setOnClickListener(new View.OnClickListener() {
                @Override
                public void onClick(View v) {
                    snackbar.dismiss();
                }
            });
Ответ: не настраивайте снэк-бар. Он не должен содержать больше элементов, чем краткий текст и одно действие. См. Рекомендации по разработке материалов Google.
ОБНОВЛЕНИЕ: Если вы все-таки хотите настроить Snackbar, вот что я реализовал в своем приложении:
//generate the snackbar
Snackbar sb = Snackbar.make(rootView, snack.text, duration);
//set te action button text color
sb.setActionTextColor(mCurrentActivity.getResources().getColor(R.color.snack_text_action));
//Get the view of the snackbar
View sbView = sb.getView();
//set background color
sbView.setBackgroundColor(mCurrentActivity.getResources().getColor(backgroudResId));
//Get the textview of the snackbar text
TextView textView = (TextView) sbView.findViewById(android.support.design.R.id.snackbar_text);
//set text color
textView.setTextColor(mCurrentActivity.getResources().getColor(R.color.snack_text));
//increase max lines of text in snackbar. default is 2.
textView.setMaxLines(10);
Я никогда не пробовал, но с получением корневого представления Snackbar вы можете программно добавлять новые представления в Snackbar.
Я попробовал, и это работает!
 View custom = LayoutInflater.from(this).inflate(R.layout.custom_view, null);
 snackbar.getView().setPadding(0,0,0,0);
 ((ViewGroup) snackbar.getView()).removeAllViews();
 ((ViewGroup) snackbar.getView()).addView(custom);
 TextView textView = custom.findViewById(R.id.text);
 View button = custom.findViewById(R.id.button);
 textView.setText("Your text here");
 button.setOnClickListener(new View.OnClickListener() {
       @Override
       public void onClick(View v) {
           // do something
       }
 });
Попробуйте следующий код.
Snackbar snackbar = Snackbar.make(container, "No Internet Connection", Snackbar.LENGTH_LONG);
View sbView = snackbar.getView();
sbView.setBackgroundColor(ContextCompat.getColor(this, R.color.colorPrimary));
snackbar.show();
Замечания:
Контейнер - родительский вид макета.
Вот мой код класса util для kotlin:https://gist.github.com/Ryszardenko/db429bc7d177e646ffe27e0672a0958c
class CustomSnackbar(private val view: View) {

    fun showSnackBar(title: String, cancelFun: () -> Unit = {}) {
        val snackView = View.inflate(view.context, R.layout.snackbar, null)
        val binding = SnackbarBinding.bind(snackView)
        val snackbar = Snackbar.make(view, "", Snackbar.LENGTH_LONG)
        (snackbar.view as ViewGroup).removeAllViews()
        (snackbar.view as ViewGroup).addView(binding.root)
        snackbar.view.setPadding(0, 0, 0, 0)
        snackbar.view.elevation = 0f
        snackbar.setBackgroundTint(
            ContextCompat.getColor(
                view.context,
                android.R.color.transparent
            )
        )
        binding.tvTitle.text = title
        binding.btnCancel.setOnClickListener {
            cancelFun()
            snackbar.dismiss()
        }
        snackbar.show()
    }
}
cancelFun() - это лямбда, по умолчанию пустая - вы можете передать туда, например, функцию "отменить".
Добавить к ответу Якова Моспана, сделать свой заказ BaseTransientBottomBar показать снизу как Snackbarскопируйте этот метод из Snackbar класс, чтобы найти подходящего родителя для BaseTransientBottomBar конструктор.
private static ViewGroup findSuitableParent(View view) {
        ViewGroup fallback = null;
        do {
            if (view instanceof CoordinatorLayout) {
                // We've found a CoordinatorLayout, use it
                return (ViewGroup) view;
            } else if (view instanceof FrameLayout) {
                if (view.getId() == android.R.id.content) {
                    // If we've hit the decor content view, then we didn't find a CoL in the
                    // hierarchy, so use it.
                    return (ViewGroup) view;
                } else {
                    // It's not the content view but we'll use it as our fallback
                    fallback = (ViewGroup) view;
                }
            }

            if (view != null) {
                // Else, we will loop and crawl up the view hierarchy and try to find a parent
                final ViewParent parent = view.getParent();
                view = parent instanceof View ? (View) parent : null;
            }
        } while (view != null);

        // If we reach here then we didn't find a CoL or a suitable content view so we'll fallback
        return fallback;
    }
Версия Kotlin для принятого ответа: /questions/38049863/kak-nastroit-maket-zakusochnoj/38049871#38049871
 private fun showSnackbar() {
        val snackbar = Snackbar.make(
                binding.root,
                "",
                Snackbar.LENGTH_INDEFINITE
        )
        (snackbar.view as Snackbar.SnackbarLayout).apply {
            findViewById<View>(R.id.snackbar_text).visibility = View.INVISIBLE
            findViewById<View>(R.id.snackbar_action).visibility = View.INVISIBLE
            val snackbarBinding = DataBindingUtil.inflate<SnackbarBinding>(
                    LayoutInflater.from(this@SnackbarActivity),
                    R.layout.snackbar,
                    binding.root as ViewGroup,
                    false
            )
            setPadding(0, 0, 0, 0)
            addView(snackbarBinding.root, 0)
        }
        snackbar.setDuration(8000).show()
    }
Мои личные утилиты + способ сэкономить время, чтобы настроить Snackbar и показать его в своей деятельности или фрагменте
          fun showSnackbar(view: View, context: Context, text: String) {
    val snackbar = Snackbar.make(view, text, Snackbar.LENGTH_LONG)

    val snackbarLayout = snackbar.view as Snackbar.SnackbarLayout
    snackbarLayout.setBackgroundColor(Color.TRANSPARENT)
    snackbarLayout.elevation = 0F
    snackbarLayout.setPadding(0, 0, 0, 0)

    val snackContentLayout = snackbarLayout.getChildAt(0) as SnackbarContentLayout
    snackContentLayout.background = ContextCompat.getDrawable(context, R.drawable.bg_main_corner)
    snackContentLayout.elevation = 5F
    snackContentLayout.setPadding(30, 0, 30, 0)

    val tvSnackbarTextView = snackContentLayout.getChildAt(0) as AppCompatTextView
    tvSnackbarTextView.setTextColor(Color.parseColor("#FFFFFF"))
    tvSnackbarTextView.typeface = Typeface.SANS_SERIF
    tvSnackbarTextView.textSize = 14F

    val btnSnackbarActionButton = snackContentLayout.getChildAt(1) as AppCompatButton
    btnSnackbarActionButton.setTextColor(Color.parseColor("#8BC34A"))
    btnSnackbarActionButton.typeface = Typeface.SANS_SERIF
    btnSnackbarActionButton.textSize = 12F

    snackbar.setAction(R.string.rate_it) { rateApp(context) }

    snackbar.show()
}
Просто назовите это в своей деятельности или фрагменте
showSnackbar(findViewById(android.R.id.content),this@ScratchActivity, "Already Credit to your wallet!!!")
Благодарю вас
Вы можете попробовать эту библиотеку. Это оболочка для снэк-бара по умолчанию для Android. https://github.com/ChathuraHettiarachchi/CSnackBar
Snackbar.with(this,null)
    .type(Type.SUCCESS)
    .message("Profile updated successfully!")
    .duration(Duration.SHORT)
    .show();
или вы можете даже использовать свой собственный вид,
View view = getLayoutInflater().inflate(R.layout.custom_view, null);

Snackbar.with(this,null)
        .type(Type.UPDATE)
        .contentView(view, 76)
        .duration(Duration.SHORT)
        .show();
В настоящее время проблема только с пользовательским макетом заключается в том, что нам нужно передать высоту просмотра в dp