Как установить фоновый угол NSString на iOS7
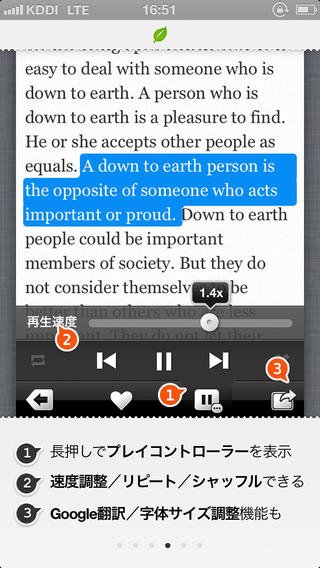
Я хочу установить фоновый угол NSString на iOS7. Но у NSString нет слоя...
Подскажите пожалуйста, как настроить фоновый угол NSString cornerRadius на iOS7?
пример
6 ответов
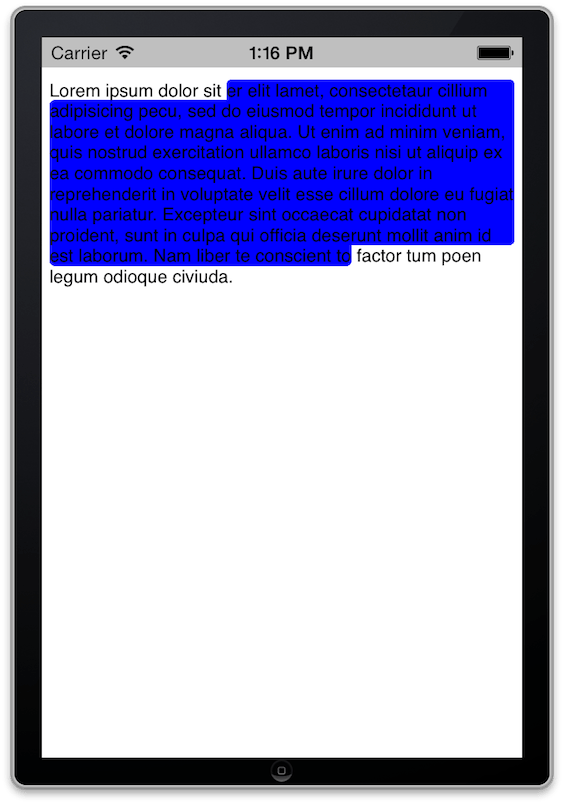
Вы можете сделать это с помощью UITextView с подклассом NSLayoutManagerпереопределить -fillBackgroundRectArray:count:forCharacterRange:color:, Просто небольшой пример, как это:
@implementation ViewController
- (void)viewDidLoad
{
    [super viewDidLoad];

    // setup text handling
    NSTextStorage *textStorage = [[NSTextStorage alloc] initWithString:@"Lorem ipsum dolor sit er elit lamet, consectetaur cillium adipisicing pecu, sed do eiusmod tempor incididunt ut labore et dolore magna aliqua. Ut enim ad minim veniam, quis nostrud exercitation ullamco laboris nisi ut aliquip ex ea commodo consequat. Duis aute irure dolor in reprehenderit in voluptate velit esse cillum dolore eu fugiat nulla pariatur. Excepteur sint occaecat cupidatat non proident, sunt in culpa qui officia deserunt mollit anim id est laborum. Nam liber te conscient to factor tum poen legum odioque civiuda."];

    // use our subclass of NSLayoutManager
    MyLayoutManager *textLayout = [[MyLayoutManager alloc] init];

    [textStorage addLayoutManager:textLayout];

    NSTextContainer *textContainer = [[NSTextContainer alloc] initWithSize:self.view.bounds.size];

    [textLayout addTextContainer:textContainer];
    UITextView *textView = [[UITextView alloc] initWithFrame:CGRectMake(0,20,self.view.bounds.size.width,self.view.bounds.size.height-20)
                                               textContainer:textContainer];
    [self.view addSubview:textView];

    // set some background color to our text
    [textView.textStorage setAttributes:[NSDictionary dictionaryWithObject:[UIColor blueColor] forKey:NSBackgroundColorAttributeName] range:NSMakeRange(22, textView.text.length - 61)];
}
@end

@interface MyLayoutManager : NSLayoutManager
@end

- (void)fillBackgroundRectArray:(const CGRect *)rectArray count:(NSUInteger)rectCount forCharacterRange:(NSRange)charRange color:(UIColor *)color
{
     CGFloat halfLineWidth = 4.; // change this to change corners radius

     CGMutablePathRef path = CGPathCreateMutable();

     if (rectCount == 1
         || (rectCount == 2 && (CGRectGetMaxX(rectArray[1]) < CGRectGetMinX(rectArray[0])))
        )
    {
        // 1 rect or 2 rects without edges in contact

         CGPathAddRect(path, NULL, CGRectInset(rectArray[0], halfLineWidth, halfLineWidth));
         if (rectCount == 2)
            CGPathAddRect(path, NULL, CGRectInset(rectArray[1], halfLineWidth, halfLineWidth));
    }
     else
    {
        // 2 or 3 rects
         NSUInteger lastRect = rectCount - 1;

         CGPathMoveToPoint(path, NULL, CGRectGetMinX(rectArray[0]) + halfLineWidth, CGRectGetMaxY(rectArray[0]) + halfLineWidth);

         CGPathAddLineToPoint(path, NULL, CGRectGetMinX(rectArray[0]) + halfLineWidth, CGRectGetMinY(rectArray[0]) + halfLineWidth);
         CGPathAddLineToPoint(path, NULL, CGRectGetMaxX(rectArray[0]) - halfLineWidth, CGRectGetMinY(rectArray[0]) + halfLineWidth);

         CGPathAddLineToPoint(path, NULL, CGRectGetMaxX(rectArray[0]) - halfLineWidth, CGRectGetMinY(rectArray[lastRect]) - halfLineWidth);
         CGPathAddLineToPoint(path, NULL, CGRectGetMaxX(rectArray[lastRect]) - halfLineWidth, CGRectGetMinY(rectArray[lastRect]) - halfLineWidth);

         CGPathAddLineToPoint(path, NULL, CGRectGetMaxX(rectArray[lastRect]) - halfLineWidth, CGRectGetMaxY(rectArray[lastRect]) - halfLineWidth);
         CGPathAddLineToPoint(path, NULL, CGRectGetMinX(rectArray[lastRect]) + halfLineWidth, CGRectGetMaxY(rectArray[lastRect]) - halfLineWidth);

         CGPathAddLineToPoint(path, NULL, CGRectGetMinX(rectArray[lastRect]) + halfLineWidth, CGRectGetMaxY(rectArray[0]) + halfLineWidth);

         CGPathCloseSubpath(path);
    }

    [color set]; // set fill and stroke color

     CGContextRef ctx = UIGraphicsGetCurrentContext();
     CGContextSetLineWidth(ctx, halfLineWidth * 2.);
     CGContextSetLineJoin(ctx, kCGLineJoinRound);

     CGContextAddPath(ctx, path);
     CGPathRelease(path);

     CGContextDrawPath(ctx, kCGPathFillStroke);
}
@end

Обновление до Swift 3.1 Код Эммануила в swift обновлен до версии 3.1
class TagLayoutManager: NSLayoutManager {

override func fillBackgroundRectArray(_ rectArray: UnsafePointer<CGRect>, count rectCount: Int, forCharacterRange charRange: NSRange, color: UIColor) {

    let cornerRadius:CGFloat = 5
    let path = CGMutablePath.init()


    if rectCount == 1 || (rectCount == 2 && (rectArray[1].maxX < rectArray[0].maxX)) {

        path.addRect(rectArray[0].insetBy(dx: cornerRadius, dy: cornerRadius))

        if rectCount == 2 {
            path.addRect(rectArray[1].insetBy(dx: cornerRadius, dy: cornerRadius))
        }

    } else {

        let lastRect = rectCount - 1

        path.move(to: CGPoint(x: rectArray[0].minX + cornerRadius, y: rectArray[0].maxY + cornerRadius))

        path.addLine(to: CGPoint(x: rectArray[0].minX + cornerRadius, y: rectArray[0].minY + cornerRadius))
        path.addLine(to: CGPoint(x: rectArray[0].maxX - cornerRadius, y: rectArray[0].minY + cornerRadius))

        path.addLine(to: CGPoint(x: rectArray[0].maxX - cornerRadius, y: rectArray[lastRect].minY - cornerRadius))
        path.addLine(to: CGPoint(x: rectArray[lastRect].maxX - cornerRadius, y: rectArray[lastRect].minY - cornerRadius))

        path.addLine(to: CGPoint(x: rectArray[lastRect].maxX - cornerRadius, y: rectArray[lastRect].maxY - cornerRadius))
        path.addLine(to: CGPoint(x: rectArray[lastRect].minX + cornerRadius, y: rectArray[lastRect].maxY - cornerRadius))

        path.addLine(to: CGPoint(x: rectArray[lastRect].minX + cornerRadius, y: rectArray[0].maxY + cornerRadius))

        path.closeSubpath()

    }

    color.set()

    let ctx = UIGraphicsGetCurrentContext()
    ctx!.setLineWidth(cornerRadius * 2.0)
    ctx!.setLineJoin(.round)

    ctx!.setAllowsAntialiasing(true)
    ctx!.setShouldAntialias(true)

    ctx!.addPath(path)
    ctx!.drawPath(using: .fillStroke)
}
}
Код Эммануила в быстром:
class TagLayoutManager : NSLayoutManager {

override func fillBackgroundRectArray(rectArray: UnsafePointer<CGRect>, count rectCount: Int, forCharacterRange charRange: NSRange, color: UIColor) {

    let cornerRadius:CGFloat = 3.0
    let path = CGPathCreateMutable()

    if rectCount == 1 || (rectCount == 2 && (CGRectGetMaxX(rectArray[1]) < CGRectGetMaxX(rectArray[0]))) {

        CGPathAddRect(path, nil, CGRectInset(rectArray[0], cornerRadius, cornerRadius))
        if rectCount == 2 {
            CGPathAddRect(path, nil, CGRectInset(rectArray[1], cornerRadius, cornerRadius))
        }

    } else {
            let lastRect = rectCount - 1

            CGPathMoveToPoint(path, nil, CGRectGetMinX(rectArray[0]) + cornerRadius, CGRectGetMaxY(rectArray[0]) + cornerRadius);

            CGPathAddLineToPoint(path, nil, CGRectGetMinX(rectArray[0]) + cornerRadius, CGRectGetMinY(rectArray[0]) + cornerRadius);
            CGPathAddLineToPoint(path, nil, CGRectGetMaxX(rectArray[0]) - cornerRadius, CGRectGetMinY(rectArray[0]) + cornerRadius);

            CGPathAddLineToPoint(path, nil, CGRectGetMaxX(rectArray[0]) - cornerRadius, CGRectGetMinY(rectArray[lastRect]) - cornerRadius);
            CGPathAddLineToPoint(path, nil, CGRectGetMaxX(rectArray[lastRect]) - cornerRadius, CGRectGetMinY(rectArray[lastRect]) - cornerRadius);

            CGPathAddLineToPoint(path, nil, CGRectGetMaxX(rectArray[lastRect]) - cornerRadius, CGRectGetMaxY(rectArray[lastRect]) - cornerRadius);
            CGPathAddLineToPoint(path, nil, CGRectGetMinX(rectArray[lastRect]) + cornerRadius, CGRectGetMaxY(rectArray[lastRect]) - cornerRadius);

            CGPathAddLineToPoint(path, nil, CGRectGetMinX(rectArray[lastRect]) + cornerRadius, CGRectGetMaxY(rectArray[0]) + cornerRadius);

            CGPathCloseSubpath(path);
        }

        color.set()

        let ctx = UIGraphicsGetCurrentContext()
        CGContextSetLineWidth(ctx, cornerRadius * 2.0)
        CGContextSetLineJoin(ctx, .Round)

        CGContextAddPath(ctx, path)

        CGContextDrawPath(ctx, .FillStroke)
    }

}
В качестве дополнения к решению @Emmanuel, добавив
CGContextSetAllowsAntialiasing(ctx, YES);
CGContextSetShouldAntialias(ctx, YES);
заставит это выглядеть намного лучше.
У NSString этого нет. NSAttributedString имеет свойство backgroundColor, которое можно использовать, но без пользовательского рендеринга вы не сможете установить угловой радиус для выделения фрагментов текста.
Так что вам нужно написать пользовательский UIView для визуализации вашего текста
NSString просто определяет строку текста. Он не определяет свойства того, как он отображается. Для отображения текста на экране, как правило, UILabel или же UITextView используется. Однако для поведения выбора, которое вы демонстрируете в своем примере, вам нужно сделать этот рисунок самостоятельно. Также он меняет цвет текста выделенного текста, поэтому вам придется справиться с этим самостоятельно.
Если вы создали кастом UIView это позволяет вам нарисовать синюю область выбора, вы можете поместить это за UILabelи вы могли бы использовать NSAttributedString установить текст метки, где "выделенный" текст будет белым, а не черным. Это, наверное, самый простой способ сделать это.