Как изменить оттенок UIIMAGE, имеющего прозрачную область?
В настоящее время я использую следующий код для изменения оттенка:
  CGSize imageSize = [imageView.image size];
  CGRect imageExtent = CGRectMake(0,0,imageSize.width,imageSize.height);

  // Create a context containing the image.
  UIGraphicsBeginImageContext(imageSize);
  CGContextRef context = UIGraphicsGetCurrentContext();
  [imageView.image drawAtPoint:CGPointMake(0, 0)];

  // Draw the hue on top of the image.
  CGContextSetBlendMode(context, kCGBlendModeHue);
  [color set];

  UIBezierPath *imagePath = [UIBezierPath bezierPathWithRect:imageExtent];
  [imagePath fill];

  // Retrieve the new image.
  UIImage *result = UIGraphicsGetImageFromCurrentImageContext();
  imageView.image= result;

  UIGraphicsEndImageContext();
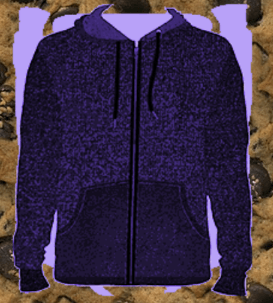
Этот код работает нормально, единственная проблема в том, что он также устанавливает цвет прозрачных частей. Можно ли избежать применения оттенка к этой прозрачной области UIImage?
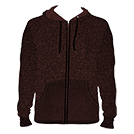
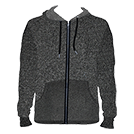
Прилагаются следующие два изображения для справки:


Заранее спасибо?
Выход 
3 ответа
Решение
Примените маску из изображения перед добавлением цвета.
CGSize imageSize = [imageView.image size];
CGRect imageExtent = CGRectMake(0,0,imageSize.width,imageSize.height);

// Create a context containing the image.
UIGraphicsBeginImageContext(imageSize);
CGContextRef context = UIGraphicsGetCurrentContext();
[imageView.image drawAtPoint:CGPointMake(0, 0)];

// Setup a clip region using the image
CGContextSaveGState(context);
CGContextClipToMask(context, imageExtent, imageView.image.CGImage);

[color set];
CGContextFillRect(context, imageExtent);

// Draw the hue on top of the image.
CGContextSetBlendMode(context, kCGBlendModeHue);
[color set];

UIBezierPath *imagePath = [UIBezierPath bezierPathWithRect:imageExtent];
[imagePath fill];

CGContextRestoreGState(context); // remove clip region

// Retrieve the new image.
UIImage *result = UIGraphicsGetImageFromCurrentImageContext();
imageView.image= result;

UIGraphicsEndImageContext();
Я использовал Core Image, чтобы сделать то, что вы пытаетесь достичь. Примечание: это в Swift, но вы должны понять суть.
    var hueFilter = CIFilter(name: "CIHueAdjust", withInputParameters: ["inputAngle" : M_2_PI])
    let imageRef = UIImage(named: "Maggie").CGImage
    let coreImage = CIImage(CGImage: imageRef)
    hueFilter.setValue(coreImage, forKey: kCIInputImageKey)
    maggieView.image = UIImage(CIImage: hueFilter.outputImage)
Одно замечание: inputAngle выполняется в радианах согласно этому сообщению SO.
Этот код работал для меня.
- (UIImage*)imageWithImage:(UIImageView*)source colorValue:(CGFloat)hue {
    CGSize imageSize = [source.image size];
    CGRect imageExtent = CGRectMake(0,0,imageSize.width,imageSize.height);

    // Create a context containing the image.
    UIGraphicsBeginImageContext(imageSize);
    CGContextRef context = UIGraphicsGetCurrentContext();
    [source.image drawAtPoint:CGPointMake(0, 0)];

    // Setup a clip region using the image
    CGContextSaveGState(context);
    CGContextClipToMask(context, source.bounds, source.image.CGImage);

    self.imageColor = [UIColor colorWithHue:hue saturation:1.0 brightness:1 alpha:1.0];
    [self.imageColor set];
    CGContextFillRect(context, source.bounds);

    // Draw the hue on top of the image.
    CGContextSetBlendMode(context, kCGBlendModeHue);
    [self.imageColor set];

    UIBezierPath *imagePath = [UIBezierPath bezierPathWithRect:imageExtent];
    [imagePath fill];

    CGContextRestoreGState(context); // remove clip region

    // Retrieve the new image.
    UIImage *result = UIGraphicsGetImageFromCurrentImageContext();
    UIGraphicsEndImageContext();

    return result;
}