Как мне создать обработчик событий для JLabel?
Я хочу сделать так, чтобы, если я нажму на JLabel, ярлык станет новым ярлыком с другим изображением, прикрепленным к нему.
Пока мой код выглядит так:
public class Picture extends JFrame  {

    private ImageIcon _image1;
    private ImageIcon _image2;
    private JLabel _mainLabel;
    private JLabel _mainLabel2;

    public Picture(){
        _image1 = new ImageIcon("src/classes/picture1.jpg");
        _image2 = new ImageIcon("src/classes/picture2.jpg");
        _mainLabel = new JLabel(_image1);
        _mainLabel2 = new JLabel(_image2);

        add(_mainLabel);

        pack();
        setVisible(true);
        setDefaultCloseOperation(JFrame.EXIT_ON_CLOSE);
    }
}
4 ответа
Добавьте mouseListener к вашему JLable и в mouseClicked(mouseEvent) метод изменения значка JLabel.
Пример кода может быть:
  jLabel.addMouseListener(new MouseAdapter() {
        @Override
        public void mouseClicked(MouseEvent e) {
            jLabel.setIcon(newIcon);
        }
    });
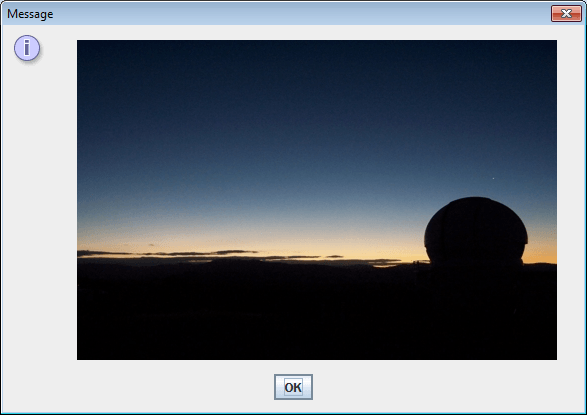
Попробуйте использовать JToggleButton вместо. Нет необходимости MouseListenerи реагирует на ввод с клавиатуры.

import javax.swing.*;
import javax.imageio.ImageIO;
import java.net.URL;
import java.awt.Image;

class ToggleImage {
    public static void main(String[] args) throws Exception {
        URL url1 = new URL("http://pscode.org/media/stromlo1.jpg");
        URL url2 = new URL("http://pscode.org/media/stromlo2.jpg");

        final Image image1 = ImageIO.read(url1);
        final Image image2 = ImageIO.read(url2);
        SwingUtilities.invokeLater(new Runnable() {
            public void run() {
                JToggleButton button = new JToggleButton();
                button.setIcon(new ImageIcon(image1));
                button.setSelectedIcon(new ImageIcon(image2));
                button.setBorderPainted(false);
                button.setContentAreaFilled(false);

                JOptionPane.showMessageDialog(null, button);
            }
        });
    }
}
Старый код - прежде чем я понял, что это было об изображениях
Я хочу сделать так, чтобы, если я нажму на JLabel
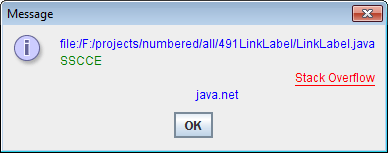
А как насчет людей, которым бросают вызов мыши? Использовать JTextField вместо. Перейдите на любую ссылку и нажмите Enter, чтобы активировать.

import java.awt.Desktop;
import java.awt.Color;
import java.awt.Cursor;
import java.awt.BorderLayout;
import java.awt.GridLayout;

import java.awt.event.*;

import javax.swing.JTextField;
import javax.swing.JPanel;
import javax.swing.JOptionPane;
import javax.swing.SwingUtilities;

import javax.swing.border.MatteBorder;
import javax.swing.border.Border;

import java.net.URI;
import java.io.File;

/**
A Java 1.6+ LinkLabel that uses the Desktop class for opening
the document of interest.

The Desktop.browse(URI) method can be invoked from applications,
applets and apps. launched using Java Webstart.  In the latter
two cases, the usual fall-back methods are used for sandboxed apps
(see the JavaDocs for further details).

While called a 'label', this class actually extends JTextField,
to easily allow the component to become focusable using keyboard
navigation.

To successfully browse to a URI for a local File, the file name
must be constructed using a canonical path.

@author Andrew Thompson
@version 2008/08/23
*/
public class LinkLabel
    // we extend a JTextField, to get a focusable component
    extends JTextField
    implements MouseListener, FocusListener, ActionListener {

    /** The target or href of this link. */
    private URI target;

    public Color standardColor = new Color(0,0,255);
    public Color hoverColor = new Color(255,0,0);
    public Color activeColor = new Color(128,0,128);
    public Color transparent = new Color(0,0,0,0);

    public boolean underlineVisible = true;

    private Border activeBorder;
    private Border hoverBorder;
    private Border standardBorder;

    /** Construct a LinkLabel that points to the given target.
    The URI will be used as the link text.*/
    public LinkLabel(URI target) {
        this( target, target.toString() );
    }

    /** Construct a LinkLabel that points to the given target,
    and displays the text to the user. */
    public LinkLabel(URI target, String text) {
        super(text);
        this.target = target;
    }

    /* Set the active color for this link (default is purple). */
    public void setActiveColor(Color active) {
        activeColor = active;
    }

    /* Set the hover/focused color for this link (default is red). */
    public void setHoverColor(Color hover) {
        hoverColor = hover;
    }

    /* Set the standard (non-focused, non-active) color for this
    link (default is blue). */
    public void setStandardColor(Color standard) {
        standardColor = standard;
    }

    /** Determines whether the */
    public void setUnderlineVisible(boolean underlineVisible) {
        this.underlineVisible = underlineVisible;
    }

    /* Add the listeners, configure the field to look and act
    like a link. */
    public void init() {
        this.addMouseListener(this);
        this.addFocusListener(this);
        this.addActionListener(this);
        setToolTipText(target.toString());

        if (underlineVisible) {
            activeBorder = new MatteBorder(0,0,1,0,activeColor);
            hoverBorder = new MatteBorder(0,0,1,0,hoverColor);
            standardBorder = new MatteBorder(0,0,1,0,transparent);
        } else {
            activeBorder = new MatteBorder(0,0,0,0,activeColor);
            hoverBorder = new MatteBorder(0,0,0,0,hoverColor);
            standardBorder = new MatteBorder(0,0,0,0,transparent);
        }

        // make it appear like a label/link
        setEditable(false);
        setForeground(standardColor);
        setBorder(standardBorder);
        setCursor( new Cursor(Cursor.HAND_CURSOR) );
    }

    /** Browse to the target URI using the Desktop.browse(URI)
    method.  For visual indication, change to the active color
    at method start, and return to the standard color once complete.
    This is usually so fast that the active color does not appear,
    but it will take longer if there is a problem finding/loading
    the browser or URI (e.g. for a File). */
    public void browse() {
        setForeground(activeColor);
        setBorder(activeBorder);
        try {
            Desktop.getDesktop().browse(target);
        } catch(Exception e) {
            e.printStackTrace();
        }
        setForeground(standardColor);
        setBorder(standardBorder);
    }

    /** Browse to the target. */
    public void actionPerformed(ActionEvent ae) {
        browse();
    }

    /** Browse to the target. */
    public void mouseClicked(MouseEvent me) {
        browse();
    }

    /** Set the color to the hover color. */
    public void mouseEntered(MouseEvent me) {
        setForeground(hoverColor);
        setBorder(hoverBorder);
    }

    /** Set the color to the standard color. */
    public void mouseExited(MouseEvent me) {
        setForeground(standardColor);
        setBorder(standardBorder);
    }

    public void mouseReleased(MouseEvent me) {}

    public void mousePressed(MouseEvent me) {}

    /** Set the color to the standard color. */
    public void focusLost(FocusEvent fe) {
        setForeground(standardColor);
        setBorder(standardBorder);
    }

    /** Set the color to the hover color. */
    public void focusGained(FocusEvent fe) {
        setForeground(hoverColor);
        setBorder(hoverBorder);
    }

    public static void main(String[] args) {
        SwingUtilities.invokeLater(new Runnable() {
            public void run() {
                try {
                    File f = new File(".","LinkLabel.java");

                    /* Filename must be constructed with a canonical path in
                    order to successfully use Desktop.browse(URI)! */
                    f = new File(f.getCanonicalPath());

                    JPanel p = new JPanel(new GridLayout(0,1));

                    URI uriFile = f.toURI();

                    LinkLabel linkLabelFile = new LinkLabel(uriFile);
                    linkLabelFile.init();
                    p.add(linkLabelFile);

                    LinkLabel linkLabelWeb = new LinkLabel(
                        new URI("http://pscode.org/sscce.html"),
                        "SSCCE");
                    linkLabelWeb.setStandardColor(new Color(0,128,0));
                    linkLabelWeb.setHoverColor(new Color(222,128,0));
                    linkLabelWeb.init();

                    /* This shows a quirk of the LinkLabel class, the
                    size of the text field needs to be constrained to
                    get the underline to appear properly. */
                    p.add(linkLabelWeb);

                    LinkLabel linkLabelConstrain = new LinkLabel(
                        new URI("http://stackru.com/"),
                        "Stack Overflow");
                    linkLabelConstrain.init();
                    /* ..and this shows one way to constrain the size
                    (appropriate for this layout).
                    Similar tricks can be used to ensure the underline does
                    not drop too far *below* the link (think BorderLayout
                    NORTH/SOUTH).
                    The same technique can also be nested further to produce
                    a NORTH+EAST packing (for example). */
                    JPanel labelConstrain = new JPanel(new BorderLayout());
                    labelConstrain.add( linkLabelConstrain, BorderLayout.EAST );
                    p.add(labelConstrain);

                    LinkLabel linkLabelNoUnderline = new LinkLabel(
                        new URI("http://java.net/"),
                        "java.net");
                    // another way to deal with the underline is to remove it
                    linkLabelNoUnderline.setUnderlineVisible(false);
                    // we can use the methods inherited from JTextField
                    linkLabelNoUnderline.
                        setHorizontalAlignment(JTextField.CENTER);
                    linkLabelNoUnderline.init();
                    p.add(linkLabelNoUnderline);

                    JOptionPane.showMessageDialog( null, p );
                } catch(Exception e) {
                    e.printStackTrace();
                }
            }
        });
    }
}
Вы не можете просто добавить actionListener, вам нужно реализовать MouseListener, что-то вроде этого.
Если вы ищете Customized JLable с другим шрифтом, размером и слушателями действий мыши, просто пройдите через это.
Это полностью протестировано со следующими задачами
1.Jabel с изображением и текстом.
2. Джабель с мышью.
3. При наведении курсора с заменой изображения и текста.
public class CustomJLabel extends JLabel implements MouseListener
{
    private Color color;
    private int width=0;
    private int height=0;
    private ImageIcon normal_icon;
    private ImageIcon hover_icon;
    private ImageIcon icon_Label;
    JLabel label;
    private boolean isMatch;
    public CustomJLabel(ImageIcon icon,ImageIcon icon1, String text, int i, int j) {


           this.normal_icon=icon;
           this.hover_icon=icon1;
           this.icon_Label=normal_icon;
           setFont(new Font("Tw Cen MT", Font.TYPE1_FONT, 16));
           setForeground(Color.WHITE);
           setOpaque(false);
           setHorizontalAlignment( SwingConstants.CENTER );
           setText(text);
           addMouseListener(this) ;


        }


    public CustomJLabel(ImageIcon icon,ImageIcon icon1, int i, int j) {


       this.normal_icon=icon;
       this.hover_icon=icon1;
       this.icon_Label=normal_icon;
       setText("");
       setVerticalAlignment( SwingConstants.CENTER);
       setForeground(Color.WHITE);
       setOpaque(false);
       addMouseListener(this) ;


    }

    public CustomJLabel(ImageIcon icon,ImageIcon icon1, String text, int i, int j,Font f) {


       this.normal_icon=icon;
       this.hover_icon=icon1;
       this.icon_Label=normal_icon;
       this.width=i;
       this.height=j;

           setFont(f);
           setForeground(Color.WHITE);
           setOpaque(false);
           setText(text);
           setVerticalAlignment( SwingConstants.TOP);

           addMouseListener(this) ;
    }


    public int getIconWidth(){

        return width;
    }

    public int getIconHeight(){

        return height;
    }


    @Override
    public void paintComponent(Graphics g) {

        if(this.width !=0 && this.height!=0){

         super.paintComponent(g);
         icon_Label.paintIcon(this, g, this.width, this.height);


        }
        else{

            g.drawImage(icon_Label.getImage(),0,0, null);
            super.paintComponent(g);
        }


          }


    @Override
    public void mouseClicked(MouseEvent arg0) {

        // TODO Auto-generated method stub

    }


    @Override
    public void mouseEntered(MouseEvent me) {
        // TODO Auto-generated method stub

        if(hover_icon!=null){

         this.icon_Label=hover_icon;
         this.repaint();
         this.revalidate();

        }
        else{

             this.icon_Label=normal_icon;
             this.repaint();
             this.revalidate();

        }
    }


    @Override
    public void mouseExited(MouseEvent arg0) {
        // TODO Auto-generated method stub
        if(normal_icon!=null){

         this.icon_Label=normal_icon;
         this.repaint();
         this.revalidate();

        }
        else{

             this.icon_Label=hover_icon;
             this.repaint();
             this.revalidate();
        }
    }


    @Override
    public void mousePressed(MouseEvent arg0) {
        // TODO Auto-generated method stub

    }


    @Override
    public void mouseReleased(MouseEvent arg0) {
        // TODO Auto-generated method stub

    }


}
// Здесь Использование кастомного JLabel
JLabel customLabel;
customLabel = новая CustomLabel (imageicon1, imageicon2, text, 0,0)
//Вот
Imageiocn1= Начальная иконка для JLabel.
Imageicon2 = Onhover изображение для JLabel.
Text = Некоторая строка для настройки имени для JLabel.