Как добавить изображение и текст в UITextView в IOS?
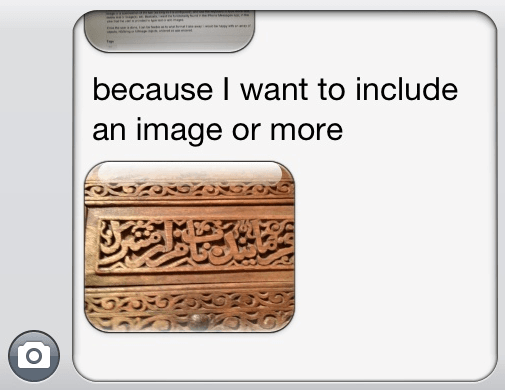
Я хочу добавить текст и изображение в UITextView. Текстовое представление должно быть расширено согласно длине текста и изображения. Короче говоря, я хочу, чтобы при захвате изображения с камеры или при выборе из галереи оно отображалось в UITextView, и я также должен иметь возможность добавить текст с этим изображением, аналогичным Facebook. Я также прикрепляю изображение, которое как будет выглядеть UITextView.
10 ответов
Это абсолютно возможно сейчас, используя
+ (NSAttributedString *)attributedStringWithAttachment:(NSTextAttachment *)attachment
Смотрите Apple документы здесь
И этот пример взят из этого другого ответа:
UITextView *textView = [[UITextView alloc] initWithFrame:CGRectMake(0,0,140,140)];
NSMutableAttributedString *attributedString = [[NSMutableAttributedString alloc] initWithString:@"before after"];
NSTextAttachment *textAttachment = [[NSTextAttachment alloc] init];
textAttachment.image = [UIImage imageNamed:@"sample_image.jpg"];

CGFloat oldWidth = textAttachment.image.size.width;

//I'm subtracting 10px to make the image display nicely, accounting
//for the padding inside the textView
CGFloat scaleFactor = oldWidth / (textView.frame.size.width - 10);
textAttachment.image = [UIImage imageWithCGImage:textAttachment.image.CGImage scale:scaleFactor orientation:UIImageOrientationUp];
NSAttributedString *attrStringWithImage = [NSAttributedString attributedStringWithAttachment:textAttachment];
[attributedString replaceCharactersInRange:NSMakeRange(6, 1) withAttributedString:attrStringWithImage];
textView.attributedText = attributedString;
Используя приведенный выше код, вы получите изображение с текстом внутри UITextView на iOS 7+. Вы можете / показать стиль приписанного текста по своему усмотрению и, возможно, установить ширину изображения, чтобы убедиться, что оно вписывается в ваш textView (а также установить собственное соотношение сторон / предпочтения масштаба)
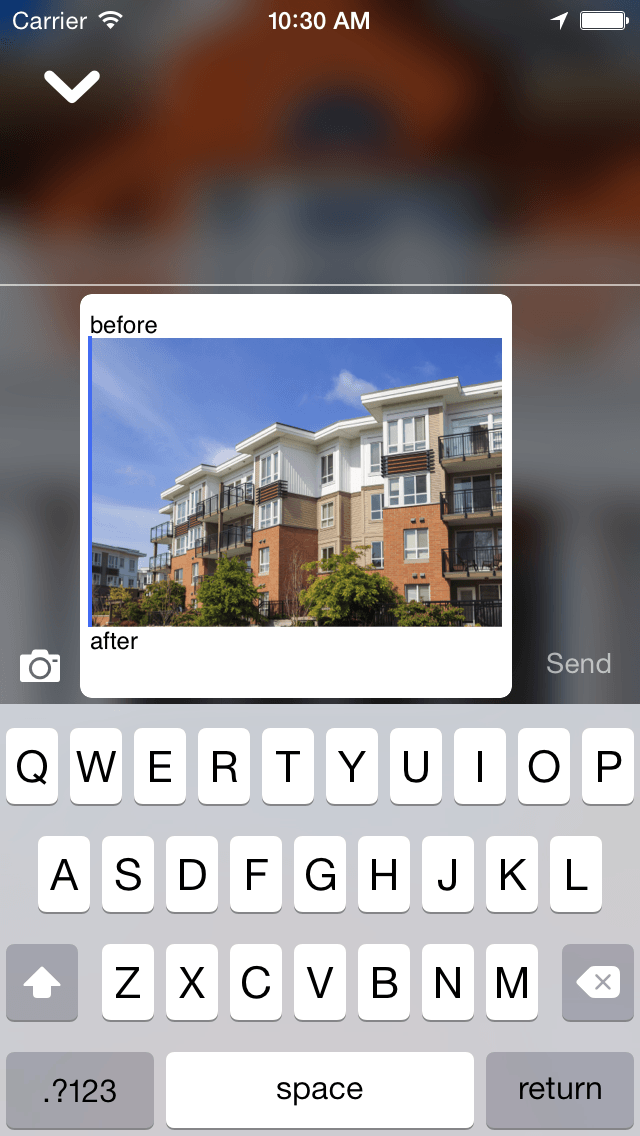
Вот быстрое тестовое изображение:
Спасибо за ваш код, это действительно сработало. Я делаю код в Swift, поэтому я хотел бы поделиться версией Swift вашего кода. Я проверил этот код работает тоже.
let textView = UITextView(frame: CGRectMake(50, 50, 200, 300))
let attributedString = NSMutableAttributedString(string: "before after")
let textAttachment = NSTextAttachment()
textAttachment.image = UIImage(named: "sample_image.jpg")!

let oldWidth = textAttachment.image!.size.width;

//I'm subtracting 10px to make the image display nicely, accounting
//for the padding inside the textView
let scaleFactor = oldWidth / (textView.frame.size.width - 10);
textAttachment.image = UIImage(CGImage: textAttachment.image!.CGImage, scale: scaleFactor, orientation: .Up)
var attrStringWithImage = NSAttributedString(attachment: textAttachment)
attributedString.replaceCharactersInRange(NSMakeRange(6, 1), withAttributedString: attrStringWithImage)
textView.attributedText = attributedString;
self.view.addSubview(textView)
Код для Swift 3.0
var attributedString :NSMutableAttributedString!
attributedString = NSMutableAttributedString(attributedString:txtBody.attributedText)
let textAttachment = NSTextAttachment()
textAttachment.image = image

let oldWidth = textAttachment.image!.size.width;

//I'm subtracting 10px to make the image display nicely, accounting
//for the padding inside the textView

let scaleFactor = oldWidth / (txtBody.frame.size.width - 10);
textAttachment.image = UIImage(cgImage: textAttachment.image!.cgImage!, scale: scaleFactor, orientation: .up)
let attrStringWithImage = NSAttributedString(attachment: textAttachment)
attributedString.append(attrStringWithImage)
txtBody.attributedText = attributedString;
Если вы просто хотите поместить изображение в конце, вы можете использовать
//create your UIImage
let image = UIImage(named: change_arr[indexPath.row]);
//create and NSTextAttachment and add your image to it.
let attachment = NSTextAttachment()
attachment.image = image
//put your NSTextAttachment into and attributedString
let attString = NSAttributedString(attachment: attachment)
//add this attributed string to the current position.
textView.textStorage.insertAttributedString(attString, atIndex: textView.selectedRange.location)
Проверить этот ответ
Если вы хотите получить изображение с камеры, вы можете попробовать мой код ниже: (Swift 3.0)
func imagePickerController(_ picker: UIImagePickerController, didFinishPickingMediaWithInfo info: [String : Any]) {
    let image = info[UIImagePickerControllerOriginalImage] as! UIImage
    //create and NSTextAttachment and add your image to it.
    let attachment = NSTextAttachment()
    attachment.image = image
    //calculate new size.  (-20 because I want to have a litle space on the right of picture)
    let newImageWidth = (textView.bounds.size.width - 20 )
    let scale = newImageWidth/image.size.width
    let newImageHeight = image.size.height * scale
    //resize this
    attachment.bounds = CGRect.init(x: 0, y: 0, width: newImageWidth, height: newImageHeight)
    //put your NSTextAttachment into and attributedString
    let attString = NSAttributedString(attachment: attachment)
    //add this attributed string to the current position.
    textView.textStorage.insert(attString, at: textView.selectedRange.location)
    picker.dismiss(animated: true, completion: nil)
}
Многие люди делают это намного сложнее, чем нужно. Во-первых, добавьте ваше изображение в каталог в нужном размере:
Затем создайте NSAttributedString в коде:
// Creates the logo image
let twitterLogoImage    = NSTextAttachment()
twitterLogoImage.image  = UIImage(named: "TwitterLogo")
let twitterLogo         = NSAttributedString(attachment: twitterLogoImage)
Затем добавьте NSAttributedString на то, что вы хотите:
// Create the mutable attributed string
let text = NSMutableAttributedString(string: "")

/* Code above, creating the logo */
/*    More attributed strings    */

// Add the logo to the whole text
text.append(twitterLogo)
textView.attributedText = text
Или же:
textView.attributedText = twitterLogo
let htmlString = "<html><body><h1>This is the title</h1><p>This is the first paragraph.</p><img src=\"https://miro.medium.com/max/9216/1*QzxcfBpKn5oNM09-vxG_Tw.jpeg\" width=\"360\" height=\"240\"><p>This is the second paragraph.</p><p>This is the third paragraph.</p><p>This is the fourth paragraph.</p><p>This is the last paragraph.</p></body></html>"
Используйте это расширение строки:
extension String {
    func convertToAttributedFromHTML() -> NSAttributedString? {
        var attributedText: NSAttributedString?
        let options: [NSAttributedString.DocumentReadingOptionKey: Any] = [.documentType: NSAttributedString.DocumentType.html, .characterEncoding: String.Encoding.utf8.rawValue]
        if let data = data(using: .unicode, allowLossyConversion: true), let attrStr = try? NSAttributedString(data: data, options: options, documentAttributes: nil) {
            attributedText = attrStr
        }
        return attributedText
    }
}
Затем установите textView:
textView.attributedText = htmlString.convertToAttributedFromHTML()
Если вы хотите добавить простое изображение в текстовое представление из галереи или камеры в качестве вложения, следует использовать этот метод:
         func insertImage(_ image:UIImage) {
    let attachment = NSTextAttachment()
    attachment.image = image
    attachment.setImageHeight(height: 200)
    let attString = NSAttributedString(attachment: attachment)
    /// at is current cursor position
    self.descriptionTextView.textStorage.insert(attString, at: self.descriptionTextView.selectedRange.location)
    descriptionTextView.font = UIFont(name: UIFont.avenirNextRegular, size: 17)
    descriptionTextView.textColor = .white
}
Если вы хотите добавить изображение по ссылке, вам нужно сделать это, в строке может быть несколько ссылок, поэтому это будет достигнуто с помощью этих методов.
Проверяет URL-адреса из существующей строки, чтобы мы могли загрузить изображение и показать его как вложение.
      func checkForUrls(text: String) -> [NSTextCheckingResult] {
    let types: NSTextCheckingResult.CheckingType = .link

    do {
        let detector = try NSDataDetector(types: types.rawValue)

        let matches = detector.matches(in: text, options: .reportCompletion, range: NSRange(location: 0, length: text.count))
        return matches
     //   return matches.compactMap({$0.url})
    } catch let error {
        debugPrint(error.localizedDescription)
    }

    return []
}
// Рекурсивный вызов функции после успешной загрузки
      func convertToAttachment() {
    if imageURLResultsFromStr.count > 0 {
        imageTOAttributedText(imageURLResultsFromStr.first?.url, imageURLResultsFromStr.first?.range)
    }
}

**// MARK: Server URL to Image conversion to show**
func imageTOAttributedText(_ url:URL?,_ range:NSRange?) {
    guard let url = url, let range = range else { return }
    let imgView = UIImageView()

   imgView.kf.setImage(with: url, completionHandler: { result in
        switch result {
        case .success(var data):
            let attachment = NSTextAttachment()
            data.image.accessibilityIdentifier  = self.recentlyUploadedImage
            attachment.image = data.image
           // attachment.fileType = self.recentlyUploadedImage
            attachment.setImageHeight(height: 200)

            /// This will help to remove existing url from server which we have sent as url
            /// Start
            let mutStr = self.descriptionTextView.attributedText.mutableCopy() as! NSMutableAttributedString
            let range = (mutStr.string as NSString).range(of: "\n\(url.absoluteString)\n")
            mutStr.deleteCharacters(in: range)
            self.descriptionTextView.attributedText = mutStr
                //End

            /// Add image as attachment downloaded from url
            let attString = NSAttributedString(attachment: attachment)
            self.descriptionTextView.textStorage.insert(attString, at: range.location)
            /// Recursivly calls to check how many urls we have in string to avoid wrong location insertion
            /// We need to re-calculate new string from server after removing url string and add image as attachment
            self.imageURLResultsFromStr.remove(at: 0)
            self.imageURLResultsFromStr =  self.checkForUrls(text: self.descriptionTextView.text)
            self.convertToAttachment()
        case .failure(let error):
            print(error)
        }
    })
}
// Теперь вызовите эту функцию и инициализируйте ее из строки сервера, вызовите ее из viewdidload или из ответа API
        func initialise() {
    self.descriptionTextView.text = ..string from server
    self.imageURLResultsFromStr =  self.checkForUrls(text:string from server)
    convertToAttachment()
      }
var imageURLResultsFromStr:[NSTextCheckingResult] = []
Вы можете обратиться к тому, как работает MLLabel. Главный идеал - NSTextAttachment
- Создать ImageAttachment расширяет NSTextAttachment -> переопределить - (обнуляемый UIImage *)imageForBounds:(CGRect)imageBounds textContainer:(обнуляемый NSTextContainer *)textContainer characterIndex:(NSUInteger)charIndex для возврата размера изображения, как вы хотите.
- Создайте NSAttributedString с помощью [NSAttributedString attribuStStWWithAttachment:ImageAttachment]
- Создайте NSMutableAttributedString и добавьте атрибутивную строку ImageAttachment, используя - (void)replaceCharactersInRange:(NSRange)range withAttributedString:(NSAttributedString *)attrString;
- Результат: у вас есть NSMutableAttributedString, содержащая ваше изображение, и вы установили для него textView.attributedText
Образец: ЗДЕСЬ
Пожалуйста, попробуйте использовать placeholderTextView для простого ввода с поддержкой иконок-заполнителей.
@IBOutlet weak var tvMessage: PlaceholderTextView!

let icon: NSTextAttachment = NSTextAttachment()
icon.image = UIImage(named: "paper-plane")
let iconString = NSMutableAttributedString(attributedString: NSAttributedString(attachment: icon))

tvMessage.icon = icon

let textColor = UIColor.gray
let lightFont = UIFont(name: "Helvetica-Light", size: tvMessage.font!.pointSize)
let italicFont = UIFont(name: "Helvetica-LightOblique", size: tvMessage.font!.pointSize)
let message = NSAttributedString(string: " " + "Personal Message", attributes: [ NSFontAttributeName: lightFont!,   NSForegroundColorAttributeName: textColor])
iconString.append(message)
let option = NSAttributedString(string: " " + "Optional", attributes: [ NSFontAttributeName: italicFont!, NSForegroundColorAttributeName: textColor])
iconString.append(option)

tvMessage.attributedPlaceHolder = iconString

tvMessage.layoutSubviews()
         NSURL *aURL = [NSURL URLWithString:[[NSString stringWithFormat:@"%@%@",Image_BASE_URL,str] stringByAddingPercentEscapesUsingEncoding: NSUTF8StringEncoding]];
        //UIImage *aImage = [UIImage imageWithData:[NSData dataWithContentsOfURL:aURL]];
        //[aImage drawInRect:CGRectMake(0, 0, 20, 20)];


        __block  NSTextAttachment *imageAttachment = [NSTextAttachment new];
        imageAttachment.bounds = CGRectMake(0, -5, 20, 20);
        NSAttributedString *stringWithImage = [NSAttributedString attributedStringWithAttachment:imageAttachment];
        [deCodedString replaceCharactersInRange:NSMakeRange(deCodedString.length, 0) withAttributedString:stringWithImage];
        incomingMessage.messageAttributedString = deCodedString;


        SDWebImageDownloader *downloader = [SDWebImageDownloader sharedDownloader];
        imageAttachment.image = [UIImage imageNamed:@"profile_main_placeholder"];

        [downloader downloadImageWithURL:aURL
                                 options:0
                                progress:^(NSInteger receivedSize, NSInteger expectedSize) {
                                    // progression tracking code
                                }
                               completed:^(UIImage *image, NSData *data, NSError *error, BOOL finished) {
                                   if (image && finished) {
                                       [image drawInRect:CGRectMake(0, 0, 20, 20)];
                                       imageAttachment.image = image;

                                       dispatch_async(dispatch_get_main_queue(), ^(void)
                                                      {

                                                          [self.tbl_Conversation reloadRowsAtIndexPaths:[self.tbl_Conversation indexPathsForVisibleRows]
                                                                                       withRowAnimation:UITableViewRowAnimationNone];
                                                          [self.tbl_Conversation reloadData];
                                                      });


                                       //                                                              NSAttributedString *stringWithImage = [NSAttributedString attributedStringWithAttachment:imageAttachment];
                                       //                                                              [deCodedString replaceCharactersInRange:NSMakeRange(deCodedString.length, 0) withAttributedString:stringWithImage];
                                       //                                                              incomingMessage.messageAttributedString = deCodedString;
                                   }
                               }];