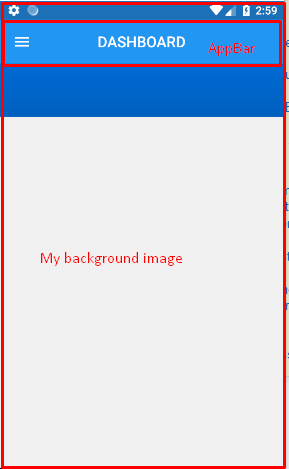
Сделайте AppBar прозрачным и покажите фоновое изображение, которое установлено на весь экран
Я добавил appBar в мое приложение флаттера. На моем экране уже есть фоновое изображение, где я не хочу устанавливать цвет appBar или не хочу устанавливать отдельное фоновое изображение для appBar.
Я хочу показать то же фоновое изображение экрана в appBar также.
Я уже пробовал, устанавливая цвет appBar как прозрачный, но он показывает цвет, как серый.
Мой код:
appBar: new AppBar(
        centerTitle: true,
//        backgroundColor: Color(0xFF0077ED),
        elevation: 0.0,
        title: new Text(
            "DASHBOARD",
            style: const TextStyle(
                color:  const Color(0xffffffff),
                fontWeight: FontWeight.w500,
                fontFamily: "Roboto",
                fontStyle:  FontStyle.normal,
                fontSize: 19.0
            )),
      )
13 ответов
Вы можете использовать виджет Stack для этого. Следуйте приведенному ниже примеру.
import 'package:flutter/material.dart';


void main() => runApp(new MyApp());

class MyApp extends StatelessWidget {
  @override
  Widget build(BuildContext context)
  {
    return new MaterialApp(
      title: 'Flutter Demo',
      theme: new ThemeData(
      ),
      home: new Home(),
      builder: (BuildContext context,Widget child){
        return Padding(
          child: child,
          padding: EdgeInsets.only(bottom: 50.0),
        );
      },
    );
  }
}


class Home extends StatefulWidget {
  @override
  _HomeState createState() => _HomeState();
}

class _HomeState extends State<Home> {
  @override
  Widget build(BuildContext context) {
    return Stack(
      children: <Widget>[
        new Container(
          height: double.infinity,
          width: double.infinity,
          decoration:new BoxDecoration(
            image: new DecorationImage(
              image: new AssetImage("images/jocker.jpg"),
              fit: BoxFit.cover,
            ),
          ),
        ),
        Scaffold(
          backgroundColor: Colors.transparent,
          appBar: new AppBar(
            title: new Text("csd"),
            backgroundColor: Colors.transparent,
            elevation: 0.0,
          ),
          body: new Container(
            color: Colors.transparent,
          ),
        ),
      ],
    );
  }
}
Теперь это поддерживается Scaffold (в стабильной версии - v1.12.13+hotfix.5).
- Установить строительные леса
extendBodyBehindAppBarк истине, - Установить AppBar
elevationдо 0, чтобы избавиться от тени, - Установить AppBar
backgroundColorпрозрачность по мере необходимости.
  @override
  Widget build(BuildContext context) {
    return Scaffold(
      extendBodyBehindAppBar: true,
      backgroundColor: Colors.red,
      appBar: AppBar(
//        backgroundColor: Colors.transparent,
        backgroundColor: Color(0x44000000),
        elevation: 0,
        title: Text("Title"),
      ),
      body: Center(child: Text("Content")),
    );
  }
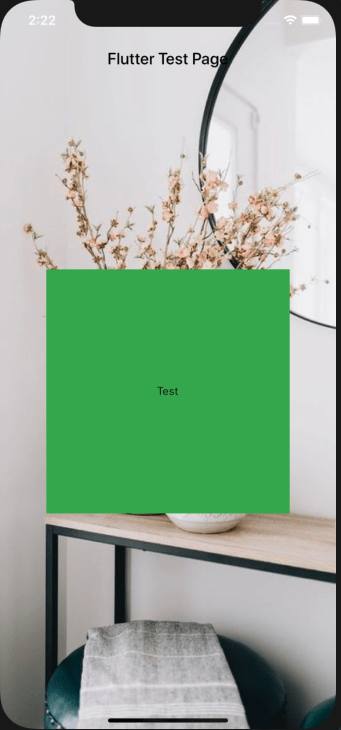
Вы можете использовать свойство Scaffold " extendBodyBehindAppBar: true ". Не забудьте обернуть дочерний элемент SafeArea.
  @Override
  Widget build(BuildContext context) {
    return Scaffold(
      appBar: AppBar(
        title: Text(
          widget.title,
          style: TextStyle(color: Colors.black),
        ),
        backgroundColor: Colors.transparent,
        elevation: 0.0,
      ),
      extendBodyBehindAppBar: true,
      body: Container(
        width: double.infinity,
        height: double.infinity,
        decoration: BoxDecoration(
          image: DecorationImage(
            image: AssetImage('assets/background/home.png'),
            fit: BoxFit.cover,
          ),
        ),
        child: SafeArea(
            child: Center(
          child: Container(
            width: 300,
            height: 300,
            decoration: BoxDecoration(
              color: Colors.green,
            ),
            child: Center(child: Text('Test')),
          ),
        )),
      ),
    );
  }
Мне кажется, что ничего из этого не работает, у меня было примерно следующее:
return Scaffold(
  extendBodyBehindAppBar: true,
  appBar: AppBar(
    backgroundColor: Colors.transparent,
    iconTheme: IconThemeData(color: Colors.white),
    elevation: 0.0,
    brightness: Brightness.dark,
  ),
  body: Stack(
    children: <Widget>[
      Container(
        decoration: BoxDecoration(
          image: DecorationImage(
            image: NetworkImage(
                'https://images.unsplash.com/photo-1517030330234-94c4fb948ebc?ixlib=rb-1.2.1&ixid=eyJhcHBfaWQiOjEyMDd9&auto=format&fit=crop&w=1275&q=80'),
            fit: BoxFit.cover,
          ),
        ),
        child: Padding(
          padding: const EdgeInsets.fromLTRB(0, 100, 0, 0),
          child:
          // Column of widgets here...
        ),
       ),
     ],
   ),
 );
Вывод:

Много ответов, но никто не объясняет почему
extendBodyBehindAppBarработает? Это работает, потому что когда мы назначили
extendBodyBehindAppBar как истина, тогда тело виджета принимает высоту
AppBar, и мы видим изображение, покрывающее
AppBar площадь.
Простой пример:
       Size size = MediaQuery.of(context).size;
    return Scaffold(
      extendBodyBehindAppBar: true,
      body: Container(
        // height: size.height * 0.3,
        child: Image.asset(
          'shopping_assets/images/Fruits/pineapple.png',
          fit: BoxFit.cover,
          height: size.height * 0.4,
          width: size.width,
        ),
      ),
    );
Может быть много случаев, например, хотите ли вы сохранить или нет, хотите ли вы сделать строку состояния видимой, для этого вы можете обернуть
Scaffold.bodyв
SafeAreaи если вы хотите, чтобы не было тени (в отличие от красного, который я предоставил в примере 2), вы можете установить его цвет на
Colors.transparent:
Полное изображение (без )
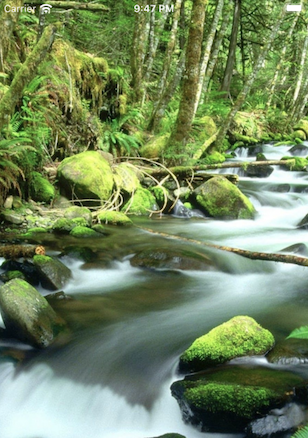
        Scaffold(
  extendBodyBehindAppBar: true,
  body: SizedBox.expand(
    child: Image.network(
      'https://wallpaperaccess.com/full/3770388.jpg',
      fit: BoxFit.cover,
    ),
  ),
)
Полное изображение (с
AppBar)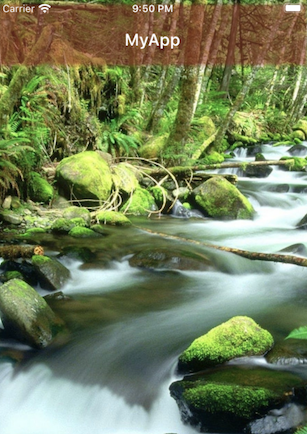
        Scaffold(
  extendBodyBehindAppBar: true,
  appBar: AppBar(
    backgroundColor: Colors.transparent,
    shadowColor: Colors.red,
    title: Text('MyApp'),
  ),
  body: SizedBox.expand(
    child: Image.network(
      'https://wallpaperaccess.com/full/3770388.jpg',
      fit: BoxFit.cover,
    ),
  ),
)
Это то, что я сделал, и это работает
Теперь это поддерживается Scaffold (в стабильной версии - v1.12.13+hotfix.5).
Установите Scaffold extendBodyBehindAppBar в значение true, установите высоту AppBar в 0, чтобы избавиться от тени, установите прозрачность AppBar backgroundColor по мере необходимости.
С наилучшими пожеланиями
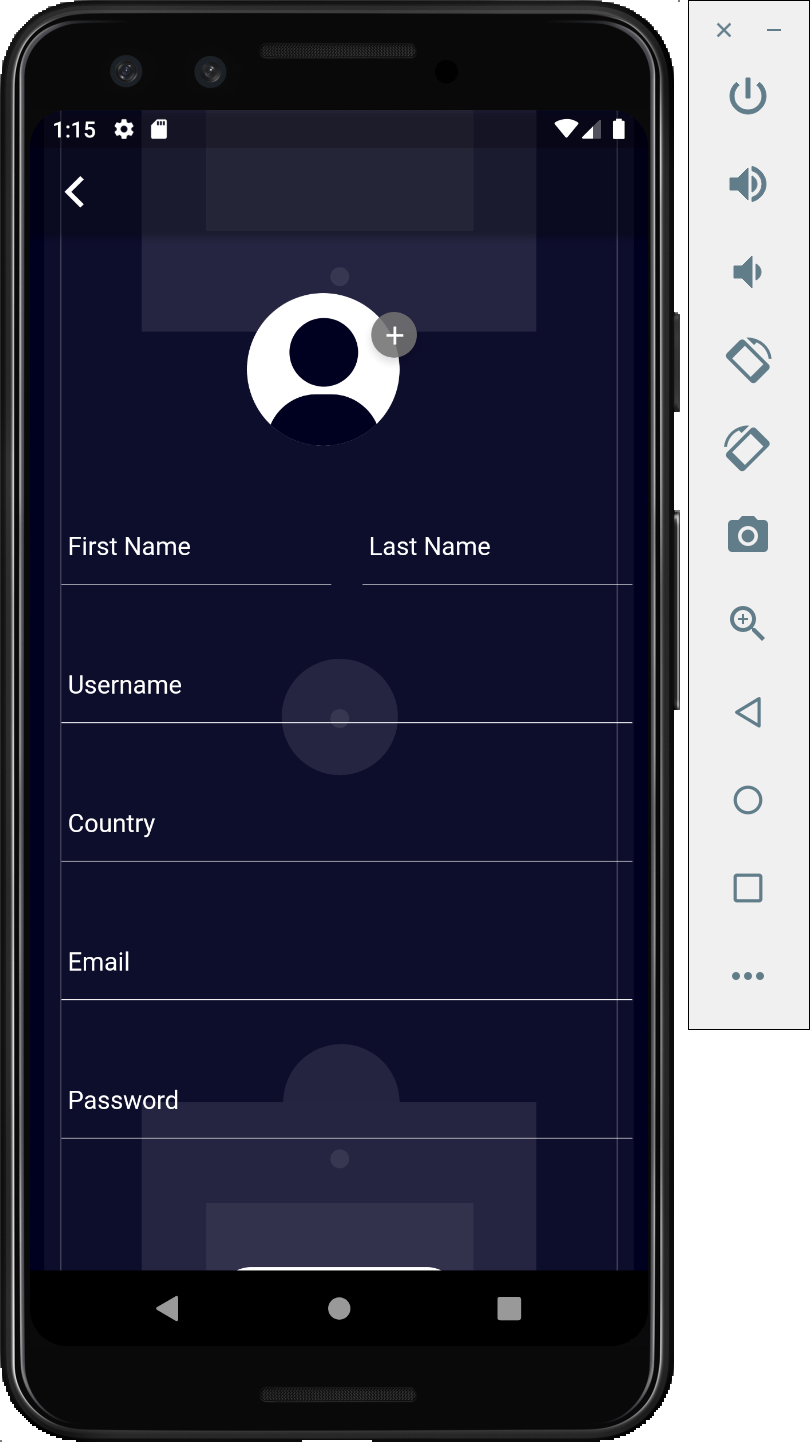
В моем случае я сделал это так:
Дополнительно создайте панель приложения с настраиваемой кнопкой возврата (в данном случае с FloatingActionButton). Вы по-прежнему можете добавлять виджеты внутриStack.
class Home extends StatefulWidget {
  @override
  _EditProfilePageState createState() => _EditProfilePageState();
}

class _HomeState extends State< Home > {

  @override
  Widget build(BuildContext context) {
    return Scaffold(
      body: Stack(
        children: <Widget>[
          this._backgroundImage(), // --> Background Image
          Positioned( // --> App Bar
            child: AppBar(
              backgroundColor: Colors.transparent,
              elevation: 0.0,
              leading: Padding( // --> Custom Back Button
                padding: const EdgeInsets.all(8.0),
                child: FloatingActionButton(
                  backgroundColor: Colors.white,
                  mini: true,
                  onPressed: this._onBackPressed,
                  child: Icon(Icons.arrow_back, color: Colors.black),
                ),
              ),
            ),
          ),
          // ------ Other Widgets ------
        ],
      ),
    );
  }

  Widget _backgroundImage() {
    return Container(
      height: 272.0,
      width: MediaQuery.of(context).size.width,
      child: FadeInImage(
        fit: BoxFit.cover,
        image: NetworkImage(
            'https://images.unsplash.com/photo-1527555197883-98e27ca0c1ea?ixlib=rb-1.2.1&ixid=eyJhcHBfaWQiOjEyMDd9&w=1000&q=80'),
        placeholder: AssetImage('assetName'),
      ),
    );
  }

  void _onBackPressed() {
    Navigator.of(context).pop();
  }
}
По следующей ссылке вы можете найти дополнительную информацию Ссылка
Вы можете попробовать этот код. Этот код работает для меня.
@override
  Widget build(BuildContext context) {
    _buildContext = context;
    sw = MediaQuery.of(context).size.width;
    sh = MediaQuery.of(context).size.height;

    return new Container(
      child: new Stack(
        children: <Widget>[
          new Container(
            child: Stack(
              children: <Widget>[
                Container(
                  padding: EdgeInsets.all(20.0),
                  decoration: BoxDecoration(image: backgroundImage),
                ),
              ],
            ),
          ),
          new Scaffold(
            backgroundColor: Colors.transparent,
            appBar: new AppBar(
              title: new Text(Strings.page_register),
              backgroundColor: Colors.transparent,
              elevation: 0.0,
              centerTitle: true,
            ),
            body: SingleChildScrollView(
              padding: EdgeInsets.all(20.0),
              physics: BouncingScrollPhysics(),
              scrollDirection: Axis.vertical,
              child: new Form(
                key: _formKey,
                autovalidate: _autoValidate,
                child: FormUI(),
              ),
            ),
          )
        ],
      ),
    );
  }
изображение на заднем плане
DecorationImage backgroundImage = new DecorationImage(
  image: new ExactAssetImage('assets/images/welcome_background.png'),
  fit: BoxFit.cover,
);
не забудьте установить атрибут foregroundColor в желаемый цвет, чтобы значок навигации и заголовок были видны
Обратите внимание, что значение по умолчанию foregroundColor — белый.
Использовать стек
- установить фоновое изображение
- Другой эшафот ()
- установить прозрачный цвет фона
- установить настраиваемую панель приложений
- использовать столбец с singleChildScrollView или ListView
- Другой эшафот ()
@override   Widget build(BuildContext context) {
        return Scaffold(
          body: Stack(
            children: <Widget>[
              backgroundBGContainer(),
              Scaffold(
                backgroundColor: Colors.transparent,
                appBar: appBarWidgetCustomTitle(context: context, titleParam: ""),
                body: SingleChildScrollView(
                  child: Column(
                    children: <Widget>[
                      _spaceWdgt(),
                      Center(
                        child: Stack(
                          children: <Widget>[
                            new Image.asset(
                              "assets/images/user_icon.png",
                              width: 117,
                              height: 97,
                            ),
                          ],
                        ),
                      ),


  Widget backgroundBGContainer() {
      return Container(
        decoration: new BoxDecoration(
            image: new DecorationImage(
              image: new AssetImage("assets/images/ground_bg_image.png"),
              fit: BoxFit.cover,
            ),
            color: MyColor().groundBackColor),
      );
    }
Перепробовал все ответы, но либо это работает только на iOS, либо они противоречат рекомендациям по скаффолдам внутри scaffold (посетите « Несколько скаффолдов» для каждой страницы в приложении Flutter ).
Решение — использовать SystemChrome.setSystemUIOverlayStyle.
      Widget build(BuildContext context) {
    setBrightnessWithoutAppBar(context, AppColors.transparent, Brightness.light); //look this
     return Scaffold(
       extendBodyBehindAppBar: true,
       body: Stack(children: [
         Positioned(
           top: 0,
           child: Container(
             width: MedSize.widthPhysical,
             height: MedSize.heightPhysical * 0.7.byUI(true),
             decoration: const BoxDecoration(
               image: DecorationImage(
                 image: AssetImage('assets/images/jesus/lovesYou.jpg'),
                 fit: BoxFit.fitWidth,
               )
И в каком-то новом файле вы делаете свой метод доступным:
      SystemUiOverlayStyle setBrightnessWithoutAppBar(BuildContext context, Color backgroundColor, Brightness brightness) {
  SystemUiOverlayStyle style = SystemUiOverlayStyle(
    statusBarColor: backgroundColor,
    statusBarIconBrightness: brightness,
    statusBarBrightness: brightness,
  );
  SystemChrome.setSystemUIOverlayStyle(style);
  return style;
}
Мне кажется, что до версии Flutter 3.12 использование AppBar на Android даже с высотой 0 перекрывает тело, даже с использованиемforceMaterialTransparency = true-по поводу использования имиджа, конечно.