Рисование пути с использованием листовки в R
Я создаю Shiny приборная панель с dataframe начальной долготы / широты и конечной долготы / широты, согласованной мной в графике R с использованием leaflet package:
`m=leaflet()%>%
      addTiles() %>%
      addMarkers(lng=(data$Start_long[i:j]), lat=(data$Start_lat[i:j]),popup="Start") %>%
      addCircleMarkers(lng=(data$End_long[i:j]), lat=(data$End_lat[i:j]),popup="End",clusterOptions=markerClusterOptions())`
Мне было интересно, есть ли способ соединить начало и конец, скоординированные по маршрутам общественного транспорта (может быть, через API карт Google или функции в библиотеке или, если это не удалось, соединить координаты по прямой линии?
2 ответа
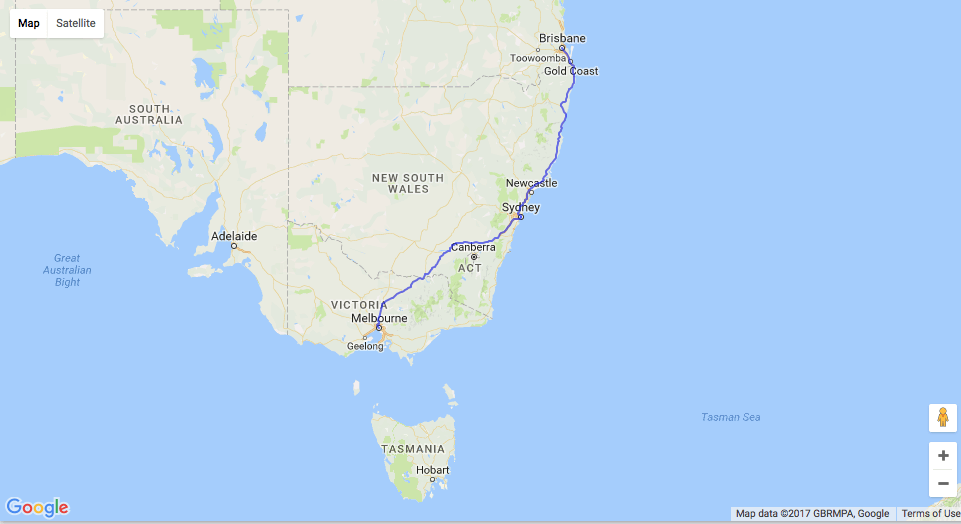
Вы можете использовать мой googleway пакет, чтобы получить маршруты и маршруты, и нанести его на карту Google
Чтобы использовать API Google, вам нужен действительный ключ для каждого API, который вы хотите использовать. В этом случае вам понадобится ключ направления, а для построения карты вам понадобится ключ javascript карты.
(Вы можете сгенерировать один ключ и включить его для обоих API, если хотите)
Чтобы вызвать API направлений и построить его в R, вы можете сделать
library(googleway)

api_key <- "your_directions_api_key"
map_key <- "your_maps_api_key"

## set up a data.frame of locations
## can also use 'lat/lon' coordinates as the origin/destination
df_locations <- data.frame(
  origin = c("Melbourne, Australia", "Sydney, Australia")
  , destination = c("Sydney, Australia", "Brisbane, Australia")
  , stringsAsFactors = F
)

## loop over each pair of locations, and extract the polyline from the result
lst_directions <- apply(df_locations, 1, function(x){
  res <- google_directions(
    key = api_key
    , origin = x[['origin']]
    , destination = x[['destination']]
  )

  df_result <- data.frame(
    origin = x[['origin']]
    , destination = x[['destination']]
    , route = res$routes$overview_polyline$points
  )
  return(df_result)
})

## convert the results to a data.frame
df_directions <- do.call(rbind, lst_directions)

## plot the map
google_map(key = map_key ) %>%
  add_polylines(data = df_directions, polyline = "route")
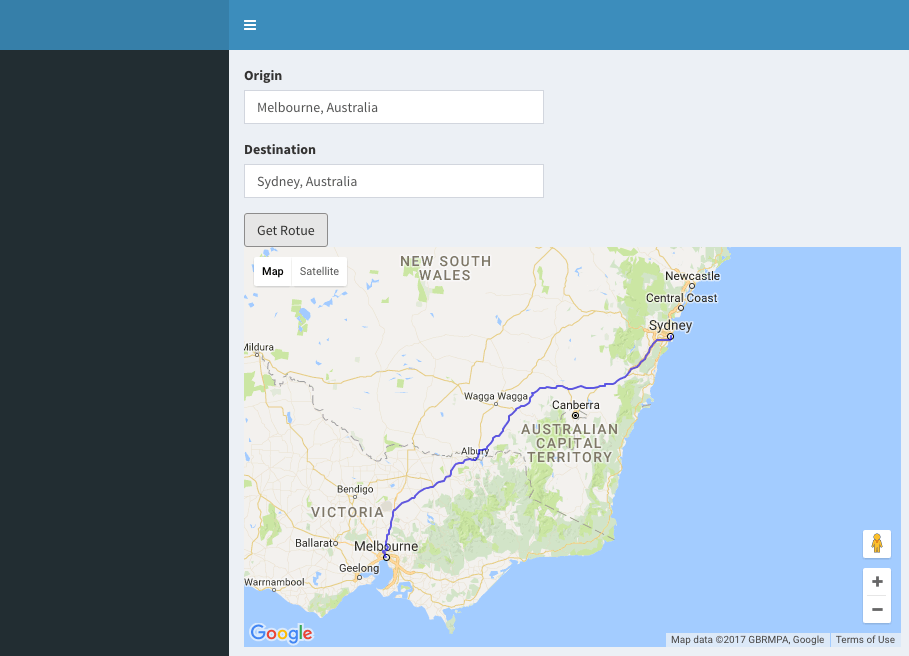
И так же в блестящем приложении
library(shiny)
library(shinydashboard)
library(googleway)

ui <- dashboardPage(
  dashboardHeader(),
  dashboardSidebar(),
  dashboardBody(
    textInput(inputId = "origin", label = "Origin"),
    textInput(inputId = "destination", label = "Destination"),
    actionButton(inputId = "getRoute", label = "Get Rotue"),
    google_mapOutput("myMap")
  )
)

server <- function(input, output){

  api_key <- "your_directions_api_key"
  map_key <- "your_maps_api_key"

  df_route <- eventReactive(input$getRoute,{

    print("getting route")

    o <- input$origin
    d <- input$destination

    return(data.frame(origin = o, destination = d, stringsAsFactors = F))
  })


  output$myMap <- renderGoogle_map({

    df <- df_route()
    print(df)
    if(df$origin == "" | df$destination == "")
      return()

    res <- google_directions(
      key = api_key
      , origin = df$origin
      , destination = df$destination
    )

    df_route <- data.frame(route = res$routes$overview_polyline$points)

    google_map(key = map_key ) %>%
      add_polylines(data = df_route, polyline = "route")
  })
}

shinyApp(ui, server)
Вы можете addPolylines() на карту.
Он принимает два вектора в качестве аргументов, один для широты и один для lng, где каждая строка является "путевой точкой".
Вам трудно помочь, не зная структуры ваших данных.
MRE:
library(leaflet)
cities <- read.csv(textConnection("
City,Lat,Long,Pop
Boston,42.3601,-71.0589,645966
Hartford,41.7627,-72.6743,125017
New York City,40.7127,-74.0059,8406000
Philadelphia,39.9500,-75.1667,1553000
Pittsburgh,40.4397,-79.9764,305841
Providence,41.8236,-71.4222,177994
"))

leaflet() %>%
    addTiles() %>%
    addPolylines(lat = cities$Lat, lng = cities$Long)
Я использую "цикл" для решения такой проблемы, просто рисую полилинии одну за другой. (извините за мое китайское выражение ^_^) для примера:
for(i in 1:nrow(sz)){
     if(i<=nrow(sz) ){
      a <- as.numeric(c(sz[i,c(8,10)]));
      b <- as.numeric(c(sz[i,c(9,11)]));
      A <- A %>% addPolylines(a,b,group=NULL,weight = 1,color = "brown",
                              stroke = TRUE,fill = NULL,opacity = 0.8)}
или как более сложный
for(j in 0:23){if(j<=23)
  #j--切每小时数据
  j1 <- as.character(paste(j,"点",sep=''))
sz <- sz121[sz121$h==j,]
sz_4 <- sz121[sz121$bi_state==4 &sz121$h==j ,]
sz_8 <- sz121[sz121$bi_state==8&sz121$h==j,]
#还原A
A <- leaflet(sz121) %>% amap() %>% addLabelOnlyMarkers(~s_lon,~s_lat) %>%
  addLegend(title=j1,colors=NULL,labels =NULL,position="topleft")
A <- A %>%addCircleMarkers(data=sz_8,~s_lon,~s_lat,color="orange",fill=TRUE,fillColor = "red", opacity = 1,fillOpacity=0.8,
                           weight =1,radius = 10) %>%addCircleMarkers(data=sz_4,~s_lon,~s_lat,color="black",fill=TRUE,fillColor = "red",
                                                                      opacity = 1,fillOpacity=0.8,weight =5,radius = 10 ) %>%
  addCircleMarkers(data=sz_8,~e_lon,~e_lat,color="orange",fill=TRUE,fillColor = "blue", opacity = 1,fillOpacity=0.8,weight=1,radius = 10) %>%
  addCircleMarkers(data=sz_4,~e_lon,~e_lat,color="black",fill=TRUE,fillColor = "blue", opacity = 1,fillOpacity=0.8,weight =5,radius = 10 )
for(i in 1:nrow(sz)){
  #i--画路径
  if(i<=nrow(sz) ){
    a <- as.numeric(c(sz[i,c(8,10)]));
    b <- as.numeric(c(sz[i,c(9,11)]));
    A <- A %>% addPolylines(a,b,group=NULL,weight = 1,color = "brown",stroke = TRUE,fill = NULL,opacity = 0.8)
  }
  if(i==nrow(sz)){print(A)}
}
Sys.sleep(3)
}

