Поворот изображения без обрезки в OpenCV в C++
Я хотел бы повернуть изображение, но я не могу получить повернутое изображение без обрезки
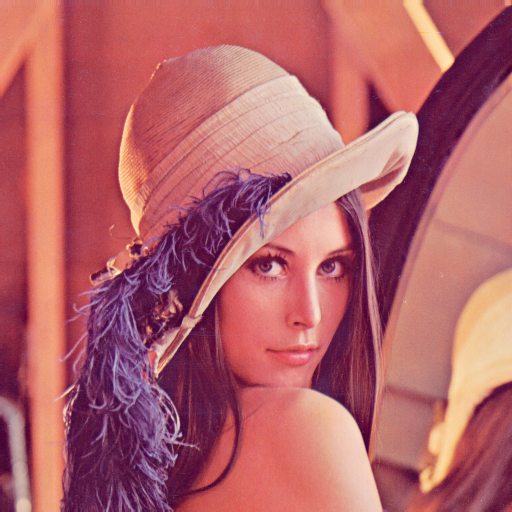
Мое оригинальное изображение:

Теперь я использую этот код:
#include <opencv2/core/core.hpp>
#include <opencv2/highgui/highgui.hpp>
#include <opencv2/imgproc/imgproc.hpp>

// Compile with g++ code.cpp -lopencv_core -lopencv_highgui -lopencv_imgproc

int main()
{
    cv::Mat src = cv::imread("im.png", CV_LOAD_IMAGE_UNCHANGED);
    cv::Mat dst;

    cv::Point2f pc(src.cols/2., src.rows/2.);
    cv::Mat r = cv::getRotationMatrix2D(pc, -45, 1.0);

    cv::warpAffine(src, dst, r, src.size()); // what size I should use?

    cv::imwrite("rotated_im.png", dst);

    return 0;
}
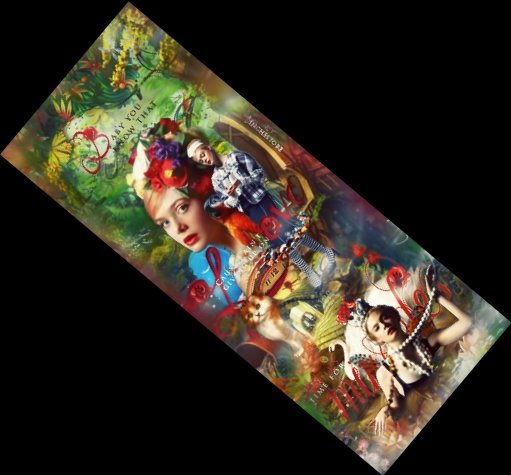
И получите следующее изображение:

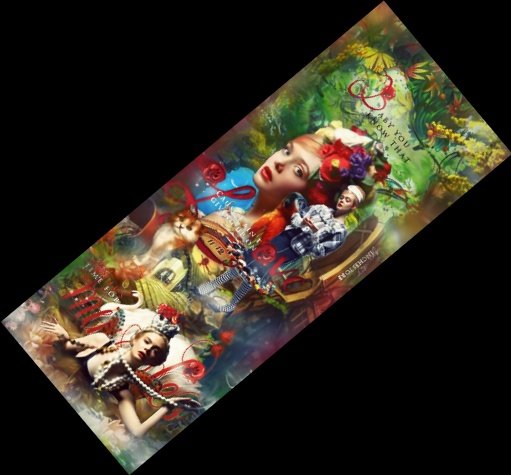
Но я хотел бы получить это:

Большое спасибо за Вашу помощь!
13 ответов
Мой ответ вдохновлен следующими постами / записями в блоге:
- Поверните cv:: Mat, используя cv::warpAffine, смещает конечное изображение
- http://john.freml.in/opencv-rotation
Основные идеи:
- Регулировка матрицы вращения путем добавления перевода в новый центр изображения
- С помощью
cv::RotatedRectмаксимально полагаться на существующую функциональность opencv
Код, протестированный с opencv 3.4.1:
#include "opencv2/opencv.hpp"

int main()
{
    cv::Mat src = cv::imread("im.png", CV_LOAD_IMAGE_UNCHANGED);
    double angle = -45;

    // get rotation matrix for rotating the image around its center in pixel coordinates
    cv::Point2f center((src.cols-1)/2.0, (src.rows-1)/2.0);
    cv::Mat rot = cv::getRotationMatrix2D(center, angle, 1.0);
    // determine bounding rectangle, center not relevant
    cv::Rect2f bbox = cv::RotatedRect(cv::Point2f(), src.size(), angle).boundingRect2f();
    // adjust transformation matrix
    rot.at<double>(0,2) += bbox.width/2.0 - src.cols/2.0;
    rot.at<double>(1,2) += bbox.height/2.0 - src.rows/2.0;

    cv::Mat dst;
    cv::warpAffine(src, dst, rot, bbox.size());
    cv::imwrite("rotated_im.png", dst);

    return 0;
}
Просто попробуйте код ниже, идея проста:
Вам нужно создать пустое изображение с максимальным размером, который вы ожидаете при повороте под любым углом. Здесь вы должны использовать Пифагор, как указано в комментариях выше.
Теперь скопируйте исходное изображение во вновь созданное изображение и передайте его
warpAffine, Здесь вы должны использовать центр вновь созданного изображения для поворота.После
warpAffineесли вам нужно обрезать точное изображение для этого, переведите четыре угла исходного изображения в увеличенное изображение, используя матрицу вращения, как описано здесьНайдите минимальные x и минимальные y для верхнего угла, а также максимальные x и максимальные y для нижнего угла из приведенного выше результата для обрезки изображения.
Это код:
int theta = 0;
Mat src,frame, frameRotated;
src = imread("rotate.png",1);
cout<<endl<<endl<<"Press '+' to rotate anti-clockwise and '-' for clockwise 's' to save" <<endl<<endl;

int diagonal = (int)sqrt(src.cols*src.cols+src.rows*src.rows);
int newWidth = diagonal;
int newHeight =diagonal;

int offsetX = (newWidth - src.cols) / 2;
int offsetY = (newHeight - src.rows) / 2;
Mat targetMat(newWidth, newHeight, src.type());
Point2f src_center(targetMat.cols/2.0F, targetMat.rows/2.0F);


while(1){
src.copyTo(frame);
double radians = theta * M_PI / 180.0;
double sin = abs(std::sin(radians));
double cos = abs(std::cos(radians));

frame.copyTo(targetMat.rowRange(offsetY, offsetY + frame.rows).colRange(offsetX, offsetX + frame.cols));
Mat rot_mat = getRotationMatrix2D(src_center, theta, 1.0);
warpAffine(targetMat, frameRotated, rot_mat, targetMat.size());
 //Calculate bounding rect and for exact image
 //Reference:- https://stackru.com/questions/19830477/find-the-bounding-rectangle-of-rotated-rectangle/19830964?noredirect=1#19830964
    Rect bound_Rect(frame.cols,frame.rows,0,0);

    int x1 = offsetX;
    int x2 = offsetX+frame.cols;
    int x3 = offsetX;
    int x4 = offsetX+frame.cols;

    int y1 = offsetY;
    int y2 = offsetY;
    int y3 = offsetY+frame.rows;
    int y4 = offsetY+frame.rows;

    Mat co_Ordinate = (Mat_<double>(3,4) << x1, x2, x3, x4,
                                            y1, y2, y3, y4,
                                            1,  1,  1,  1 );
    Mat RotCo_Ordinate = rot_mat * co_Ordinate;

    for(int i=0;i<4;i++){
       if(RotCo_Ordinate.at<double>(0,i)<bound_Rect.x)
         bound_Rect.x=(int)RotCo_Ordinate.at<double>(0,i); //access smallest
       if(RotCo_Ordinate.at<double>(1,i)<bound_Rect.y)
        bound_Rect.y=RotCo_Ordinate.at<double>(1,i); //access smallest y
     }

     for(int i=0;i<4;i++){
       if(RotCo_Ordinate.at<double>(0,i)>bound_Rect.width)
         bound_Rect.width=(int)RotCo_Ordinate.at<double>(0,i); //access largest x
       if(RotCo_Ordinate.at<double>(1,i)>bound_Rect.height)
        bound_Rect.height=RotCo_Ordinate.at<double>(1,i); //access largest y
     }

    bound_Rect.width=bound_Rect.width-bound_Rect.x;
    bound_Rect.height=bound_Rect.height-bound_Rect.y;

    Mat cropedResult;
    Mat ROI = frameRotated(bound_Rect);
    ROI.copyTo(cropedResult);

    imshow("Result", cropedResult);
    imshow("frame", frame);
    imshow("rotated frame", frameRotated);
    char k=waitKey();
    if(k=='+') theta+=10;
    if(k=='-') theta-=10;
    if(k=='s') imwrite("rotated.jpg",cropedResult);
    if(k==27) break;

}

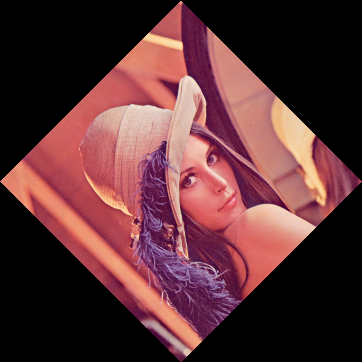
Обрезанное изображение
Спасибо, Робула! На самом деле, вам не нужно вычислять синус и косинус дважды.
import cv2

def rotate_image(mat, angle):
  # angle in degrees

  height, width = mat.shape[:2]
  image_center = (width/2, height/2)

  rotation_mat = cv2.getRotationMatrix2D(image_center, angle, 1.)

  abs_cos = abs(rotation_mat[0,0])
  abs_sin = abs(rotation_mat[0,1])

  bound_w = int(height * abs_sin + width * abs_cos)
  bound_h = int(height * abs_cos + width * abs_sin)

  rotation_mat[0, 2] += bound_w/2 - image_center[0]
  rotation_mat[1, 2] += bound_h/2 - image_center[1]

  rotated_mat = cv2.warpAffine(mat, rotation_mat, (bound_w, bound_h))
  return rotated_mat
Спасибо @Haris! Вот версия Python:
def rotate_image(image, angle):
  '''Rotate image "angle" degrees.

  How it works:
    - Creates a blank image that fits any rotation of the image. To achieve
      this, set the height and width to be the image's diagonal.
    - Copy the original image to the center of this blank image
    - Rotate using warpAffine, using the newly created image's center
      (the enlarged blank image center)
    - Translate the four corners of the source image in the enlarged image
      using homogenous multiplication of the rotation matrix.
    - Crop the image according to these transformed corners
  '''

  diagonal = int(math.sqrt(pow(image.shape[0], 2) + pow(image.shape[1], 2)))
  offset_x = (diagonal - image.shape[0])/2
  offset_y = (diagonal - image.shape[1])/2
  dst_image = np.zeros((diagonal, diagonal, 3), dtype='uint8')
  image_center = (diagonal/2, diagonal/2)

  R = cv2.getRotationMatrix2D(image_center, angle, 1.0)
  dst_image[offset_x:(offset_x + image.shape[0]), \
            offset_y:(offset_y + image.shape[1]), \
            :] = image
  dst_image = cv2.warpAffine(dst_image, R, (diagonal, diagonal), flags=cv2.INTER_LINEAR)

  # Calculate the rotated bounding rect
  x0 = offset_x
  x1 = offset_x + image.shape[0]
  x2 = offset_x
  x3 = offset_x + image.shape[0]

  y0 = offset_y
  y1 = offset_y
  y2 = offset_y + image.shape[1]
  y3 = offset_y + image.shape[1]

  corners = np.zeros((3,4))
  corners[0,0] = x0
  corners[0,1] = x1
  corners[0,2] = x2
  corners[0,3] = x3
  corners[1,0] = y0
  corners[1,1] = y1
  corners[1,2] = y2
  corners[1,3] = y3
  corners[2:] = 1

  c = np.dot(R, corners)

  x = int(c[0,0])
  y = int(c[1,0])
  left = x
  right = x
  up = y
  down = y

  for i in range(4):
    x = int(c[0,i])
    y = int(c[1,i])
    if (x < left): left = x
    if (x > right): right = x
    if (y < up): up = y
    if (y > down): down = y
  h = down - up
  w = right - left

  cropped = np.zeros((w, h, 3), dtype='uint8')
  cropped[:, :, :] = dst_image[left:(left+w), up:(up+h), :]
  return cropped
После поиска чистого и легкого для понимания решения и прочтения приведенных выше ответов, пытаясь понять их, я в конечном итоге нашел решение с использованием тригонометрии.
Надеюсь, это кому-нибудь поможет:)
import cv2
import math

def rotate_image(mat, angle):
    height, width = mat.shape[:2]
    image_center = (width / 2, height / 2)

    rotation_mat = cv2.getRotationMatrix2D(image_center, angle, 1)

    radians = math.radians(angle)
    sin = math.sin(radians)
    cos = math.cos(radians)
    bound_w = int((height * abs(sin)) + (width * abs(cos)))
    bound_h = int((height * abs(cos)) + (width * abs(sin)))

    rotation_mat[0, 2] += ((bound_w / 2) - image_center[0])
    rotation_mat[1, 2] += ((bound_h / 2) - image_center[1])

    rotated_mat = cv2.warpAffine(mat, rotation_mat, (bound_w, bound_h))
    return rotated_mat
РЕДАКТИРОВАТЬ: Пожалуйста, обратитесь к ответу @Remi Cuingnet ниже.
Увеличьте изображение холста (одинаково от центра без изменения размера изображения), чтобы оно могло соответствовать изображению после поворота, затем примените warpAffine:
Mat img = imread ("/path/to/image", 1);
double offsetX, offsetY;
double angle = -45;
double width = img.size().width;
double height = img.size().height;
Point2d center = Point2d (width / 2, height / 2);
Rect bounds = RotatedRect (center, img.size(), angle).boundingRect();
Mat resized = Mat::zeros (bounds.size(), img.type());
offsetX = (bounds.width - width) / 2;
offsetY = (bounds.height - height) / 2;
Rect roi = Rect (offsetX, offsetY, width, height);
img.copyTo (resized (roi));
center += Point2d (offsetX, offsetY);
Mat M = getRotationMatrix2D (center, angle, 1.0);
warpAffine (resized, resized, M, resized.size());

Если у вас есть вращение и масштабирование изображения:
      #include "opencv2/opencv.hpp"
#include <functional>
#include <vector>

bool compareCoords(cv::Point2f p1, cv::Point2f p2, char coord)
{
    assert(coord == 'x' || coord == 'y');

    if (coord == 'x')
        return p1.x < p2.x;

    return p1.y < p2.y;
}


int main(int argc, char** argv)
{

    cv::Mat image = cv::imread("lenna.png");

    float angle = 45.0;  // degrees
    float scale = 0.5;
    cv::Mat_<float> rot_mat = cv::getRotationMatrix2D( cv::Point2f( 0.0f, 0.0f ), angle, scale );

    // Image corners
    cv::Point2f pA = cv::Point2f(0.0f, 0.0f);
    cv::Point2f pB = cv::Point2f(image.cols, 0.0f);
    cv::Point2f pC = cv::Point2f(image.cols, image.rows);
    cv::Point2f pD = cv::Point2f(0.0f, image.rows);

    std::vector<cv::Point2f> pts = { pA, pB, pC, pD };
    std::vector<cv::Point2f> ptsTransf;
    cv::transform(pts, ptsTransf, rot_mat );

    using namespace std::placeholders;
    float minX = std::min_element(ptsTransf.begin(), ptsTransf.end(), std::bind(compareCoords, _1, _2, 'x'))->x;
    float maxX = std::max_element(ptsTransf.begin(), ptsTransf.end(), std::bind(compareCoords, _1, _2, 'x'))->x;
    float minY = std::min_element(ptsTransf.begin(), ptsTransf.end(), std::bind(compareCoords, _1, _2, 'y'))->y;
    float maxY = std::max_element(ptsTransf.begin(), ptsTransf.end(), std::bind(compareCoords, _1, _2, 'y'))->y;

    float newW = maxX - minX;
    float newH = maxY - minY;

    cv::Mat_<float> trans_mat = (cv::Mat_<float>(2,3) << 0, 0, -minX, 0, 0, -minY);
    cv::Mat_<float> M = rot_mat + trans_mat;

    cv::Mat warpedImage;
    cv::warpAffine( image, warpedImage, M, cv::Size(newW, newH) );

    cv::imshow("lenna", image);
    cv::imshow("Warped lenna", warpedImage);

    cv::waitKey();
    cv::destroyAllWindows();
    return 0;
}
Версия Python для поворота изображения и управления областью черного цвета с мягкой подкладкой , которую вы можете использовать
scipy.ndimage.rotate. Вот пример:
      from skimage import io
from scipy import ndimage

image = io.imread('https://www.pyimagesearch.com/wp-
content/uploads/2019/12/tensorflow2_install_ubuntu_header.jpg')
io.imshow(image)
plt.show()

      rotated = ndimage.rotate(image, angle=234, mode='nearest')
rotated = cv2.resize(rotated, (image.shape[:2]))
# rotated = cv2.cvtColor(rotated, cv2.COLOR_BGR2RGB)
# cv2.imwrite('rotated.jpg', rotated)
io.imshow(rotated)
plt.show()

Версия Go (с использованием gocv) @robula и @remi-cuingnet
func rotateImage(mat *gocv.Mat, angle float64) *gocv.Mat {
        height := mat.Rows()
        width := mat.Cols()

        imgCenter := image.Point{X: width/2, Y: height/2}

        rotationMat := gocv.GetRotationMatrix2D(imgCenter, -angle, 1.0)

        absCos := math.Abs(rotationMat.GetDoubleAt(0, 0))
        absSin := math.Abs(rotationMat.GetDoubleAt(0, 1))

        boundW := float64(height) * absSin + float64(width) * absCos
        boundH := float64(height) * absCos + float64(width) * absSin

        rotationMat.SetDoubleAt(0, 2, rotationMat.GetDoubleAt(0, 2) + (boundW / 2) - float64(imgCenter.X))
        rotationMat.SetDoubleAt(1, 2, rotationMat.GetDoubleAt(1, 2) + (boundH / 2) - float64(imgCenter.Y))

        gocv.WarpAffine(*mat, mat, rotationMat, image.Point{ X: int(boundW), Y: int(boundH) })

        return mat
}
Я вращаюсь в той же матрице в памяти, создаю новую матрицу, если вы не хотите ее изменять
Спасибо всем за этот пост, он был очень полезен. Тем не менее, я нашел несколько черных линий влево и вверх (используя версию python для Rose) при повороте на 90º. Проблема, казалось, заключалась в некоторых int() округлениях. Кроме того, я изменил знак угла, чтобы он увеличивался по часовой стрелке.
def rotate_image(image, angle):
    '''Rotate image "angle" degrees.

    How it works:
    - Creates a blank image that fits any rotation of the image. To achieve
      this, set the height and width to be the image's diagonal.
    - Copy the original image to the center of this blank image
    - Rotate using warpAffine, using the newly created image's center
      (the enlarged blank image center)
    - Translate the four corners of the source image in the enlarged image
      using homogenous multiplication of the rotation matrix.
    - Crop the image according to these transformed corners
    '''

    diagonal = int(math.ceil(math.sqrt(pow(image.shape[0], 2) + pow(image.shape[1], 2))))
    offset_x = (diagonal - image.shape[0])/2
    offset_y = (diagonal - image.shape[1])/2
    dst_image = np.zeros((diagonal, diagonal, 3), dtype='uint8')
    image_center = (float(diagonal-1)/2, float(diagonal-1)/2)

    R = cv2.getRotationMatrix2D(image_center, -angle, 1.0)
    dst_image[offset_x:(offset_x + image.shape[0]), offset_y:(offset_y + image.shape[1]), :] = image
    dst_image = cv2.warpAffine(dst_image, R, (diagonal, diagonal), flags=cv2.INTER_LINEAR)

    # Calculate the rotated bounding rect
    x0 = offset_x
    x1 = offset_x + image.shape[0]
    x2 = offset_x + image.shape[0]
    x3 = offset_x

    y0 = offset_y
    y1 = offset_y
    y2 = offset_y + image.shape[1]
    y3 = offset_y + image.shape[1]

    corners = np.zeros((3,4))
    corners[0,0] = x0
    corners[0,1] = x1
    corners[0,2] = x2
    corners[0,3] = x3
    corners[1,0] = y0
    corners[1,1] = y1
    corners[1,2] = y2
    corners[1,3] = y3
    corners[2:] = 1

    c = np.dot(R, corners)

    x = int(round(c[0,0]))
    y = int(round(c[1,0]))
    left = x
    right = x
    up = y
    down = y

    for i in range(4):
        x = c[0,i]
        y = c[1,i]
        if (x < left): left = x
        if (x > right): right = x
        if (y < up): up = y
        if (y > down): down = y
    h = int(round(down - up))
    w = int(round(right - left))
    left = int(round(left))
    up = int(round(up))

    cropped = np.zeros((w, h, 3), dtype='uint8')
    cropped[:, :, :] = dst_image[left:(left+w), up:(up+h), :]
    return cropped
Для тех, кто используетилиоболочка в .NET, есть реализация C#Lars Schillingmannответ :
Emgu.CV:
      using Emgu.CV;
using Emgu.CV.CvEnum;
using Emgu.CV.Structure;

public static class MatExtension
{
    /// <summary>
    /// <see>https://stackoverflow.com/questions/22041699/rotate-an-image-without-cropping-in-opencv-in-c/75451191#75451191</see>
    /// </summary>
    public static Mat Rotate(this Mat src, float degrees)
    {
        degrees = -degrees; // counter-clockwise to clockwise
        var center = new PointF((src.Width - 1) / 2f, (src.Height - 1) / 2f);
        var rotationMat = new Mat();
        CvInvoke.GetRotationMatrix2D(center, degrees, 1, rotationMat);
        var boundingRect = new RotatedRect(new(), src.Size, degrees).MinAreaRect();
        rotationMat.Set(0, 2, rotationMat.Get<double>(0, 2) + (boundingRect.Width / 2f) - (src.Width / 2f));
        rotationMat.Set(1, 2, rotationMat.Get<double>(1, 2) + (boundingRect.Height / 2f) - (src.Height / 2f));
        var rotatedSrc = new Mat();
        CvInvoke.WarpAffine(src, rotatedSrc, rotationMat, boundingRect.Size);
        return rotatedSrc;
    }

    /// <summary>
    /// <see>https://stackoverflow.com/questions/32255440/how-can-i-get-and-set-pixel-values-of-an-emgucv-mat-image/69537504#69537504</see>
    /// </summary>
    public static unsafe void Set<T>(this Mat mat, int row, int col, T value) where T : struct =>
        _ = new Span<T>(mat.DataPointer.ToPointer(), mat.Rows * mat.Cols * mat.ElementSize)
        {
            [(row * mat.Cols) + col] = value
        };

    public static unsafe T Get<T>(this Mat mat, int row, int col) where T : struct =>
        new ReadOnlySpan<T>(mat.DataPointer.ToPointer(), mat.Rows * mat.Cols * mat.ElementSize)
            [(row * mat.Cols) + col];
}
OpenCvSharp:
OpenCvSharp уже имеетMat.Set<>метод, который работает так же, какmat.at<>в исходном OpenCV, поэтому нам не нужно копировать эти методы из Как я могу получить и установить значения пикселей изображения EmguCV Mat?
      using OpenCvSharp;

public static class MatExtension
{
    /// <summary>
    /// <see>https://stackoverflow.com/questions/22041699/rotate-an-image-without-cropping-in-opencv-in-c/75451191#75451191</see>
    /// </summary>
    public static Mat Rotate(this Mat src, float degrees)
    {
        degrees = -degrees; // counter-clockwise to clockwise
        var center = new Point2f((src.Width - 1) / 2f, (src.Height - 1) / 2f);
        var rotationMat = Cv2.GetRotationMatrix2D(center, degrees, 1);
        var boundingRect = new RotatedRect(new(), new Size2f(src.Width, src.Height), degrees).BoundingRect();
        rotationMat.Set(0, 2, rotationMat.Get<double>(0, 2) + (boundingRect.Width / 2f) - (src.Width / 2f));
        rotationMat.Set(1, 2, rotationMat.Get<double>(1, 2) + (boundingRect.Height / 2f) - (src.Height / 2f));
        var rotatedSrc = new Mat();
        Cv2.WarpAffine(src, rotatedSrc, rotationMat, boundingRect.Size);
        return rotatedSrc;
    }
}
Кроме того, вы можете захотеть изменить параметр вместо того, чтобы возвращать его новый клон во время вращения, для этого вы можете просто установитьdetпараметрWrapAffine()как то же самое сsrc: c++, opencv: Безопасно ли использовать один и тот же мат как для исходного, так и для целевого изображения в операции фильтрации?
CvInvoke.WarpAffine(src, src, rotationMat, boundingRect.Size);
Это называется какin-place mode: https://answers.opencv.org/question/24/do-all-opencv-functions-support-in-place-mode-for-their-arguments/
Можно ли использовать функцию OpenCV cvtColor для преобразования матрицы на месте?
Если это просто повернуть на 90 градусов, возможно, этот код может быть полезен.
    Mat img = imread("images.jpg");
    Mat rt(img.rows, img.rows, CV_8U);
    Point2f pc(img.cols / 2.0, img.rows / 2.0);
    Mat r = getRotationMatrix2D(pc, 90, 1);
    warpAffine(img, rt, r, rt.size());
    imshow("rotated", rt);
Надеюсь, это полезно.
Кстати, только для поворотов на 90 ° есть более эффективная и точная функция:
def rotate_image_90(image, angle):
    angle = -angle
    rotated_image = image
    if angle == 0:
        pass
    elif angle == 90:
        rotated_image = np.rot90(rotated_image)
    elif angle == 180 or angle == -180:
        rotated_image = np.rot90(rotated_image)
        rotated_image = np.rot90(rotated_image)
    elif angle == -90:
        rotated_image = np.rot90(rotated_image)
        rotated_image = np.rot90(rotated_image)
        rotated_image = np.rot90(rotated_image)
    return rotated_image