Как определить интересующую область, а затем обрезать изображение с помощью OpenCV
Я задал подобный вопрос здесь, но это больше сосредоточено на тессеракте.
У меня есть образец изображения, как показано ниже. Я хотел бы сделать белый квадрат моей областью интересов, а затем обрезать эту часть (квадрат) и создать новое изображение с ним. Я буду работать с разными изображениями, поэтому квадрат не всегда будет находиться в одном и том же месте на всех изображениях. Поэтому мне нужно как-то определить края квадрата.
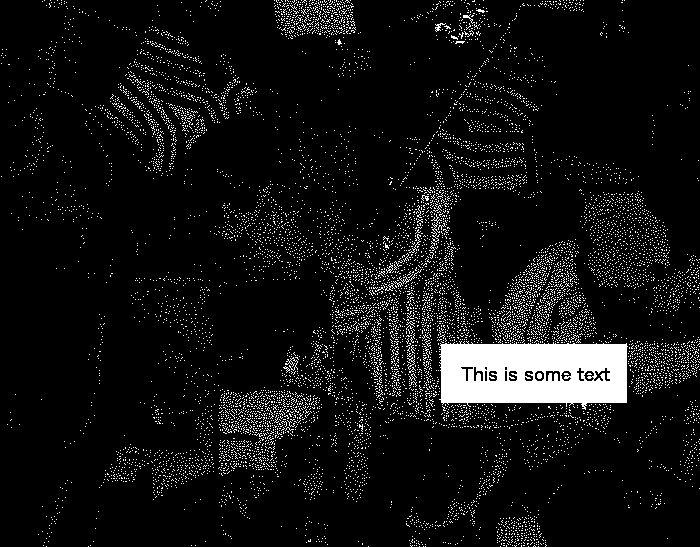
Какие методы предварительной обработки я могу выполнить для достижения результата?
3 ответа
Используя ваше тестовое изображение, я смог удалить все шумы с помощью простой операции эрозии.
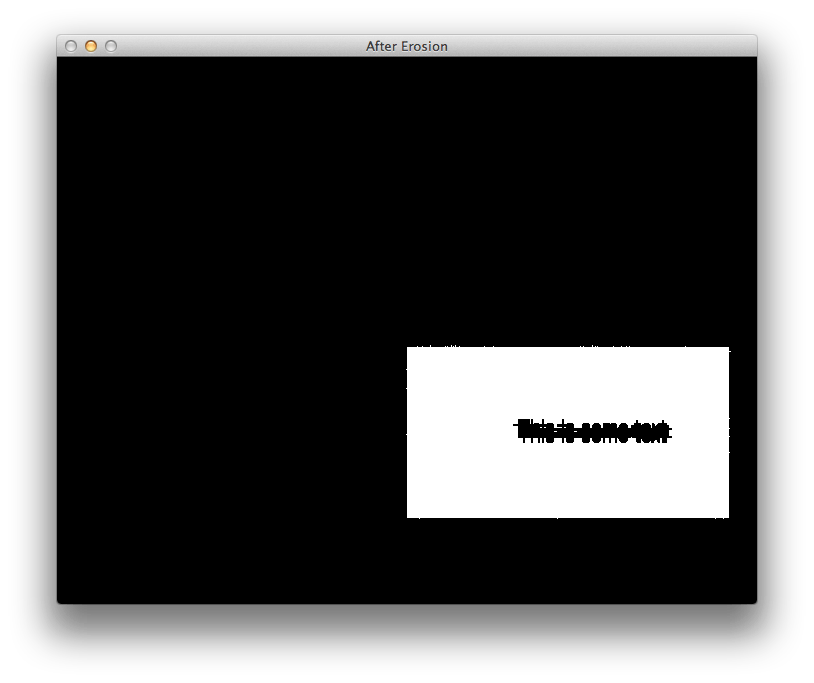
После этого простая итерация на Mat найти для угловых пикселей тривиально, и я говорил об этом в этом ответе. В целях тестирования мы можем нарисовать зеленые линии между этими точками, чтобы отобразить интересующую нас область на исходном изображении:
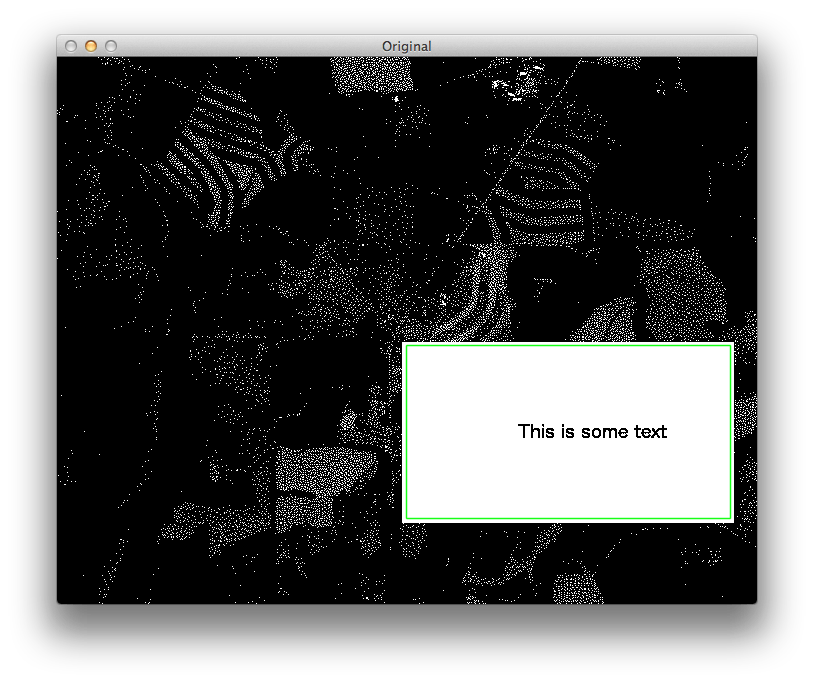
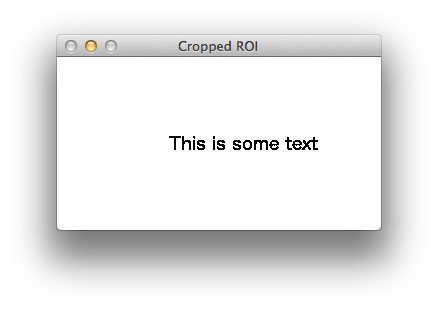
В конце я устанавливаю ROI в исходном изображении и обрезаю эту часть.
Окончательный результат отображается на изображении ниже:
Я написал пример кода, который выполняет эту задачу, используя C++ интерфейс OpenCV. Я уверен в ваших навыках по переводу этого кода на Python. Если вы не можете этого сделать, забудьте код и придерживайтесь схемы, которой я поделился в этом ответе.
#include <cv.h>
#include <highgui.h>

int main(int argc, char* argv[])
{
    cv::Mat img = cv::imread(argv[1]);
    std::cout << "Original image size: " << img.size() << std::endl;

    // Convert RGB Mat to GRAY
    cv::Mat gray;
    cv::cvtColor(img, gray, CV_BGR2GRAY);
    std::cout << "Gray image size: " << gray.size() << std::endl;

    // Erode image to remove unwanted noises
    int erosion_size = 5;
    cv::Mat element = cv::getStructuringElement(cv::MORPH_CROSS,
                                       cv::Size(2 * erosion_size + 1, 2 * erosion_size + 1),
                                       cv::Point(erosion_size, erosion_size) );
    cv::erode(gray, gray, element);

    // Scan the image searching for points and store them in a vector
    std::vector<cv::Point> points;
    cv::Mat_<uchar>::iterator it = gray.begin<uchar>();
    cv::Mat_<uchar>::iterator end = gray.end<uchar>();
    for (; it != end; it++)
    {
        if (*it)
            points.push_back(it.pos());
    }

    // From the points, figure out the size of the ROI
    int left, right, top, bottom;
    for (int i = 0; i < points.size(); i++)
    {
        if (i == 0) // initialize corner values
        {
            left = right = points[i].x;
            top = bottom = points[i].y;
        }

        if (points[i].x < left)
            left = points[i].x;

        if (points[i].x > right)
            right = points[i].x;

        if (points[i].y < top)
            top = points[i].y;

        if (points[i].y > bottom)
            bottom = points[i].y;
    }
    std::vector<cv::Point> box_points;
    box_points.push_back(cv::Point(left, top));
    box_points.push_back(cv::Point(left, bottom));
    box_points.push_back(cv::Point(right, bottom));
    box_points.push_back(cv::Point(right, top));

    // Compute minimal bounding box for the ROI
    // Note: for some unknown reason, width/height of the box are switched.
    cv::RotatedRect box = cv::minAreaRect(cv::Mat(box_points));
    std::cout << "box w:" << box.size.width << " h:" << box.size.height << std::endl;

    // Draw bounding box in the original image (debugging purposes)
    //cv::Point2f vertices[4];
    //box.points(vertices);
    //for (int i = 0; i < 4; ++i)
    //{
    //    cv::line(img, vertices[i], vertices[(i + 1) % 4], cv::Scalar(0, 255, 0), 1, CV_AA);
    //}
    //cv::imshow("Original", img);
    //cv::waitKey(0);

    // Set the ROI to the area defined by the box
    // Note: because the width/height of the box are switched,
    // they were switched manually in the code below:
    cv::Rect roi;
    roi.x = box.center.x - (box.size.height / 2);
    roi.y = box.center.y - (box.size.width / 2);
    roi.width = box.size.height;
    roi.height = box.size.width;
    std::cout << "roi @ " << roi.x << "," << roi.y << " " << roi.width << "x" << roi.height << std::endl;

    // Crop the original image to the defined ROI
    cv::Mat crop = img(roi);

    // Display cropped ROI
    cv::imshow("Cropped ROI", crop);
    cv::waitKey(0);

    return 0;
}
Видя, что текст - это единственное большое пятно, а все остальное чуть больше пикселя, простого морфологического открытия должно хватить
Вы можете сделать это в opencv или с imagemagic
После этого белый прямоугольник должен быть единственным, что осталось на изображении. Вы можете найти его с помощью opencvs findcontours, с помощью библиотеки CvBlobs для opencv или с помощью функции imagemagick -crop.
Вот ваше изображение с 2-мя ступенями эрозии и двумя ступенями расширения: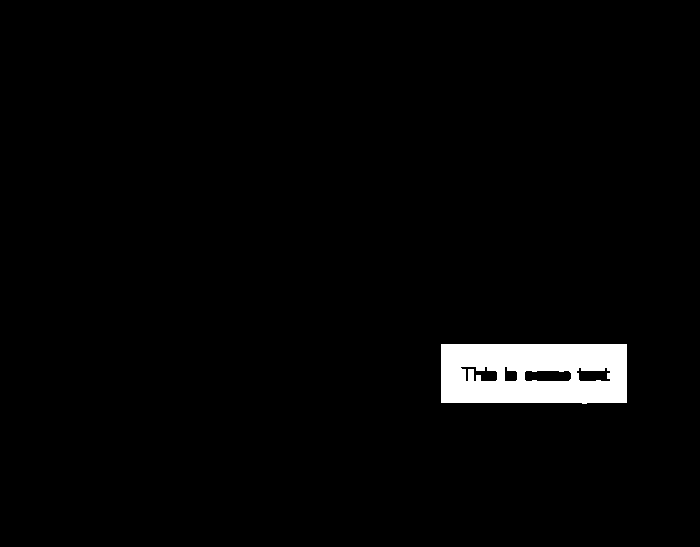 Вы можете просто вставить это изображение в функцию openCv findContours, как в учебном примере Squares, чтобы получить позицию
      #objective:
#1)compress large images to less than 1000x1000
#2)identify region of interests
#3)save rois in top to bottom order
import cv2
import os

def get_contour_precedence(contour, cols):
    tolerance_factor = 10
    origin = cv2.boundingRect(contour)
    return ((origin[1] // tolerance_factor) * tolerance_factor) * cols + origin[0]

# Load image, grayscale, Gaussian blur, adaptive threshold
image = cv2.imread('./images/sample_0.jpg')

#compress the image if image size is >than 1000x1000
height, width, color = image.shape #unpacking tuple (height, width, colour) returned by image.shape
while(width > 1000):
    height = height/2
    width = width/2
print(int(height), int(width))
height = int(height)
width = int(width)
image = cv2.resize(image, (width, height))

gray = cv2.cvtColor(image, cv2.COLOR_BGR2GRAY)
blur = cv2.GaussianBlur(gray, (9,9), 0)
thresh = cv2.adaptiveThreshold(gray,255,cv2.ADAPTIVE_THRESH_GAUSSIAN_C, cv2.THRESH_BINARY_INV,11,30)
# Dilate to combine adjacent text contours
kernel = cv2.getStructuringElement(cv2.MORPH_RECT, (9,9))
ret,thresh3 = cv2.threshold(image,127,255,cv2.THRESH_BINARY_INV)
dilate = cv2.dilate(thresh, kernel, iterations=4)

# Find contours, highlight text areas, and extract ROIs
cnts = cv2.findContours(dilate, cv2.RETR_EXTERNAL, cv2.CHAIN_APPROX_SIMPLE)
#cnts = cv2.findContours(thresh3, cv2.RETR_EXTERNAL, cv2.CHAIN_APPROX_SIMPLE)

cnts = cnts[0] if len(cnts) == 2 else cnts[1]

#ORDER CONTOURS top to bottom
cnts.sort(key=lambda x:get_contour_precedence(x, image.shape[1]))

#delete previous roi images in folder roi to avoid
dir = './roi/'
for f in os.listdir(dir):
    os.remove(os.path.join(dir, f))

ROI_number = 0
for c in cnts:
    area = cv2.contourArea(c)
    if area > 10000:
        x,y,w,h = cv2.boundingRect(c)
        #cv2.rectangle(image, (x, y), (x + w, y + h), (36,255,12), 3)
        cv2.rectangle(image, (x, y), (x + w, y + h), (100,100,100), 1)
        #use below code to write roi when results are good
        ROI = image[y:y+h, x:x+w]
        cv2.imwrite('roi/ROI_{}.jpg'.format(ROI_number), ROI)
        ROI_number += 1

cv2.imshow('thresh', thresh)
cv2.imshow('dilate', dilate)
cv2.imshow('image', image)
cv2.waitKey()