iOS - позиционирование пользовательского наложения на камеру (вертикальное выравнивание). Размер верхней черной полосы
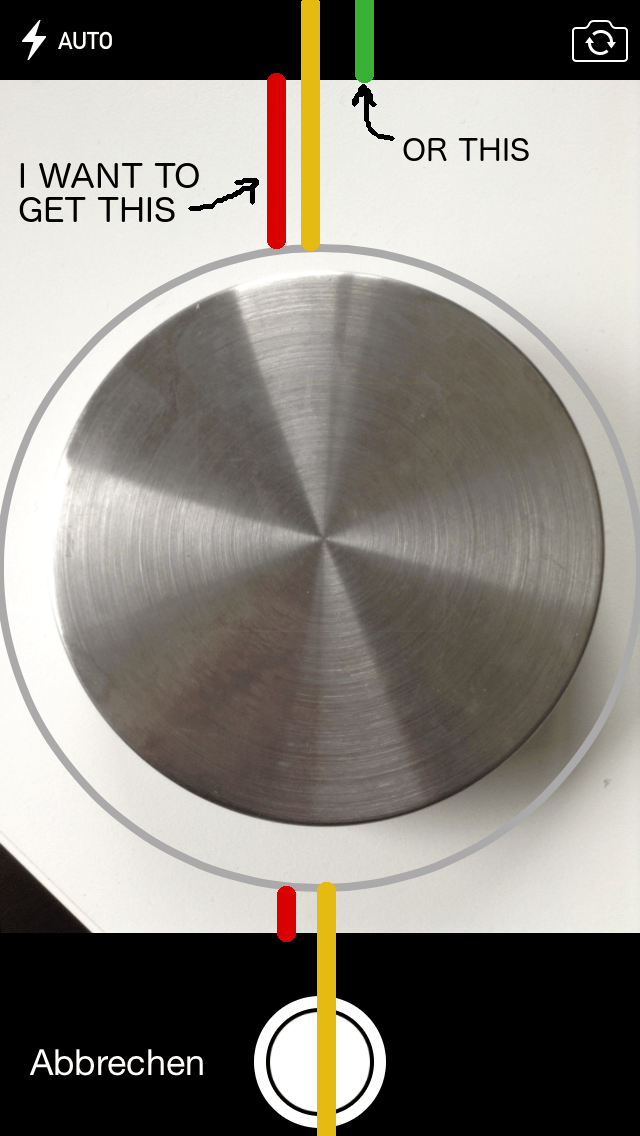
Я ищу программное решение для следующей проблемы: я хочу нарисовать пользовательский оверлей на камере (iOS). И я хочу, чтобы он был вертикально в центре обзора камеры. Мне удалось нарисовать мой пользовательский вид по центру относительно экрана, но не по изображению с камеры.
Для этого мне нужно получить размер верхней черной полосы. Как я могу получить это?
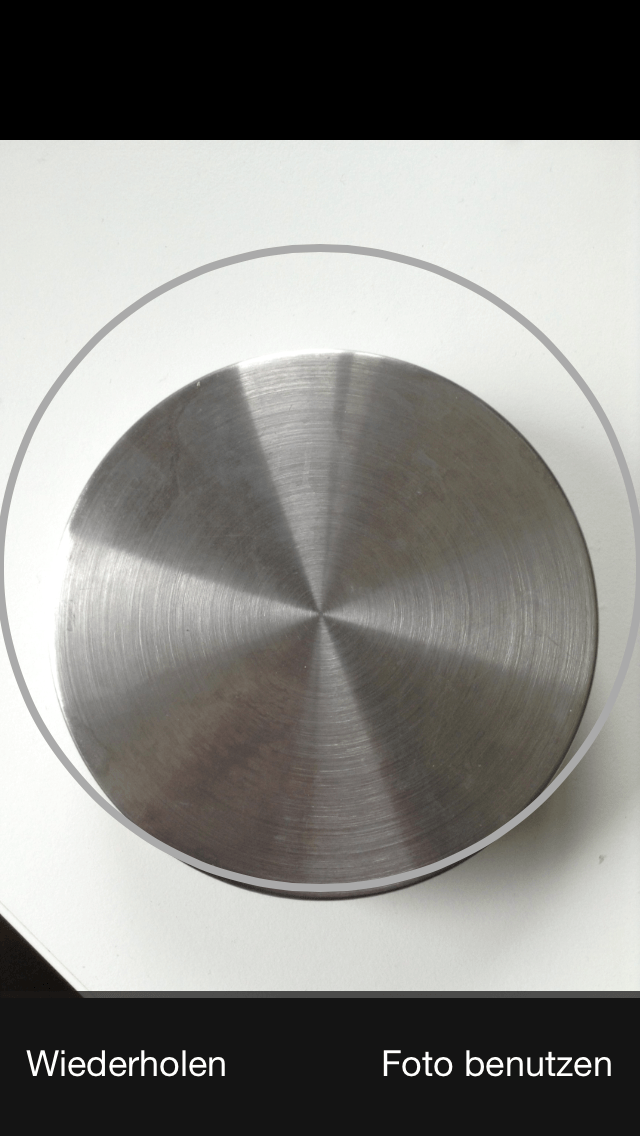
Размеры верхней и нижней полос не одинаковы, поэтому изображение, которое я получаю, имеет это раздражающее смещение по оси Y к нижней части.

Обратите внимание на смещение полученного изображения:
1 ответ
Хорошо, ребята, я в конечном итоге использовал AVFoundation, который в итоге оказался еще лучшим решением, так как его можно настраивать. я имел self.fullScreenImageView а также self.previewLayer как свойства класса. Вам нужно написать свой собственный код, реализующий кнопки и код съемки камеры. Здесь вы можете поиграть с качеством фотографии, чтобы получить оптимальный размер / качество. Я использовал 0,6, но вы можете выбрать все, что вы хотите.
@import MobileCoreServices;
@import AVFoundation;

    - (void)viewDidLoad {
    [super viewDidLoad];
    // Do any additional setup after loading the view.

    [self.view setBackgroundColor:[UIColor blackColor]];

    self.fullScreenImageView = [[UIImageView alloc] initWithFrame:CGRectMake(0, 0, self.view.bounds.size.width, self.view.bounds.size.height)];
    self.fullScreenImageView.contentMode = UIViewContentModeScaleAspectFit;
    [self.fullScreenImageView setCenter:self.view.center];

        AVCaptureSession *captureSession = [[AVCaptureSession alloc] init];
        captureSession.sessionPreset = AVCaptureSessionPresetHigh;
        AVCaptureDevice *captureDevice = [AVCaptureDevice defaultDeviceWithMediaType:AVMediaTypeVideo];
        if (captureDevice) {
            NSError *error;
            AVCaptureDeviceInput *captureDeviceInput = [[AVCaptureDeviceInput alloc] initWithDevice:captureDevice error:&error];
            if (!error && [captureSession canAddInput:captureDeviceInput]) {
                [captureSession addInput:captureDeviceInput];
            }
        }

        AVCaptureStillImageOutput *stillImageOutput = [AVCaptureStillImageOutput new];
        [stillImageOutput setOutputSettings:@{AVVideoCodecKey : AVVideoCodecJPEG,
                                              AVVideoQualityKey : @(0.6)}];
        [captureSession addOutput:stillImageOutput];

        self.previewLayer = [[AVCaptureVideoPreviewLayer alloc] initWithSession:captureSession];
        [self.previewLayer setVideoGravity:AVLayerVideoGravityResizeAspectFill];
        self.previewLayer.frame = self.fullScreenImageView.bounds;
        self.previewLayer.position = CGPointMake(CGRectGetMidX(self.fullScreenImageView.bounds), CGRectGetMidY(self.fullScreenImageView.bounds));
        [self.fullScreenImageView.layer addSublayer:self.previewLayer];
        [captureSession startRunning];

        CGRect circleRect = CGRectMake(0, (self.fullScreenImageView.bounds.size.height - self.fullScreenImageView.bounds.size.width) / 2, self.fullScreenImageView.bounds.size.width, self.fullScreenImageView.bounds.size.width);
        UIBezierPath *circle = [UIBezierPath bezierPathWithOvalInRect:circleRect];
        CAShapeLayer *ringLayer = [CAShapeLayer layer];
        ringLayer.path = circle.CGPath;
        ringLayer.fillColor = nil;
        ringLayer.strokeColor = [UIColor redColor].CGColor;
        ringLayer.lineWidth = 2.0;
        ringLayer.lineDashPattern = @[@5.0, @10.0];
        [self.fullScreenImageView.layer addSublayer:ringLayer];

        [self.navigationController setToolbarHidden:NO];
        [self.navigationController.toolbar setBarStyle:UIBarStyleBlackOpaque];
        [self.navigationController.toolbar setTintColor:[UIColor whiteColor]];
        // Add here some buttons, which are standard UIBarButtonItems

    [self.view addSubview:self.fullScreenImageView];
}