Как начать новый вид деятельности с основного и отобразить все элементы вместе с фоном?
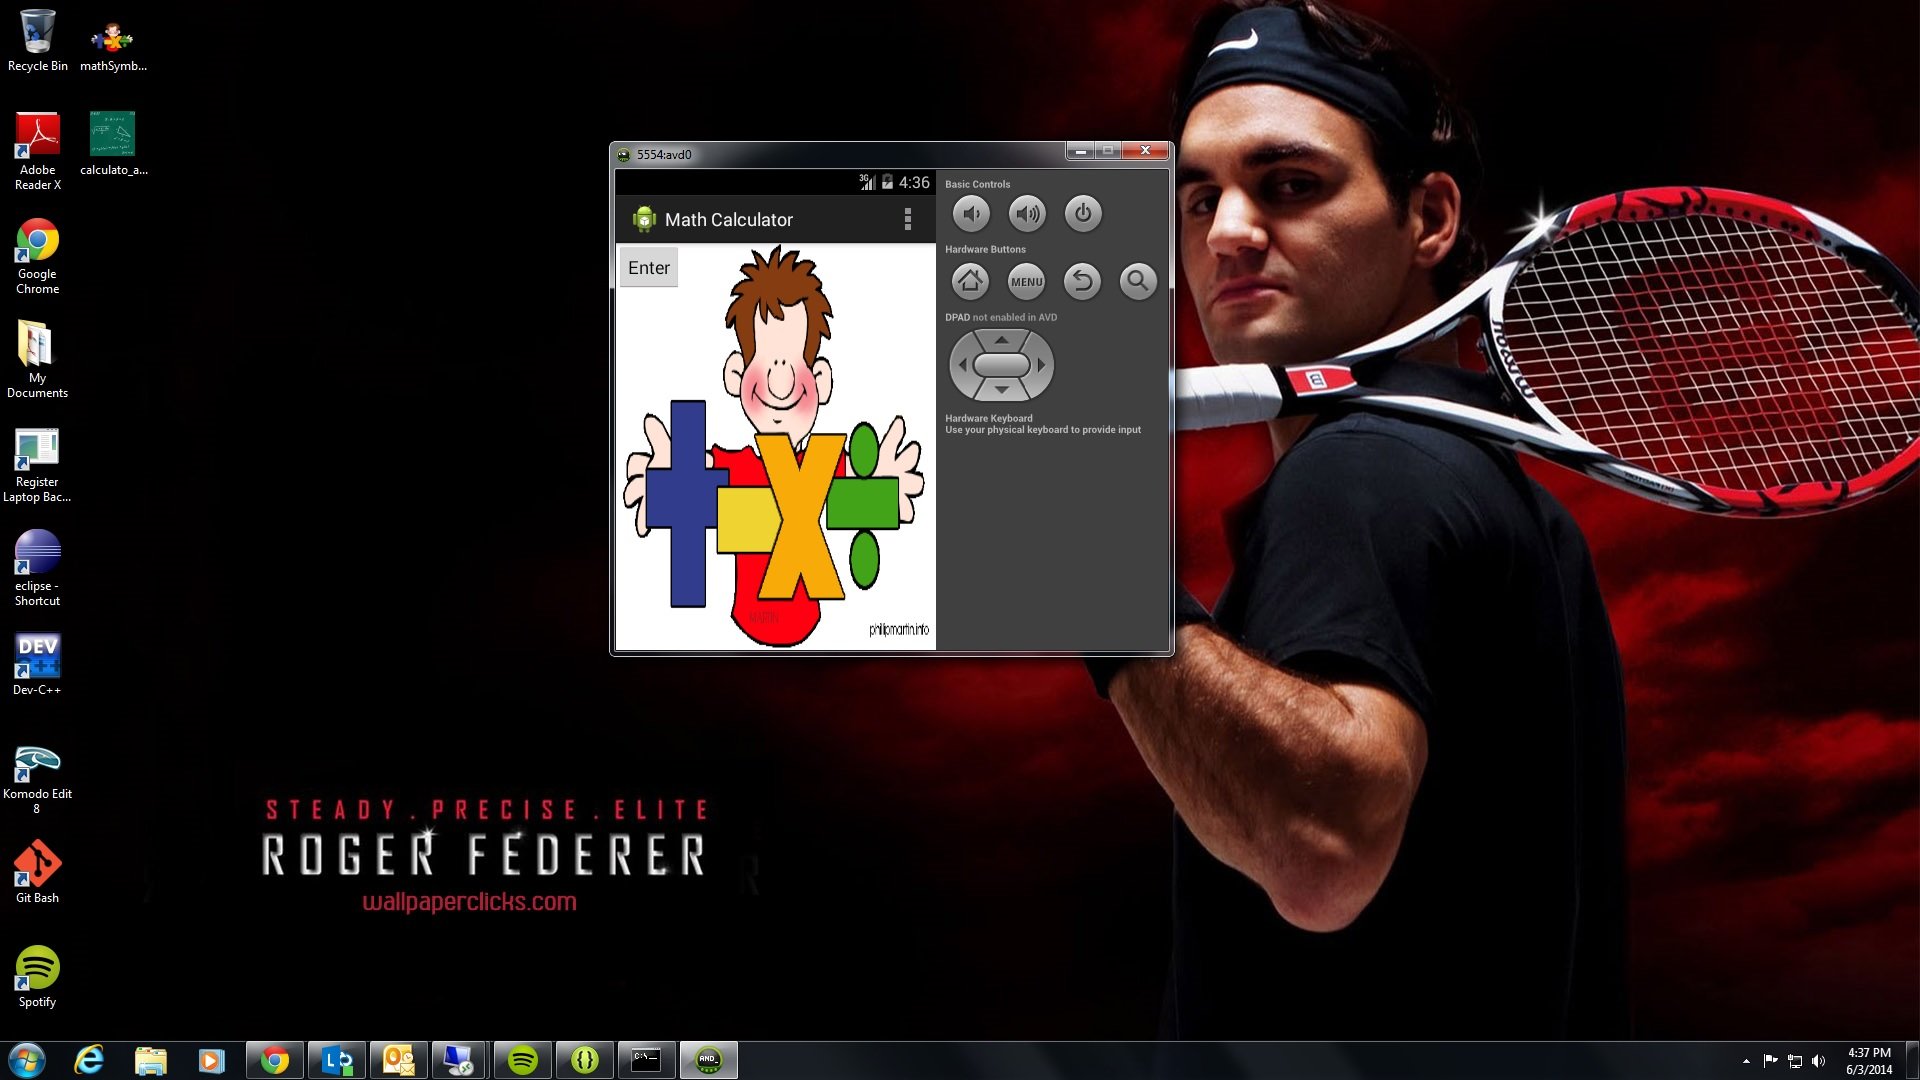
Я новичок в программировании на Android, и чтобы научиться этому, я сам делаю пример калькулятора, используя ссылки в Интернете, сейчас я хочу это сделать. Я следовал учебному пособию "Построение первого приложения", как это предусмотрено в официальной документации Google, и мне удалось запустить новое действие по нажатию кнопки с помощью класса Intents, вот изображение приложения в начале:
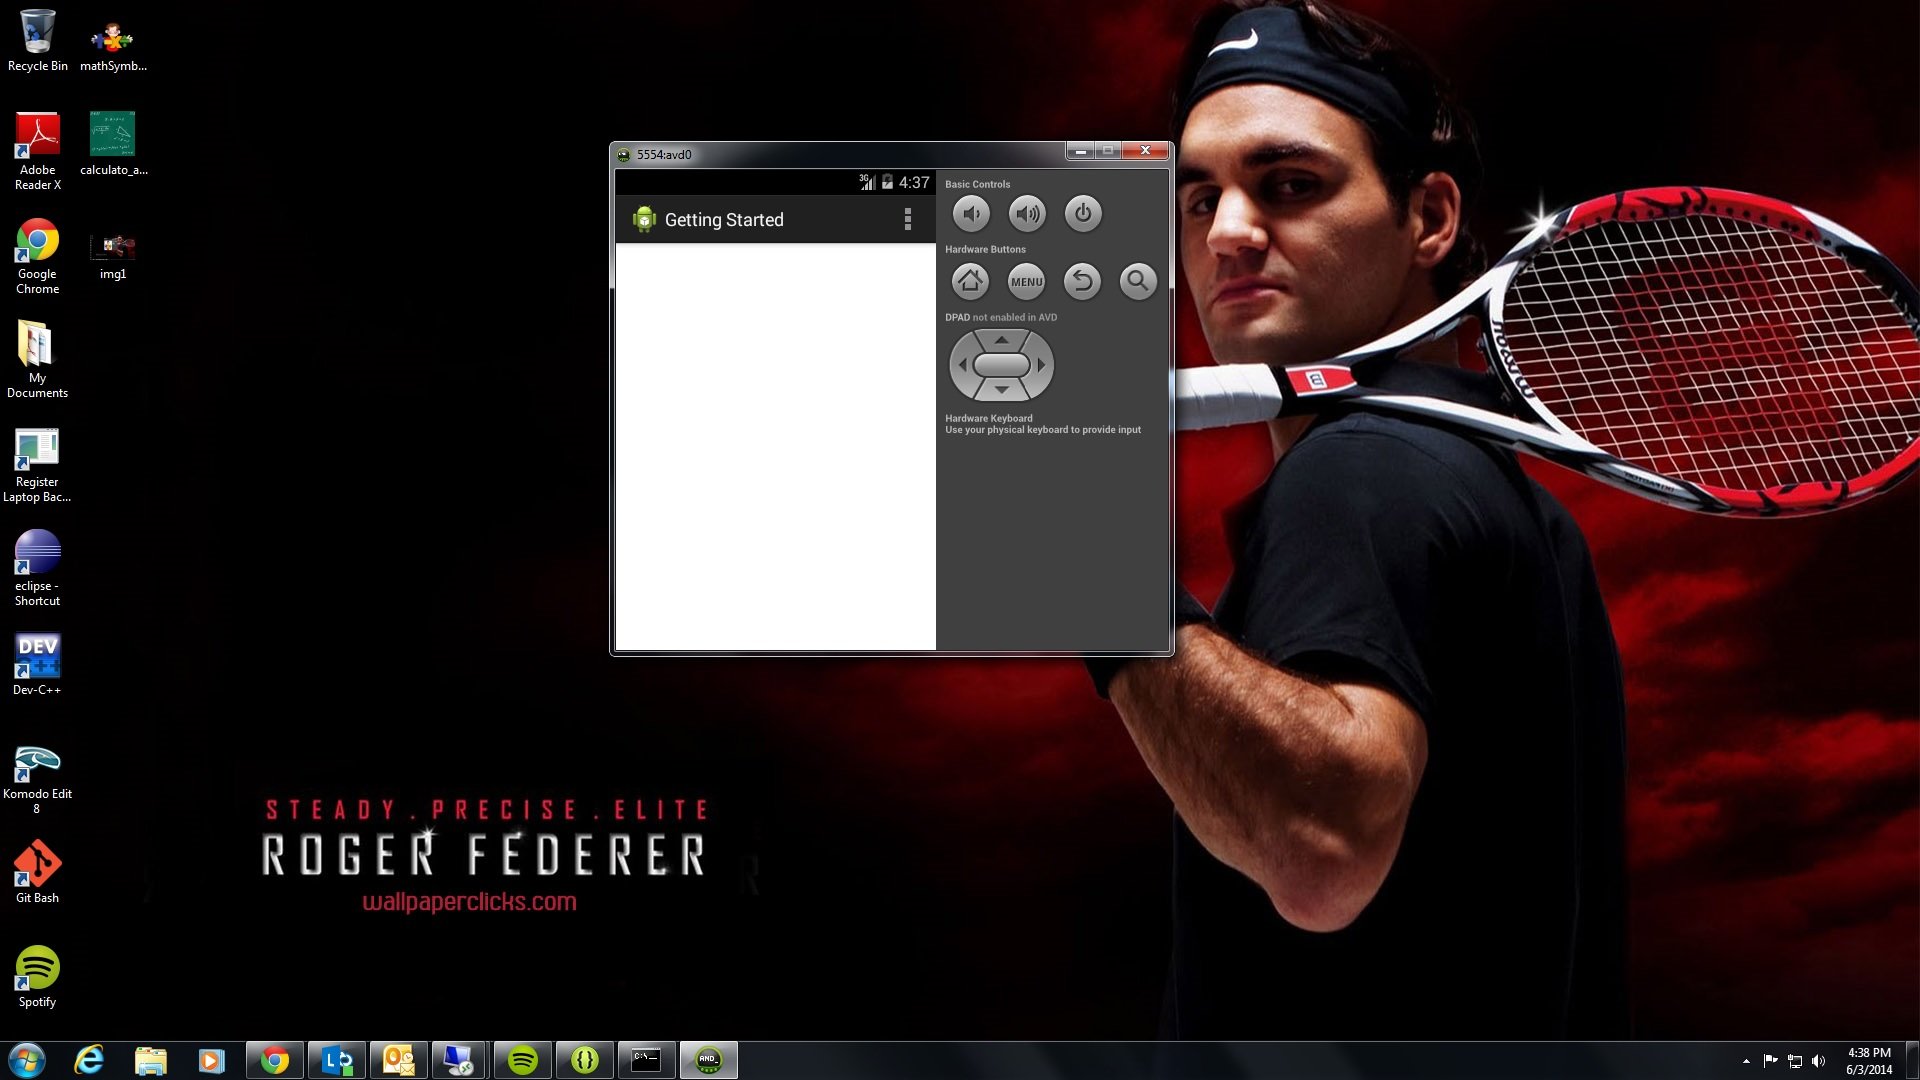
но когда я нажимаю кнопку ввода, хотя я установил параметр android: background для нового действия, он не устанавливает фон для этого изображения, единственное, что я получаю, это пустое действие, вот изображение -:

вот код для моей MainActivity, которая запускается при запуске приложения -
<LinearLayout xmlns:android="http://schemas.android.com/apk/res/android"
    xmlns:tools="http://schemas.android.com/tools"
    android:layout_width="match_parent"
    android:layout_height="match_parent"
    android:orientation="vertical"
    android:background="@drawable/math_symbols" >

    <Button android:id="@+id/enter_button"
            android:layout_width="wrap_content"
            android:layout_height="wrap_content"
            android:text="@string/enter_button"
            android:onClick="enterCalculator"/>
</LinearLayout>
Вот код для второго действия, которое начинается, когда я нажимаю кнопку ввода, и это делается с помощью Intents -:
<LinearLayout xmlns:android="http://schemas.android.com/apk/res/android"
    xmlns:tools="http://schemas.android.com/tools"
    android:layout_width="match_parent"
    android:layout_height="match_parent"
    android:orientation="vertical"
    android:background="@drawable/calculato_activity_1" >

     <RadioGroup android:id="@+id/operation_radio_group"
            android:layout_width="fill_parent"
            android:layout_height="wrap_content"
            android:layout_marginLeft="30dip"
            android:orientation="horizontal">

        <RadioButton android:id="@+id/sum"
                 android:layout_width="wrap_content"
                 android:layout_height="wrap_content"
                 android:text="@string/sum">

        </RadioButton>

        <RadioButton android:id="@+id/difference"
                 android:layout_width="wrap_content"
                 android:layout_height="wrap_content"
                 android:text="@string/difference">

        </RadioButton>

        <RadioButton android:id="@+id/multiply"
                 android:layout_width="wrap_content"
                 android:layout_height="wrap_content"
                 android:text="@string/multiply">

        </RadioButton>

    </RadioGroup>
</LinearLayout>
выше фон не отображается, и на экран не добавляются никакие представления, также вот как я использую Intents в классе MainActivity:
package com.example.mathcalculator;

import android.support.v7.app.ActionBarActivity;
import android.support.v7.app.ActionBar;
import android.support.v4.app.Fragment;
import android.content.Intent;
import android.os.Bundle;
import android.view.LayoutInflater;
import android.view.Menu;
import android.view.MenuItem;
import android.view.View;
import android.view.ViewGroup;
import android.os.Build;

public class MainActivity extends ActionBarActivity {

    // this is the message used to enter the main calculator activity
    public static String ENTER_MESSAGE = "com.example.mathcalculator.MainActivity.Message";

    // this method is used to enter the actual calculator screen
    public void enterCalculator(View view){

        // we create an Intent to carry over the data from the button and enter the CalculatorActivity1
        Intent intent = new Intent(this, CalculatorActivity1.class);

        // put the key-value pair into the intent
        intent.putExtra(ENTER_MESSAGE, "ENTER");

        // start the new activity with the intent as the input which carries over the message bundle
        startActivity(intent);
    }

    @Override
    protected void onCreate(Bundle savedInstanceState) {
        super.onCreate(savedInstanceState);
        setContentView(R.layout.activity_main);

        if (savedInstanceState == null) {
            getSupportFragmentManager().beginTransaction()
                    .add(R.id.container, new PlaceholderFragment()).commit();
        }
    }

    @Override
    public boolean onCreateOptionsMenu(Menu menu) {

        // Inflate the menu; this adds items to the action bar if it is present.
        getMenuInflater().inflate(R.menu.main, menu);
        return true;
    }

    @Override
    public boolean onOptionsItemSelected(MenuItem item) {
        // Handle action bar item clicks here. The action bar will
        // automatically handle clicks on the Home/Up button, so long
        // as you specify a parent activity in AndroidManifest.xml.
        int id = item.getItemId();
        if (id == R.id.action_settings) {
            return true;
        }
        return super.onOptionsItemSelected(item);
    }

    /**
     * A placeholder fragment containing a simple view.
     */
    public static class PlaceholderFragment extends Fragment {

        public PlaceholderFragment() {
        }

        @Override
        public View onCreateView(LayoutInflater inflater, ViewGroup container,
                Bundle savedInstanceState) {
            View rootView = inflater.inflate(R.layout.fragment_main, container,
                    false);
            return rootView;
        }
    }

}
и вот код для класса CalculatorActivity1 -:
package com.example.mathcalculator;

import android.support.v7.app.ActionBarActivity;
import android.support.v4.app.Fragment;
import android.os.Bundle;
import android.view.LayoutInflater;
import android.view.Menu;
import android.view.MenuItem;
import android.view.View;
import android.view.ViewGroup;

public class CalculatorActivity1 extends ActionBarActivity {

    @Override
    protected void onCreate(Bundle savedInstanceState) {
        super.onCreate(savedInstanceState);

    }

    @Override
    public boolean onCreateOptionsMenu(Menu menu) {

        // Inflate the menu; this adds items to the action bar if it is present.
        getMenuInflater().inflate(R.menu.calculator_activity1, menu);
        return true;
    }

    @Override
    public boolean onOptionsItemSelected(MenuItem item) {
        // Handle action bar item clicks here. The action bar will
        // automatically handle clicks on the Home/Up button, so long
        // as you specify a parent activity in AndroidManifest.xml.
        int id = item.getItemId();
        if (id == R.id.action_settings) {
            return true;
        }
        return super.onOptionsItemSelected(item);
    }

    /**
     * A placeholder fragment containing a simple view.
     */
    public static class PlaceholderFragment extends Fragment {

        public PlaceholderFragment() {
        }

        @Override
        public View onCreateView(LayoutInflater inflater, ViewGroup container,
                Bundle savedInstanceState) {
            View rootView = inflater.inflate(
                    R.layout.fragment_calculator_activity1, container, false);
            return rootView;
        }
    }

}
3 ответа
Вам необходимо настроить вид контента для своей деятельности. Это уже сделано в примере активности приложения, поэтому внутри метода oncreate вашей MainActivity вы можете увидеть: setContentView(R.layout.activity_main);Он устанавливает макет Activity_main для представления содержимого MainActivity. Так что вам нужно сделать это и с CalculatorActivity1, под super.onCreate(savedInstanceState);Вы можете найти второе имя макета в папке res / layout.
Вы не делаете изменения во фрагменте. После setContentView(R.layout.xml_file); внутри onCreate вы должны иметь это:
 if (savedInstanceState == null) {
        getSupportFragmentManager().beginTransaction()
                .add(R.id.container, new PlaceholderFragment()).commit();
    }
Вы пропустили установить фон во втором упражнении xml.
android:background="@drawable/math_symbols"
Привязать макет XML ко второму действию CalculatorActivity1:
@Override
protected void onCreate(Bundle savedInstanceState) {
    super.onCreate(savedInstanceState);

    setContentView(R.layout.<xmlName>);
}