Справка по макету Android, недостающие элементы
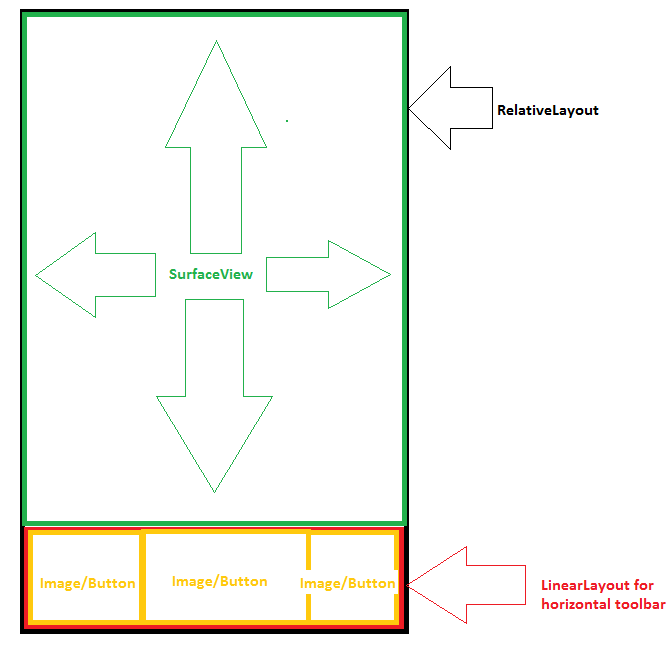
Я пытаюсь создать макет, который содержит "SurfaceView" вверху с горизонтальной панелью инструментов, которая разделена на 3 сегмента в нижней части, однако мой SurfaceView, который содержит предварительный просмотр камеры, является единственным отображаемым элементом. Пожалуйста, укажите на ошибку в моем макете XML или предоставьте мне похожий макет XML, спасибо.
Ниже мой макет и обновления на основе рекомендаций пользователя
Попытка № 1 (RelativeLayout от имени root):
<RelativeLayout xmlns:android="http://schemas.android.com/apk/res/android"
    android:id="@+id/LayoutForPreview"
    android:layout_width="fill_parent"
    android:layout_height="fill_parent"
    android:orientation="vertical"
    android:screenOrientation="portrait" >

    <SurfaceView
        android:id="@+id/surfaceViewBarcodeScanner"
        android:layout_width="match_parent"
        android:layout_height="wrap_content"
        android:layout_above="@+id/linearLayoutToolbar"
        android:layout_gravity="top"
        android:scaleType="fitXY" />

    <LinearLayout
        android:id="@+id/linearLayoutToolbar"
        android:layout_width="match_parent"
        android:layout_height="wrap_content"
        android:layout_alignParentBottom="true"
        android:orientation="horizontal" >

        <ImageView
            android:id="@+id/imageView1"
            android:layout_width="wrap_content"
            android:layout_height="wrap_content"
            android:scaleType="fitXY"
            android:src="@drawable/scanner_bottom_left" />

        <ImageView
            android:id="@+id/imageView2"
            android:layout_width="wrap_content"
            android:layout_height="wrap_content"
            android:layout_weight="0.68"
            android:scaleType="fitXY"
            android:src="@drawable/scanner_bottom_center_toolbar" />

        <ImageView
            android:id="@+id/imageView3"
            android:layout_width="wrap_content"
            android:layout_height="wrap_content"
            android:scaleType="fitXY"
            android:src="@drawable/scanner_bottom_right_landscape_button" />
    </LinearLayout>

</RelativeLayout>
Ниже мой желаемый внешний вид GUI:
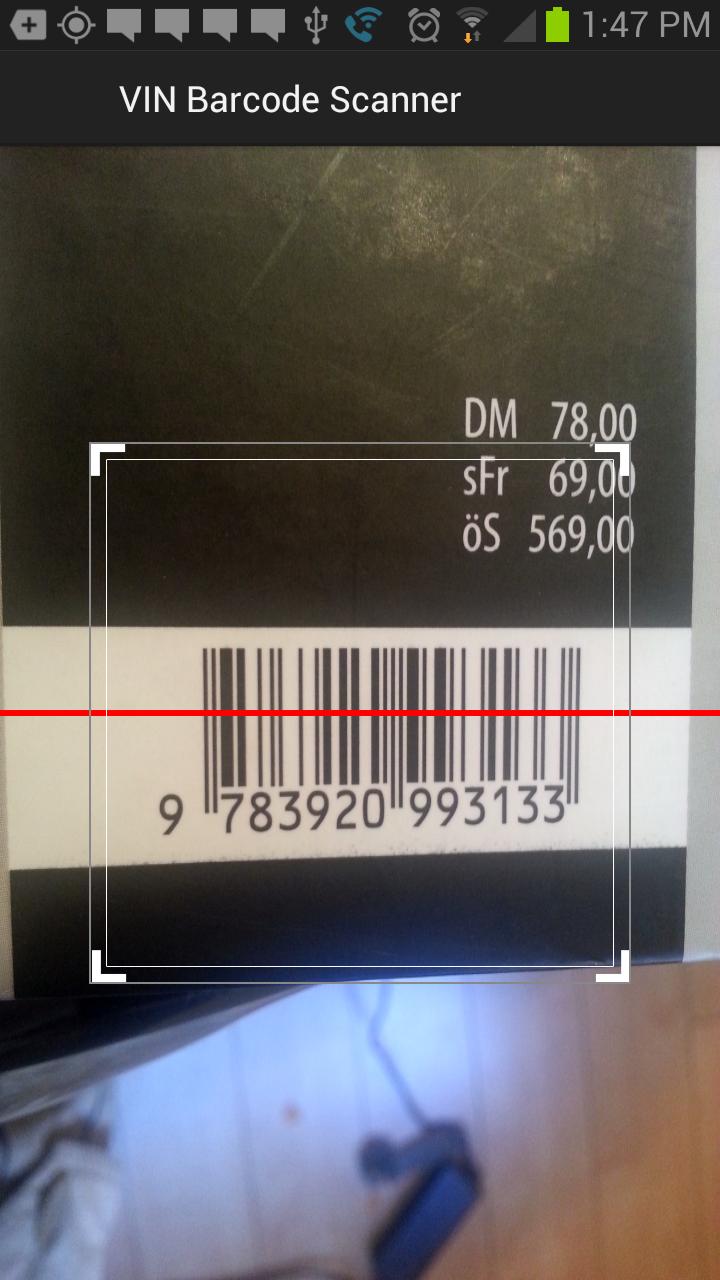
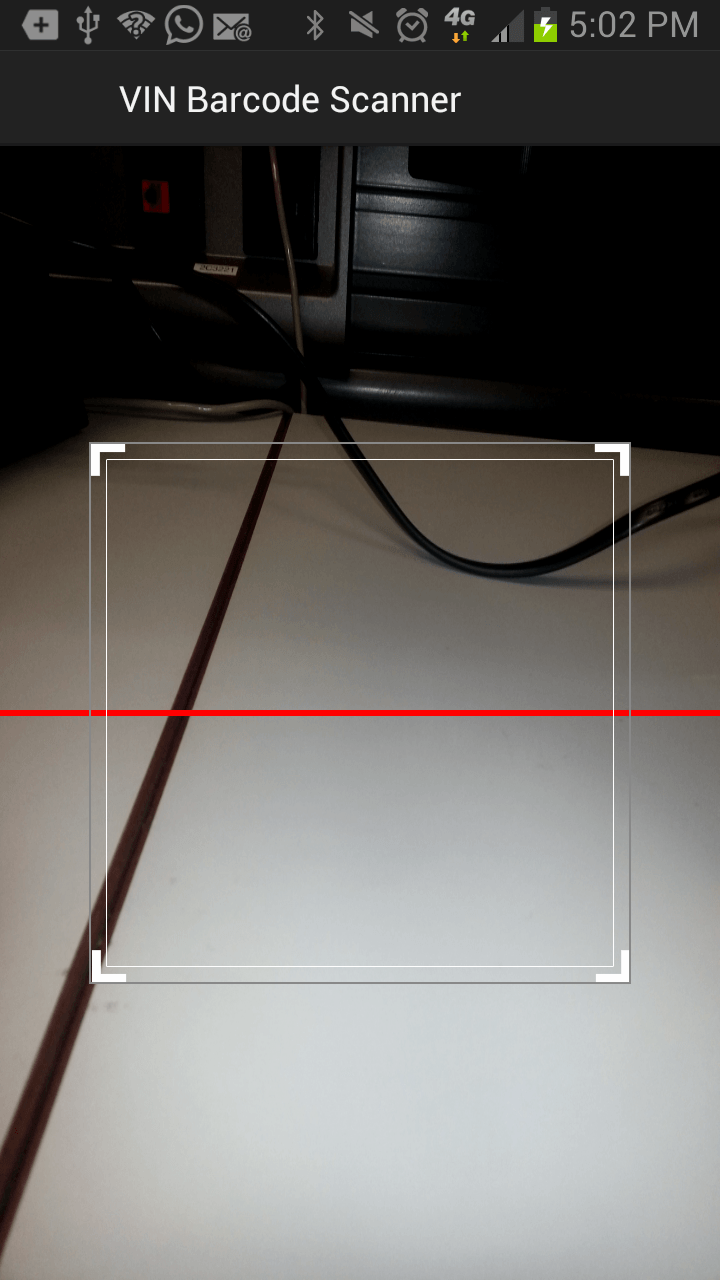
Попытка # 1 Результат, снимок устройства, который показывает только SurfaceView:
Снимок графического инструмента eclipse, который показывает, как должен выглядеть макет. 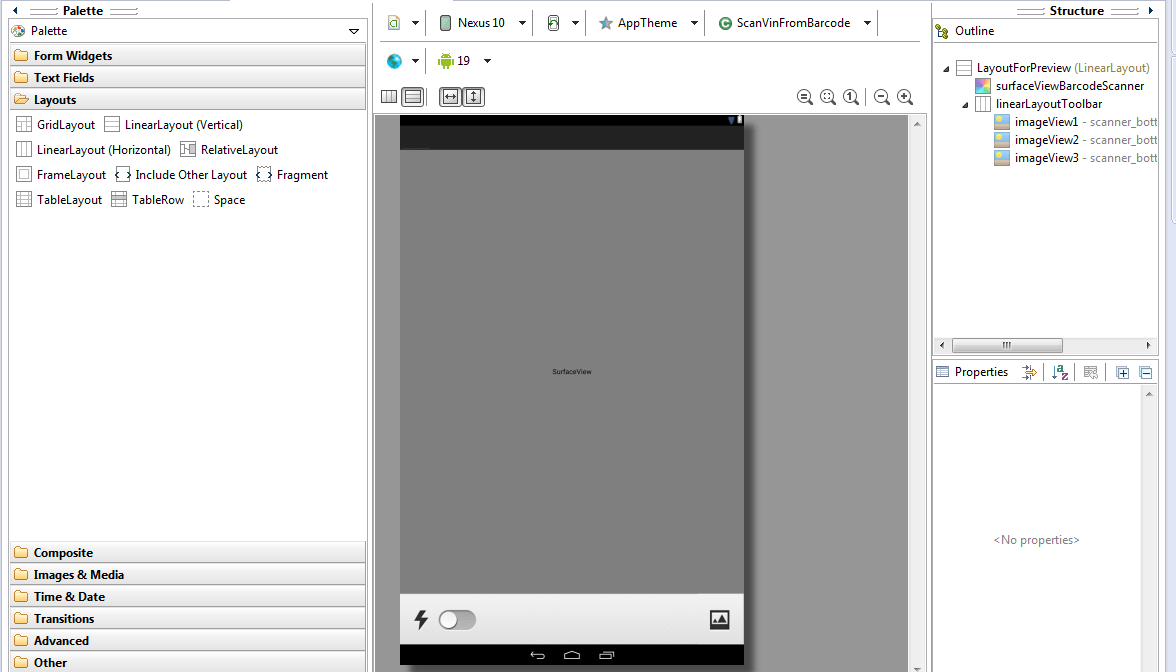
Попытка № 2 (LinearLayout как root):
<LinearLayout xmlns:android="http://schemas.android.com/apk/res/android"
    android:id="@+id/LayoutForPreview"
    android:layout_width="fill_parent"
    android:layout_height="fill_parent"
    android:orientation="vertical"
    android:screenOrientation="portrait" >

    <SurfaceView
        android:id="@+id/surfaceViewBarcodeScanner"
        android:layout_width="match_parent"
        android:layout_height="wrap_content"
        android:layout_gravity="top"
        android:scaleType="fitXY"
        android:layout_weight="1" />

    <LinearLayout
        android:id="@+id/linearLayoutToolbar"
        android:layout_width="match_parent"
        android:layout_height="wrap_content"
        android:orientation="horizontal"
        android:layout_gravity="bottom" >

        <ImageView
            android:id="@+id/imageView1"
            android:layout_width="wrap_content"
            android:layout_height="wrap_content"
            android:scaleType="fitXY"
            android:src="@drawable/scanner_bottom_left" />

        <ImageView
            android:id="@+id/imageView2"
            android:layout_width="wrap_content"
            android:layout_height="wrap_content"
            android:layout_weight="0.68"
            android:scaleType="fitXY"
            android:src="@drawable/scanner_bottom_center_toolbar" />

        <ImageView
            android:id="@+id/imageView3"
            android:layout_width="wrap_content"
            android:layout_height="wrap_content"
            android:scaleType="fitXY"
            android:src="@drawable/scanner_bottom_right_landscape_button" />
    </LinearLayout>

</LinearLayout>
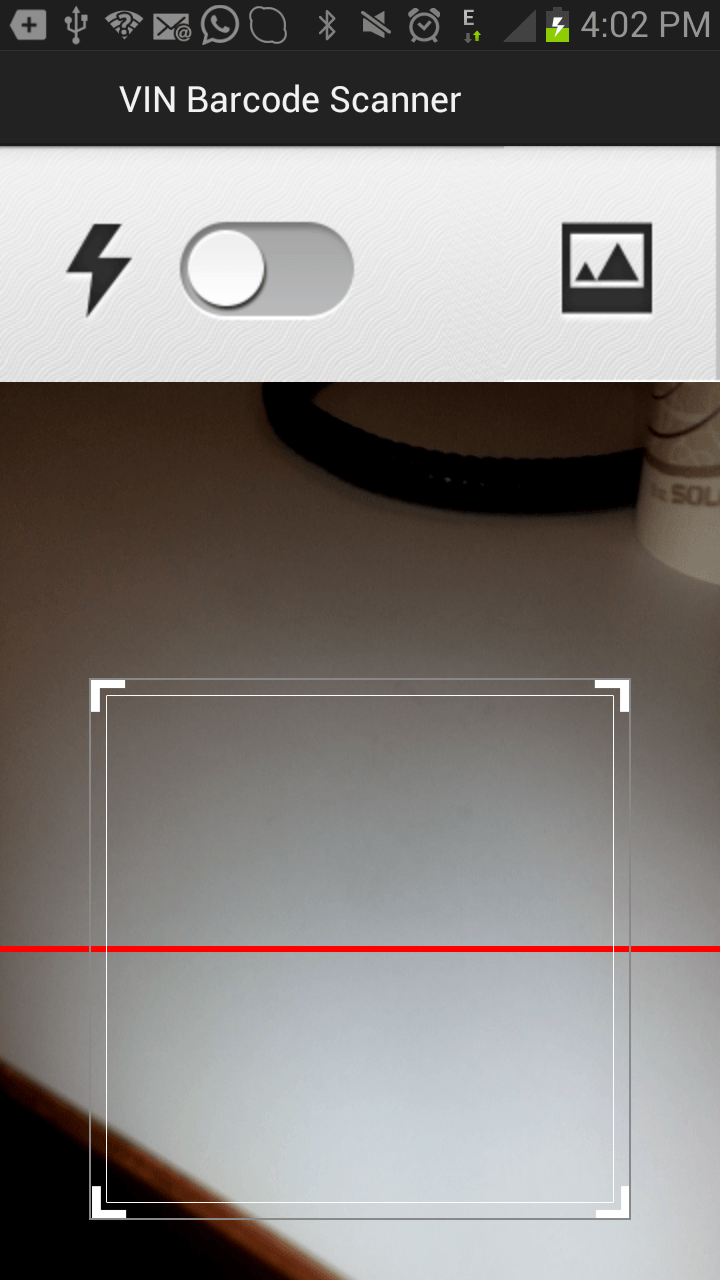
Попытка № 2, Результат, Снимок устройства:
Вопросы:
1) Панель инструментов появляется сверху, а не снизу
2) Предварительный просмотр камеры зависает и приложение вылетает. По какой-то причине LinearLayout вызывает ошибку камеры 1001, и я думаю, что это связано с размерами предварительного просмотра.
Попытка № 3 (программно добавить панель инструментов в относительный или линейный макет в действии onCreate).
LinearLayout:
<LinearLayout xmlns:android="http://schemas.android.com/apk/res/android"
    android:id="@+id/LayoutForPreview"
    android:layout_width="fill_parent"
    android:layout_height="fill_parent"
    android:orientation="vertical"
    android:screenOrientation="portrait" >

    <SurfaceView
        android:id="@+id/surfaceViewBarcodeScanner"
        android:layout_width="match_parent"
        android:layout_height="wrap_content"
        android:layout_gravity="top"
        android:scaleType="fitXY"
        android:layout_weight="1" />

</LinearLayout>
Панель инструментов определена в отдельном XML, добавленном позже через код Java:
<?xml version="1.0" encoding="UTF-8"?>
<!--  LinearLayout that contains toolbar that is divided into 3 sections horizontally , layout_below="@+id/BarcodeScannerFrame-->
<LinearLayout
     xmlns:android="http://schemas.android.com/apk/res/android"
    android:id="@+id/linearLayoutToolbar"
    android:layout_width="match_parent"
    android:layout_height="wrap_content"
    android:layout_gravity="bottom"
    android:orientation="horizontal" >

    <ImageView
        android:id="@+id/imageView1"
        android:layout_width="wrap_content"
        android:layout_height="wrap_content"
        android:scaleType="fitXY"
        android:src="@drawable/scanner_bottom_left" />

    <ImageView
        android:id="@+id/imageView2"
        android:layout_width="wrap_content"
        android:layout_height="wrap_content"
        android:layout_weight="0.68"
        android:scaleType="fitXY"
        android:src="@drawable/scanner_bottom_center_toolbar" />

    <ImageView
        android:id="@+id/imageView3"
        android:layout_width="wrap_content"
        android:layout_height="wrap_content"
        android:scaleType="fitXY"
        android:src="@drawable/scanner_bottom_right_landscape_button" />
</LinearLayout>
onCreate, onResume, другие соответствующие фрагменты кода только для моей деятельности, панель инструментов LinearLayout добавляется в линейный или относительный макет во время выполнения:
//import not included
    public class ScanVinFromBarcodeActivity extends Activity {
        // camera object that is used globally in this activity and also passed
        // reference to PreviewSurface inner class
        private Camera globalCamera;
        private int cameraId = 0;
        // bitmap that would created after picture is taken and converted from
        // camera bytes
        private Bitmap bmpOfTheImageFromCamera = null;
        // global flag whether a camera has been detected
        private boolean isThereACamera = false;
        // layout for this activity
        private LinearLayout RelativeLayoutBarcodeScanner= null;
        // CameraPreview extends SurfaceView displays preview of images from the
        // Camera
        private CameraPreview newCameraPreview = null;
        // used to inflate the xml layout
        private SurfaceView surfaceViewBarcodeScanner = null;
        private boolean cameraPreviewing = false;
        // this continueToAutomaticallyDecode flag is initially set to TRUE, but
        // will be set to FALSE on the first successful decode OR when a crucial
        // method in the code process fails or throws an exception
        private volatile boolean continueToAutomaticallyDecode = true;
        // global flag used to indicate picture taking & decoding is in progress
        private volatile boolean takingPictureAndDecodeInprogress = false;
        // Bitmap options for bitmap creation from camera picture
        BitmapFactory.Options options = null;
        // used for samsung galaxy s devices only
        private Matrix rotationMatrix90CounterClockWise = null;
        // Reader is class from zxing used to decode barcodes
        Reader reader = null;
        // DecodeHintType hashtable is used to provide help to the zxing Reader
        // class
        Hashtable<DecodeHintType, Object> decodeHints = null;
        //
        private boolean onTouchEvent = true;
        //
        private OrientationEventListener orientationEventListener = null;
        // 1 means the screen is PORTRAIT and 2 means screen is LANDSCAPE
        private int latestScreenOrientation = 1;
        //
        Camera.Parameters Flash = null;
        //
        private String globalVIN = null;
        //
        private Handler handler = null;
        //
        private LinearLayout barcodeVinScannerToolbar = null;

        public boolean isContinueToAutomaticallyDecode() {

            return continueToAutomaticallyDecode;
        }

        public void setContinueToAutomaticallyDecode(
                boolean continueToAutomaticallyDecode) {

                this.continueToAutomaticallyDecode = continueToAutomaticallyDecode;

        }

        public boolean isTakingPictureAndDecodeInprogress() {
            return takingPictureAndDecodeInprogress;
        }

        public void setTakingPictureAndDecodeInprogress(
                boolean takingPictureAndDecodeInprogress) {

                this.takingPictureAndDecodeInprogress = takingPictureAndDecodeInprogress;

        }

        /*
         * This method , finds FEATURE_CAMERA, opens the camera, set parameters ,
         * add CameraPreview to layout, set camera surface holder, start preview
         */
        @SuppressLint("InlinedApi")
        private void initializeGlobalCamera() {

            try {
                if (!getPackageManager().hasSystemFeature(
                        PackageManager.FEATURE_CAMERA)) {
                    Toast.makeText(this, "No camera on this device",
                            Toast.LENGTH_LONG).show();
                } else { // check for front camera ,and get the ID
                    cameraId = findFrontFacingCamera();
                    if (cameraId < 0) {

                        Toast.makeText(this, "No front facing camera found.",
                                Toast.LENGTH_LONG).show();
                    } else {

                        Log.d("ClassScanViewBarcodeActivity",
                                "camera was found , ID: " + cameraId);
                        // camera was found , set global camera flag to true
                        isThereACamera = true;
                        // OPEN
                        globalCamera = getGlobalCamera(cameraId);
                        // parameters auto focus
                        globalCamera.getParameters().setFocusMode(
                                Camera.Parameters.FOCUS_MODE_CONTINUOUS_PICTURE);
                        // set picture format to JPEG, everytime makesure JPEg
                        globalCamera.getParameters().setPictureFormat(
                                ImageFormat.JPEG);
                        autoFocusSetupForBarcode(globalCamera);
                        /*
                         * START early setup variables & setting used in
                         * jpegCallback in order to optimize the jpegCallback code
                         */
                        options = new BitmapFactory.Options();
                        // option set for down sampling he captured image taken from
                        // the camera in order to MemoryOutOfBounds exception
                        options.inSampleSize = 4;
                        // image quality rather than speed in order to achieve early
                        // barcode detection & decode
                        options.inPreferQualityOverSpeed = false;
                        // Samsung galaxy S only , rotate to correct orientation
                        // ,and capture only the image within the guidance rectangle

                        rotationMatrix90CounterClockWise = new Matrix();
                        rotationMatrix90CounterClockWise.postRotate(90);
                        // early variable used by zxing to decode method
                        decodeHints = new Hashtable<DecodeHintType, Object>();
                        decodeHints.put(DecodeHintType.TRY_HARDER, Boolean.TRUE);
                        decodeHints.put(DecodeHintType.PURE_BARCODE, Boolean.TRUE);
                        decodeHints.put(DecodeHintType.ASSUME_CODE_39_CHECK_DIGIT,
                                Boolean.TRUE);
                        reader = new MultiFormatReader();

                        turnOnFlashlight(globalCamera);

                        // pass surfaceView to CameraPreview
                        newCameraPreview = new CameraPreview(this, globalCamera) {

                            @Override
                            public boolean onTouchEvent(MotionEvent event) {
                                Log.d("ClassScanViewBarcodeActivity",
                                        " onTouchEvent(MotionEvent event) ");

                                onTouchEvent = true;
                                globalCamera
                                        .autoFocus(autoFocusCallbackForAutomaticScan);

                                return super.onTouchEvent(event);
                            }

                        };

                        // pass CameraPreview to Layout
                        RelativeLayoutBarcodeScanner.addView(newCameraPreview);


                        // give reference SurfaceView to camera object
                        globalCamera.setPreviewDisplay(surfaceViewBarcodeScanner
                                .getHolder());

                        // PREVIEW
                        if (cameraPreviewing != true) {
                            globalCamera.startPreview();
                        }

                        Log.d("ClassScanViewBarcodeActivity",
                                "camera opened & previewing");
                    }
                }// end else ,check for front camera
            }// end try
            catch (Exception exc) {

                // in case of exception release resources & cleanup
                if (globalCamera != null) {
                    globalCamera.stopPreview();
                    cameraPreviewing = false;
                    globalCamera.setPreviewCallback(null);
                    globalCamera.release();
                    globalCamera = null;
                    options = null;
                    rotationMatrix90CounterClockWise = null;
                    reader = null;

                }
                Log.d("ClassScanViewBarcodeActivity initializeGlobalCamera() exception:",
                        exc.getMessage());
                exc.printStackTrace();
            }// end catch

        }// end ini

        /* this method detect whether the camera flashlight a.k.a torch feature is available to be turned on then turns on the light*/
        public void turnOnFlashlight(Camera camera) {
            Log.d("ClassScanViewBarcodeActivity",
                    "turnOnFlashlight(Camera camera )");

            boolean flag = false;
            Context context  = null;
            if (camera != null) {
                Log.d("ClassScanViewBarcodeActivity",
                        "turnOnFlashlight() , FEATURE_CAMERA_FLASH: " + flag);

                context = RelativeLayoutBarcodeScanner.getContext();
                if (context != null) {
                    flag = context.getPackageManager().hasSystemFeature(
                            PackageManager.FEATURE_CAMERA_FLASH);
                    if (flag) {
                        Flash = camera.getParameters();
                        Flash.setFlashMode("torch");

                        camera.setParameters(Flash);

                    }// end if camera feature is available

                    else {
                        Log.d("ClassScanViewBarcodeActivity",
                                "turnOnFlashlight() , FEATURE_CAMERA_FLASH: "
                                        + flag);
                    }
                }// end if context not null

            }// end camera not null

        }// end turnOnFlashlight(Camera camera )

        // onCreate, instantiates layouts & surfaceView used for video preview
        @Override
        public void onCreate(Bundle savedInstanceState) {
            super.onCreate(savedInstanceState);
            setContentView(R.layout.activity_barcode_vin_scanner);
            Log.d("ClassScanViewBarcodeActivity", "onCreate ");

            // create surfaceView for previewing of camera image
            RelativeLayoutBarcodeScanner = (LinearLayout) findViewById(R.id.LayoutForPreview);
            surfaceViewBarcodeScanner = (SurfaceView) findViewById(R.id.surfaceViewBarcodeScanner);
            barcodeVinScannerToolbar = (LinearLayout) findViewById(R.id.linearLayoutToolbar);


            initializeGlobalCamera();


            //*****TOOLBAR IS ADDED*****

            if (RelativeLayoutBarcodeScanner!=null && barcodeVinScannerToolbar!=null)
            {

                //surfaceViewBarcodeScanner.addChildrenForAccessibility(list);
               RelativeLayoutBarcodeScanner.addView(barcodeVinScannerToolbar);

            }


            // instantiate orientationEventListener
            orientationEventListener = new OrientationEventListener(this,
                    SensorManager.SENSOR_DELAY_NORMAL) {

                @Override
                public void onOrientationChanged(int arg0) {


                    /*
                    latestScreenOrientation = ScreenUtility
                            .getScreenOrientation(RelativeLayoutBarcodeScanner.getContext());

                    Log.d("ClassScanViewBarcodeActivity",
                            "latestScreenOrientation: " + latestScreenOrientation);

                    if (orientationEventListener.canDetectOrientation()) {
                        orientationEventListener.enable();
                        Log.d("ClassScanViewBarcodeActivity",
                                "enabled orientationEventListener: "
                                        + String.valueOf(orientationEventListener
                                                .canDetectOrientation()));
                    } else {
                        Log.d("ClassScanViewBarcodeActivity",
                                "enabled orientationEventListener: "
                                        + String.valueOf(orientationEventListener
                                                .canDetectOrientation()));
                    }
    */
                }

            };


            handler = new Handler();


        }// end onCreate


        @Override
        protected void onResume() {

            Log.d("ClassScanViewBarcodeActivity, onResume() globalCamera:",
                    String.valueOf(globalCamera));

            initializeGlobalCamera();


            //*****TOOLBAR IS ADDED*****

            if (RelativeLayoutBarcodeScanner!=null && barcodeVinScannerToolbar!=null)
            {

                //surfaceViewBarcodeScanner.addChildrenForAccessibility(list);
               RelativeLayoutBarcodeScanner.addView(barcodeVinScannerToolbar);

            }


            if (orientationEventListener != null) {
                orientationEventListener.enable();
            }

            super.onResume();
        }

        @Override
        protected void onStop() {

            if (globalCamera != null) {
                globalCamera.stopPreview();
                cameraPreviewing = false;
                globalCamera.setPreviewCallback(null);
                globalCamera.release();
                globalCamera = null;
            }

            if (orientationEventListener != null) {
                orientationEventListener.disable();
            }
            super.onStop();
        }

        @Override
        protected void onPause() {
            if (globalCamera != null) {
                globalCamera.stopPreview();
                cameraPreviewing = false;
                globalCamera.setPreviewCallback(null);
                globalCamera.release();
                globalCamera = null;
                options = null;
                rotationMatrix90CounterClockWise = null;
                reader = null;
            }
            if (orientationEventListener != null) {
                orientationEventListener.disable();
            }
            super.onPause();
        }// end onPause()

    //other irrelevant code was not included

    }//end activity
Попытка № 3, результат, зависание экрана, не сообщается об определенной ошибке или исключении:
Журнал ошибок:
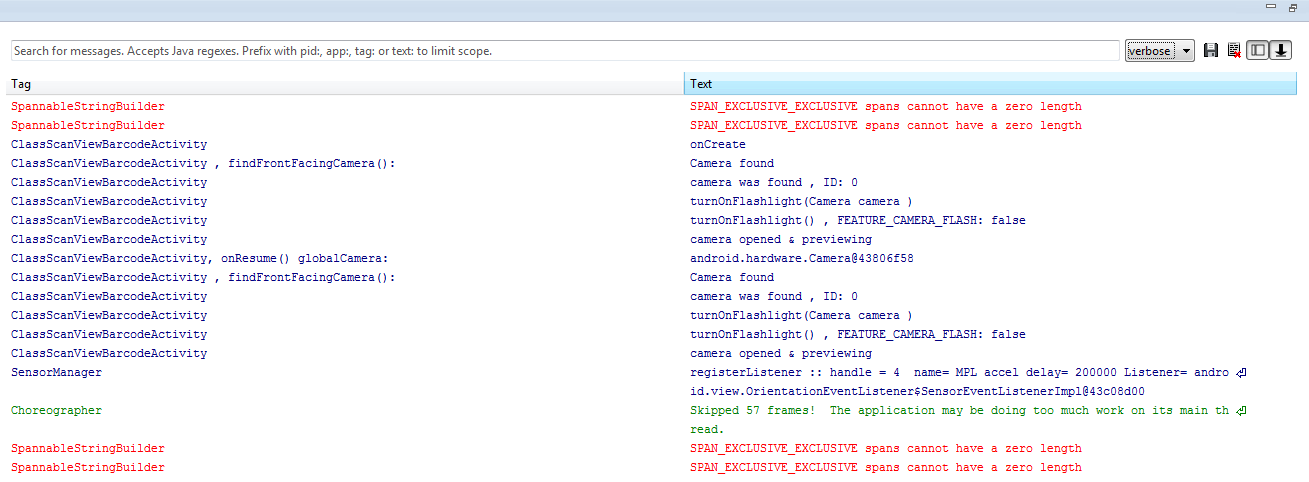
** Если инструмент Eclipse GUI показывает желаемый вид, то почему панель инструментов все еще отсутствует??? Я хотел бы иметь панель инструментов внизу, желательно используя RelativeLayout без сбоев или зависаний экрана. Любая помощь будет оценена.
Я использую Samsung Galaxy S3 для тестирования.
Спасибо.**
9 ответов
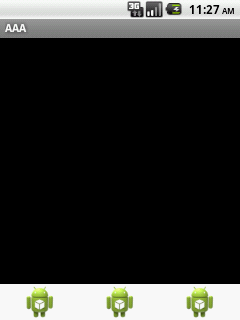
Вы хотели что-то подобное?
макет, который я использовал:
<?xml version="1.0" encoding="utf-8"?>
<RelativeLayout
    xmlns:android="http://schemas.android.com/apk/res/android"
    android:layout_width="match_parent"
    android:layout_height="match_parent"
    >
    <LinearLayout
        android:id="@+id/linearLayoutToolbar"
        android:layout_width="match_parent"
        android:layout_height="wrap_content"
        android:layout_alignParentBottom="true"
        >
        <ImageView
            android:id="@+id/imageView1"
            android:layout_width="0dp"
            android:layout_height="wrap_content"
            android:layout_weight="1"
            android:gravity="center"
            android:src="@drawable/ic_launcher"
        />
        <ImageView
            android:id="@+id/imageView2"
            android:layout_width="0dp"
            android:layout_height="wrap_content"
            android:layout_weight="1"
            android:gravity="center"
            android:src="@drawable/ic_launcher"
        />
        <ImageView
            android:id="@+id/imageView3"
            android:layout_width="0dp"
            android:layout_height="wrap_content"
            android:layout_weight="1"
            android:gravity="center"
            android:src="@drawable/ic_launcher"
        />
    </LinearLayout>
    <SurfaceView
        android:id="@+id/surfaceViewBarcodeScanner"
        android:layout_width="match_parent"
        android:layout_height="match_parent"
        android:layout_above="@+id/linearLayoutToolbar"
    />
</RelativeLayout>
Обратите внимание, что, поскольку у меня не было ваших изображений в моей папке res / drawable, я заменил их на ic_launcher.
Также обратите внимание, что я использовал устройство ldpi под управлением Froyo (уровень API 2.2). Вот почему изображение меньше, чем у вас, и пользовательский интерфейс немного отличается (...). Во всяком случае, это работает в любом разрешении и с каждой версией ОС.
Некоторые небольшие изменения в вашей первоначальной компоновке приведут к устранению ошибки. Вам нужно использовать android:layout_height="0dp" определение 0dp поможет вашему виду поверхности уместиться на вашем экране.
<SurfaceView
    android:id="@+id/surfaceViewBarcodeScanner"
    android:layout_width="match_parent"
    android:layout_height="0dp"
    android:layout_above="@+id/linearLayoutToolbar"
    />
И я не нашел использование атрибута ниже в SurfaceView.
    android:layout_gravity="top"
    android:scaleType="fitXY"
Изучите этот макет, как работает android:layout_height="0dp" и как работает android:layout_width="0dp".
Попробуйте изменить макет так:
<LinearLayout xmlns:android="http://schemas.android.com/apk/res/android"
android:id="@+id/LayoutForPreview"
android:layout_width="fill_parent"
android:layout_height="fill_parent"
android:orientation="vertical"
android:screenOrientation="portrait" >

<SurfaceView
    android:id="@+id/surfaceViewBarcodeScanner"
    android:layout_width="match_parent"
    android:layout_height="0dp"
    android:layout_gravity="top"
    android:scaleType="fitXY"
    android:layout_weight="1" />

<LinearLayout
    android:id="@+id/linearLayoutToolbar"
    android:layout_width="match_parent"
    android:layout_height="0dp"
     android:layout_weight=".1"
    android:orientation="horizontal"
    android:layout_gravity="bottom" >

    <ImageView
        android:id="@+id/imageView1"
        android:layout_width="wrap_content"
        android:layout_height="wrap_content"
        android:scaleType="fitXY"
        android:src="@drawable/scanner_bottom_left" />

    <ImageView
        android:id="@+id/imageView2"
        android:layout_width="wrap_content"
        android:layout_height="wrap_content"
        android:layout_weight="0.68"
        android:scaleType="fitXY"
        android:src="@drawable/scanner_bottom_center_toolbar" />

    <ImageView
        android:id="@+id/imageView3"
        android:layout_width="wrap_content"
        android:layout_height="wrap_content"
        android:scaleType="fitXY"
        android:src="@drawable/scanner_bottom_right_landscape_button" />
</LinearLayout>
Я вижу несколько ошибок в вашем исходном XML 1. В виде поверхности вы используете:
android:layout_above="@+id/linearLayoutToolbar"
Вы должны использовать @+id при создании Id, но когда вы хотите сделать ссылку, вы должны делать только @id следующим образом:
android:layout_above="@id/linearLayoutToolbar"
2. Вы не можете сделать ссылку на другой объект, который еще не создан! Таким образом, вы должны поместить SurfaceView ниже de linearlayout следующим образом:
<RelativeLayout xmlns:android="http://schemas.android.com/apk/res/android"
android:id="@+id/LayoutForPreview"
android:layout_width="fill_parent"
android:layout_height="fill_parent"
android:orientation="vertical"
android:screenOrientation="portrait" >

<LinearLayout
    android:id="@+id/linearLayoutToolbar"
    android:layout_width="match_parent"
    android:layout_height="wrap_content"
    android:layout_alignParentBottom="true"
    android:orientation="horizontal" >

    <ImageView
        android:id="@+id/imageView1"
        android:layout_width="wrap_content"
        android:layout_height="wrap_content"
        android:scaleType="fitXY"
        android:src="@drawable/scanner_bottom_left" />

    <ImageView
        android:id="@+id/imageView2"
        android:layout_width="wrap_content"
        android:layout_height="wrap_content"
        android:layout_weight="0.68"
        android:scaleType="fitXY"
        android:src="@drawable/scanner_bottom_center_toolbar" />

    <ImageView
        android:id="@+id/imageView3"
        android:layout_width="wrap_content"
        android:layout_height="wrap_content"
        android:scaleType="fitXY"
        android:src="@drawable/scanner_bottom_right_landscape_button" />
</LinearLayout>

<SurfaceView
    android:id="@+id/surfaceViewBarcodeScanner"
    android:layout_width="match_parent"
    android:layout_height="wrap_content"
    android:layout_above="@id/linearLayoutToolbar"
    android:layout_gravity="top"
    android:scaleType="fitXY" />

</RelativeLayout>
3. Вы должны добавить вес к своим 3 ImageViews следующим образом:
android:layout_weight="1"
Почему вы используете RelativeLayout в качестве корневого макета, я думаю, что гораздо проще использовать LinearLayou с параметром layout_weight в одном из дочерних представлений:
<?xml version="1.0" encoding="utf-8"?>
<LinearLayout xmlns:android="http://schemas.android.com/apk/res/android"
android:orientation="vertical"
android:layout_width="match_parent"
android:layout_height="match_parent">


<SurfaceView
    android:layout_weight="1"
    android:id="@+id/surfaceViewBarcodeScanner"
    android:layout_width="match_parent"
    android:layout_height="0dp" />

<!--  LinearLayout that contains toolbar that is divided into 3 sections horizontally -->
<LinearLayout
    android:id="@+id/linearLayoutToolbar"
    android:layout_width="wrap_content"
    android:layout_height="wrap_content"
    android:orientation="horizontal">

    <ImageView
        android:id="@+id/imageView1"
        android:layout_width="wrap_content"
        android:layout_height="wrap_content"
        android:src="@drawable/scanner_bottom_left" />

    <ImageView
        android:id="@+id/imageView2"
        android:layout_width="wrap_content"
        android:layout_height="wrap_content"
        android:src="@drawable/scanner_bottom_center_toolbar" />

    <ImageView
        android:id="@+id/imageView3"
        android:layout_width="wrap_content"
        android:layout_height="wrap_content"
        android:src="@drawable/scanner_bottom_right_landscape_button" />
</LinearLayout>
</LinearLayout>
Вы забыли рассказать surfaceView быть above linearLayout, Ваш код должен выглядеть примерно так:
<?xml version="1.0" encoding="utf-8"?>
<RelativeLayout xmlns:android="http://schemas.android.com/apk/res/android"
    android:layout_width="match_parent"
    android:layout_height="match_parent" >

    <LinearLayout
        android:id="@+id/linearLayoutToolbar"
        android:layout_width="match_parent"
        android:layout_height="wrap_content"
        android:layout_alignParentBottom="true" >

        <ImageView
            android:id="@+id/imageView1"
            android:layout_width="wrap_content"
            android:layout_height="wrap_content"
            android:src="@drawable/scanner_bottom_left" />

        <ImageView
            android:id="@+id/imageView2"
            android:layout_width="wrap_content"
            android:layout_height="wrap_content"
            android:src="@drawable/scanner_bottom_center_toolbar" />

        <ImageView
            android:id="@+id/imageView3"
            android:layout_width="wrap_content"
            android:layout_height="wrap_content"
            android:src="@drawable/scanner_bottom_right_landscape_button" />
    </LinearLayout>

    <SurfaceView
        android:id="@+id/surfaceViewBarcodeScanner"
        android:layout_width="match_parent"
        android:layout_height="match_parent"
        android:layout_above="@+id/linearLayoutToolbar" />

</RelativeLayout>
Что вы действительно хотите, так это не использовать Relativelayout, а вместо этого использовать Linearlayout в качестве корня. Затем установите вес вида поверхности на 1, что-то вроде:
 <SurfaceView
    android:id="@+id/surfaceViewBarcodeScanner"
    android:layout_width="match_parent"
    android:layout_height="match_parent"
    android:layout_weight="1"/>
    <ImageView
        android:id="@+id/imageView1"
        android:layout_width="wrap_content"
        android:layout_height="wrap_content"
        android:src="@drawable/scanner_bottom_left" />

    <ImageView
        android:id="@+id/imageView2"
        android:layout_width="wrap_content"
        android:layout_height="wrap_content"
        android:src="@drawable/scanner_bottom_center_toolbar" />

    <ImageView
        android:id="@+id/imageView3"
        android:layout_width="wrap_content"
        android:layout_height="wrap_content"
        android:src="@drawable/scanner_bottom_right_landscape_button" />
</LinearLayout>
Добавьте это к вашему LinearLayout содержащий imageView
android:layout_alignParentBottom="true"
Я использовал такие макеты во многих приложениях, и вот как должен быть ваш макет. Никаких хитростей, никаких молитв за удачу, это просто чистый, счастливый и всегда работающий способ добиться этого.
<RelativeLayout xmlns:android="http://schemas.android.com/apk/res/android"
    android:layout_width="fill_parent"
    android:layout_height="fill_parent"
    android:screenOrientation="portrait" >

    <SurfaceView
        android:id="@+id/surfaceViewBarcodeScanner"
        android:layout_width="match_parent"
        android:layout_height="wrap_content"
        android:layout_above="@+id/linearLayoutToolbar"
        android:layout_alignParentTop="true" />

    <LinearLayout
        xmlns:android="http://schemas.android.com/apk/res/android"
        android:id="@+id/linearLayoutToolbar"
        android:layout_width="match_parent"
        android:layout_height="wrap_content"
        android:layout_alignParentBottom="true"
        android:orientation="horizontal" >

        <ImageView
            android:id="@+id/imageView1"
            android:layout_width="wrap_content"
            android:layout_height="wrap_content"
            android:scaleType="fitXY"
            android:src="@drawable/scanner_bottom_left" />

        <ImageView
            android:id="@+id/imageView2"
            android:layout_width="wrap_content"
            android:layout_height="wrap_content"
            android:layout_weight="0.68"
            android:scaleType="fitXY"
            android:src="@drawable/scanner_bottom_center_toolbar" />

        <ImageView
            android:id="@+id/imageView3"
            android:layout_width="wrap_content"
            android:layout_height="wrap_content"
            android:scaleType="fitXY"
            android:src="@drawable/scanner_bottom_right_landscape_button" />
    </LinearLayout>

</RelativeLayout>
здесь у вас есть предварительный просмотр одного из моих приложений.
Размещенный код адаптирован к вашему, поэтому копирование / вставка сделает это. обратите внимание, что все в простом файле, поэтому вы должны немного изменить свою деятельность